

Purpose
The purpose of this quick reference guide is to step through the process of using the Rates Generator Import Tool. The intended audience for this document is Standard Payroll Users. The Rates Generator Import Tool is used to generate Minimum Pay Rate records from Client data, for use within the 2cloudnine Rate Calculator. These are typically exported from existing rates to a format that is easily loaded into 2cloudnine Payroll using Dataloader. The Rate Gen Excel file has 5 worksheets:- Instructions – This contains instructions and general configuration options. This will be used to map the columns in the data into the matching 2cloudnine Payroll fields
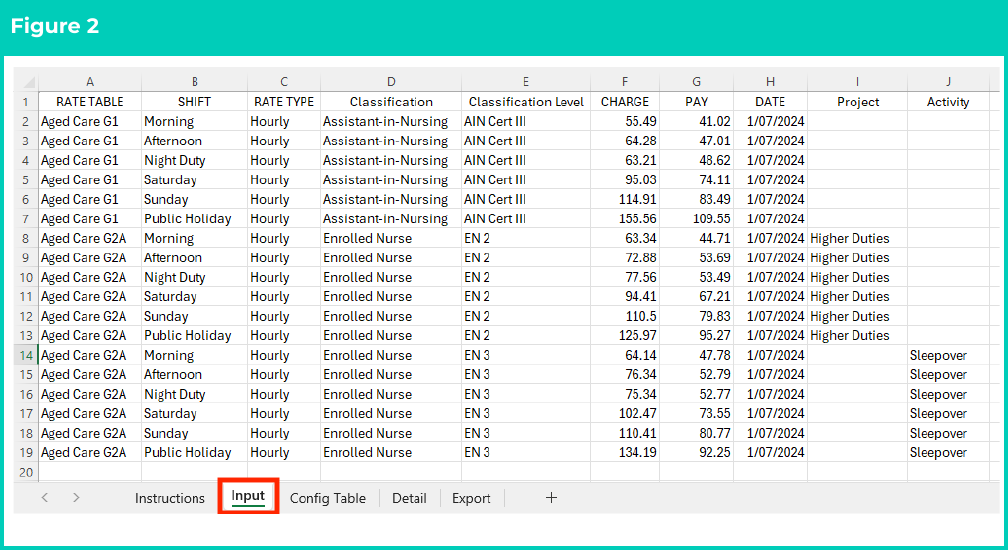
- Input – Use this worksheet to paste your data into a spreadsheet format. The order of the data and the heading names do not have to be in any particular sequence, as you will provide this mapping on the Instructions worksheet for this to calculate the rates as required.
- Config Table – This table allows setting options for each rate group.
- Detail – Shows a detailed view of the data and calculations used to allow analysis.
- Export – Formatted to use with Salesforce Dataloader.
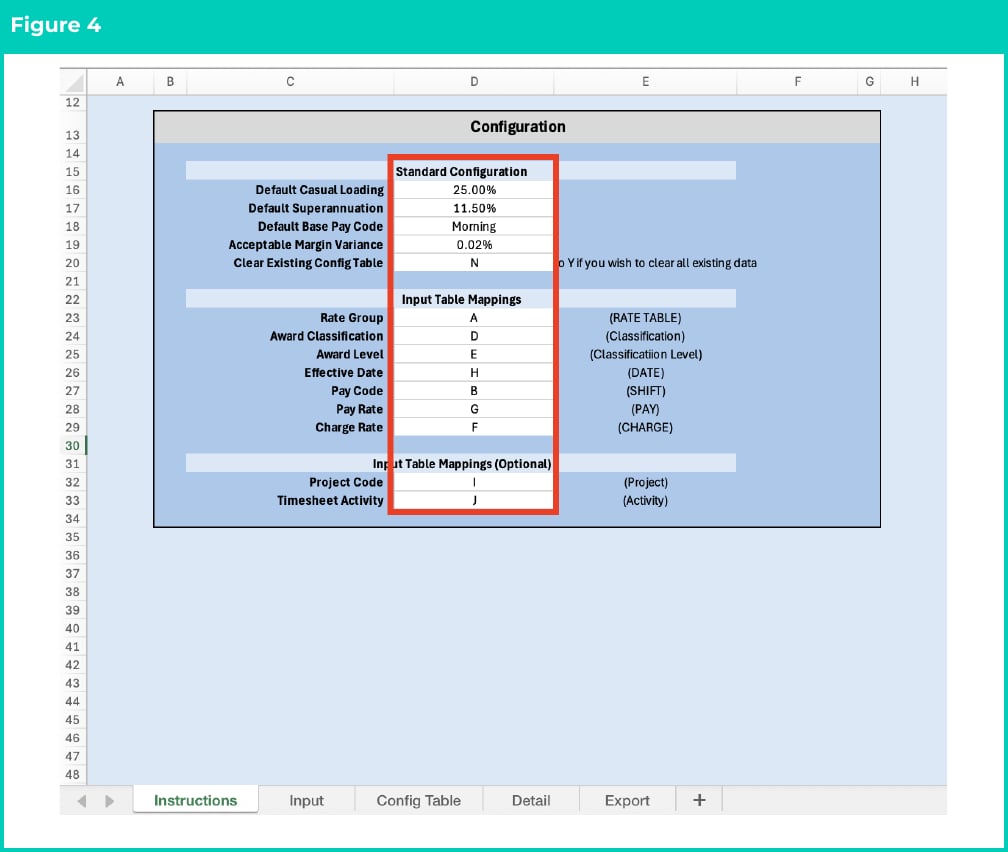
- Default Casual Loading, Superannuation, Base Pay Code – These set the defaults on the Config Table, which can be overridden as needed.
- Acceptable Margin Variance – Anything within this margin will be considered acceptable.
- Clear Existing Config Table – This can be set to Y or N, but should normally be set to N to preserve the existing config. Only set this to Y if the Config Table needs to be cleared. If this is set to Y, when clicking ‘Generate Config Table’ it will clear all existing data from the Config Table Worksheet.
- Input Table Mappings – This provides mapping from the specified fields to the columns on the Input table. All of these are required to be set.
- Input Table Mappings (Optional) – Same as above, however, they aren’t always required.
Steps
Prerequisites
You must complete the setup of the Rates Generator Import Tool before you can use this QRG. For more information about how to set up the Rates Generator Import Tool, please refer to QRG Rates Generator Import Tool - Setup Instructions.Rates Generator Import Tool
To use the Rates Generator Import Tool, follow the steps below:-
Open the Rates Gen Dist folder. Within the folder, open the Rate Gen.xlsx Excel file (see Figure 1).

-
Click on the Input Worksheet and paste the Rates data, ensuring the data has clear headings as shown below (see Figure 2). The order of the columns and their headings does not need to match this, as you will provide the correct mapping for this on the Instructions Worksheet at Step 4 later.
-
Select the Instructions Worksheet (see Figure 3).

-
Populate the Standard Configuration fields with the required values. Ensure the Input Table Mappings are mapped to the correct columns. You can enter the heading names in Column E of this section if that helps (see Figure 4).
-
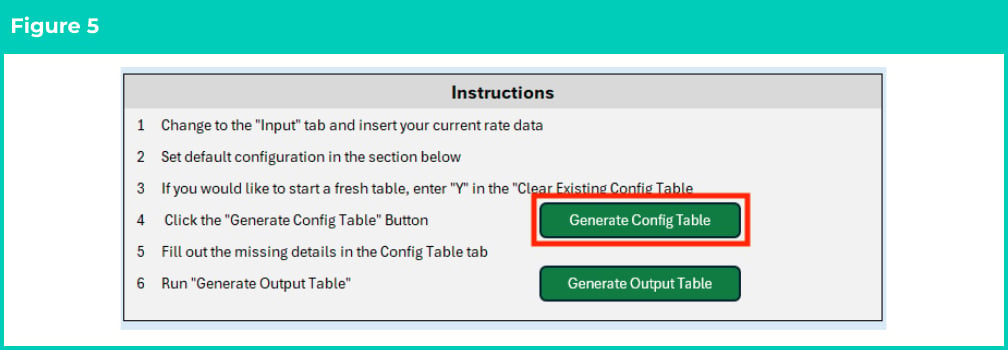
At the top of the Instruction Worksheet, click Generate Config Table (see Figure 5).
Important Notes
(Trouleshooting the script error)If you are unable to use the Generate Config Table button or get an error saying “The button cannot run because the script was unshared. Contact the owner to share it again.”, please repeat the setup process by first deleting the existing scripts, re-uploading the scripts, and adding all the buttons again to the Workbook.
(Trouleshooting the script error)If you are unable to use the Generate Config Table button or get an error saying “The button cannot run because the script was unshared. Contact the owner to share it again.”, please repeat the setup process by first deleting the existing scripts, re-uploading the scripts, and adding all the buttons again to the Workbook.
-
Select the Config Table Worksheet (see Figure 6).

-
Please ensure the following required fields are all populated with values, keeping in consideration that some of these will be pre-populated (see Figure 7):
- Rate Group
- Casual Loading
- Payroll Tax
- WIC
- Superannuation
- Interpretation Rule
- Base Pay Code
-
Please note that the following optional fields only need to be populated if they are used (see Figure 7):
- Custom On-cost 1
- Custom On-cost 2
- Custom On-cost 3

-
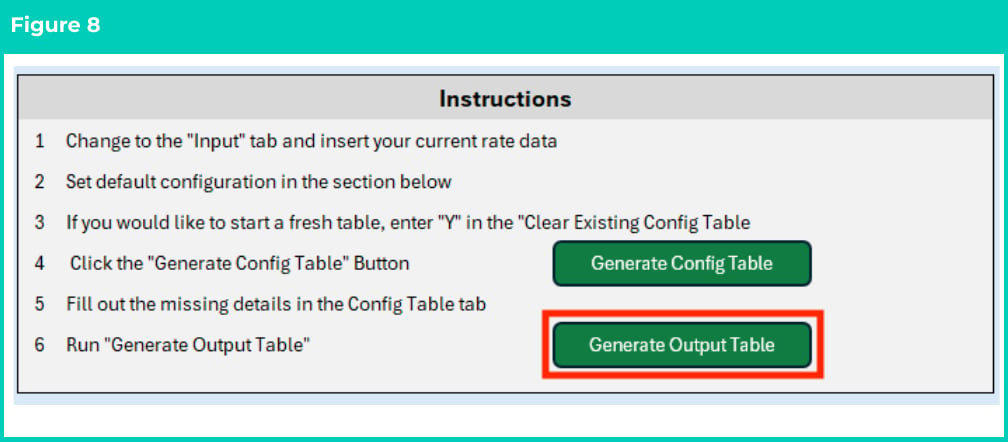
Select the Instructions Worksheet again and click Generate Output Table, which will generate values in the Detail Worksheet and the Export Worksheet (see Figure 8).
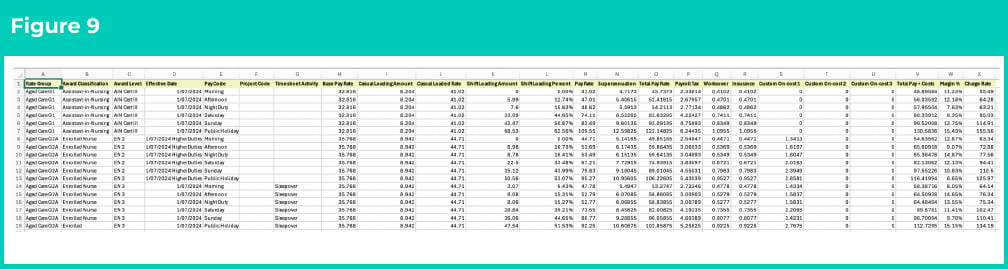
- You will see that the Rates have been generated and added to the right-hand side of the Detail Worksheet (see Figure 9).
- You will see that the Rates data has also been added to the Export Worksheet (see Figure 10).

- Click the Detail Worksheet, and review the data populated. If this data looks correct, you may copy the data from the Export Worksheet into a new Excel file. Save this new spreadsheet as a CSV file for use within Salesforce Dataloader.
