

Purpose
The purpose of this quick reference guide is to step through the process of setting up the Rates Generator Import Tool. The intended audience for this document is Standard Users. The Rates Generator Import Tool requires an initial setup on individual computers. It is used to generate Minimum Pay Rates for use within the 2cloudnine Rate Calculator by adding data within a Microsoft Excel 365 spreadsheet.Steps
Prerequisites
To use the Rates Generator Import Tool, you must have Microsoft 365 installed on your computer. Specifically, Microsoft Excel is required to use the Rates Generator Import Tool. For assistance in installing Microsoft 365 on your computer, please visit the following link:https://www.microsoft.com/en-us/microsoft-365/download-office
Rates Generator Import Tool Setup Instructions
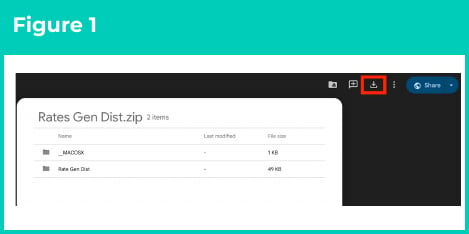
Before proceeding, please ensure the above prerequisite is complete and that Microsoft 365 has been installed and is available. To set up the Rates Generator Import Tool, follow the steps below:- Download the Rates Generator Setup zip package by clicking on this Rates Gen Dist.zip file, and then click the Download icon on the top right corner (see Figure 1).
-
Unzip and open the Rates Gen Dist folder. Within the folder, open the Rate Gen Excel file (see Figure 2).

-
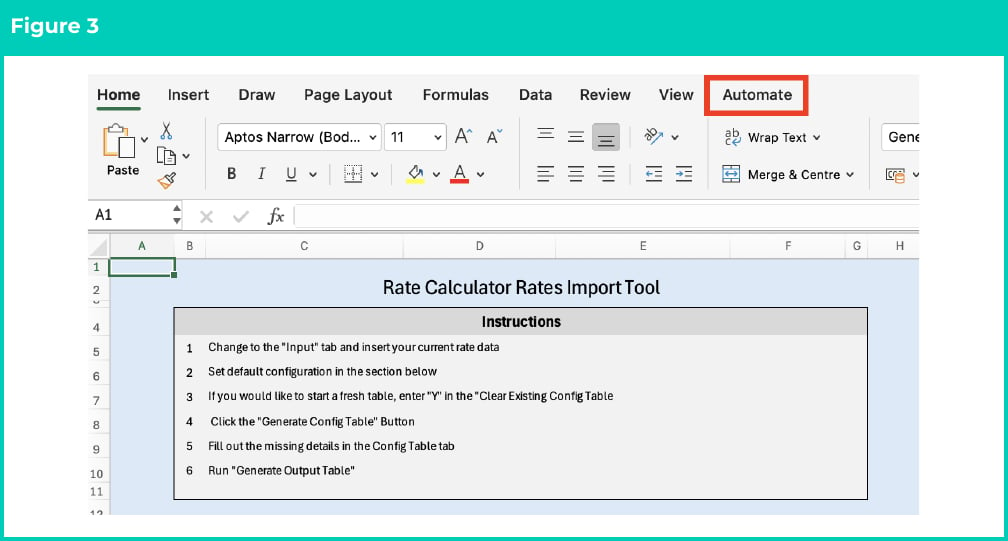
Once the Excel file opens, click on the Automate tab (see Figure 3).
-
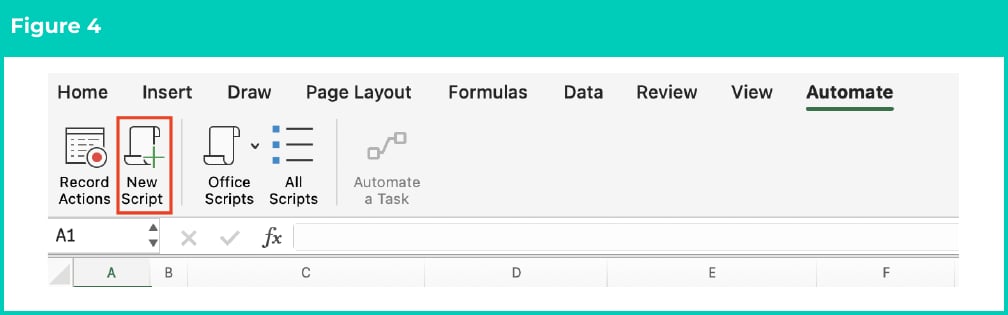
Click on the New Script button (see Figure 4).
-
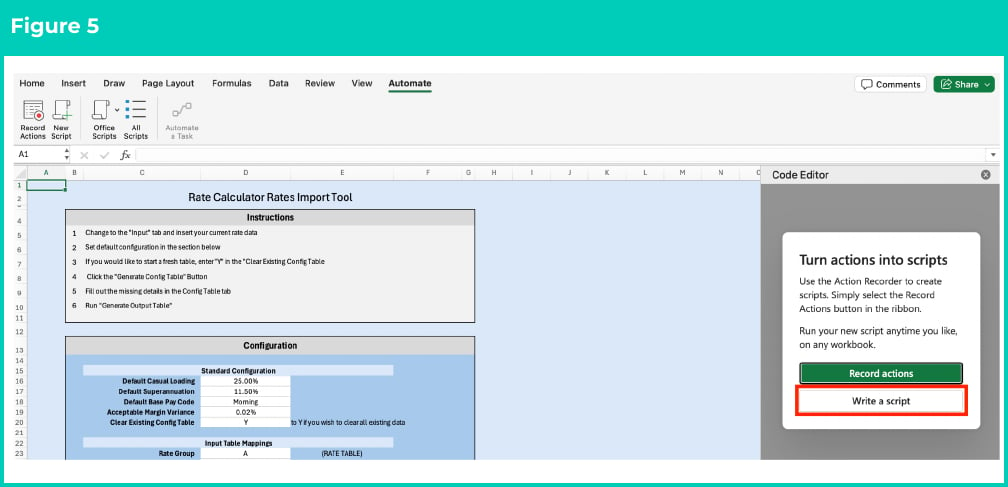
The Code Editor will open on the right-hand side. Within the Code Editor, click the Write a script button (see Figure 5).
-
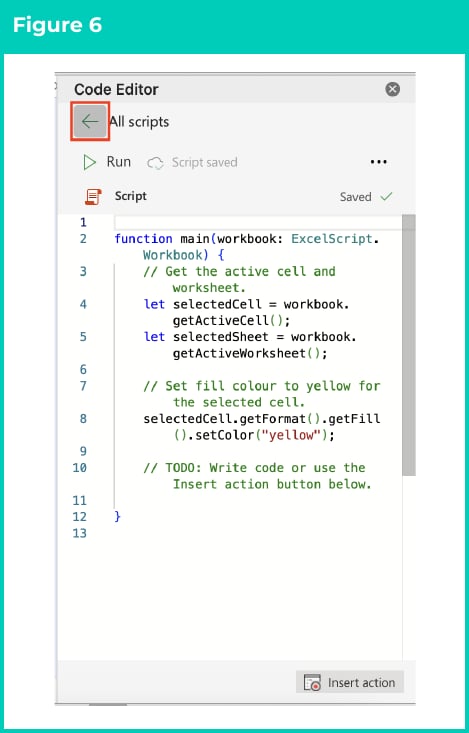
Within the Code Editor, click the arrow at the top-left corner to view all the available scripts (see Figure 6).
-
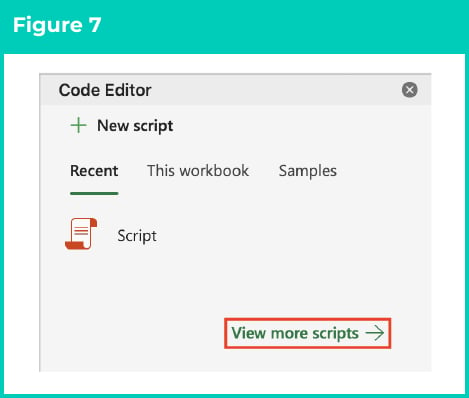
Click View more scripts (see Figure 7).
-
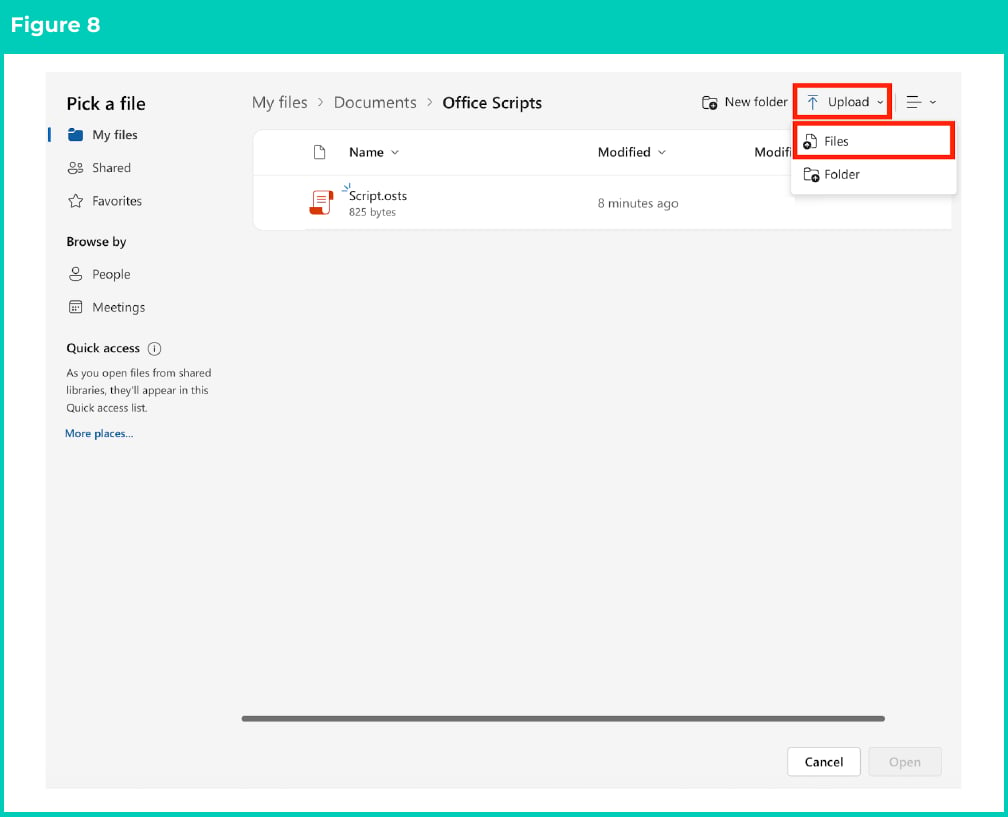
In the pop-up window, click Upload, then Files (see Figure 8).
-
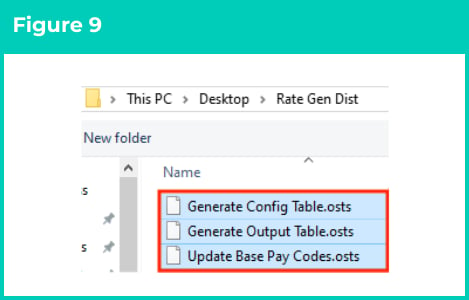
Browse to the folder containing the script files and upload all three files.
-
If you are using a Windows computer, please refer to Figure 9.
-
If you are using a Mac computer, please refer to Figure 10.
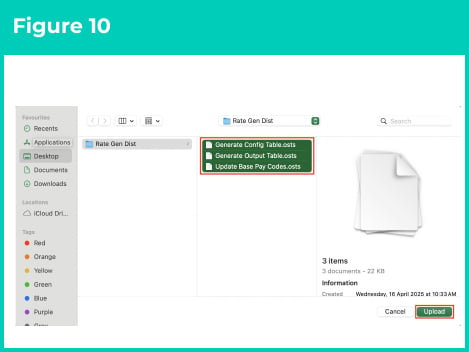
-
- Select the Generate Output Table file and click Open (see Figure 11).
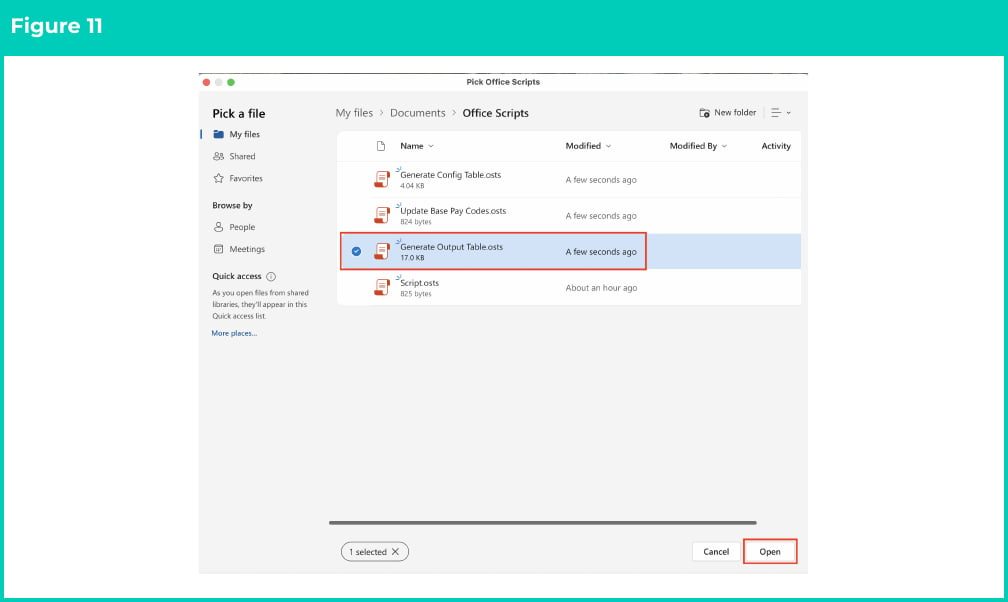
- Leave the Code Editor side window open. On the Instructions worksheet, click on cell E10 (see Figure 12).
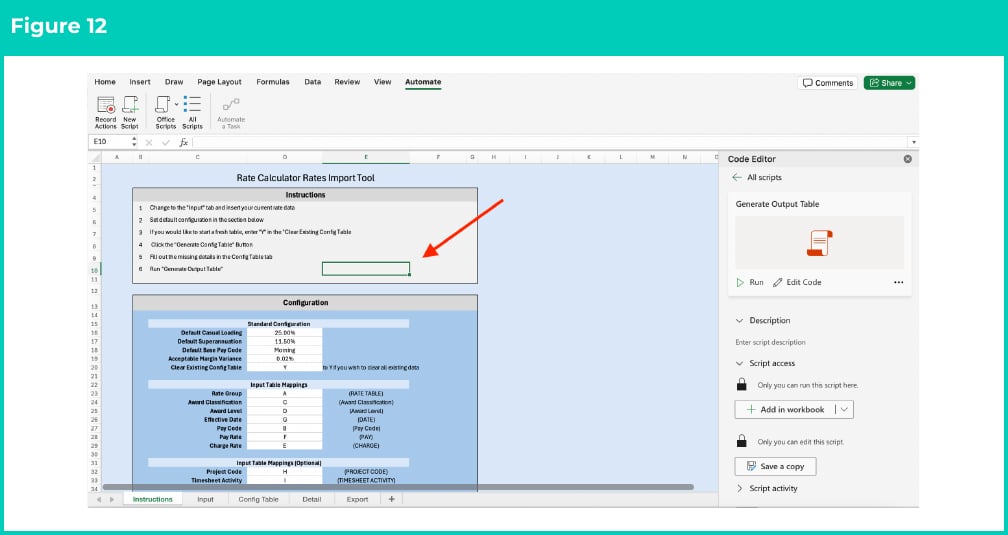
- In the Code Editor window under the Script Access section, click Add in workbook (see Figure 13).
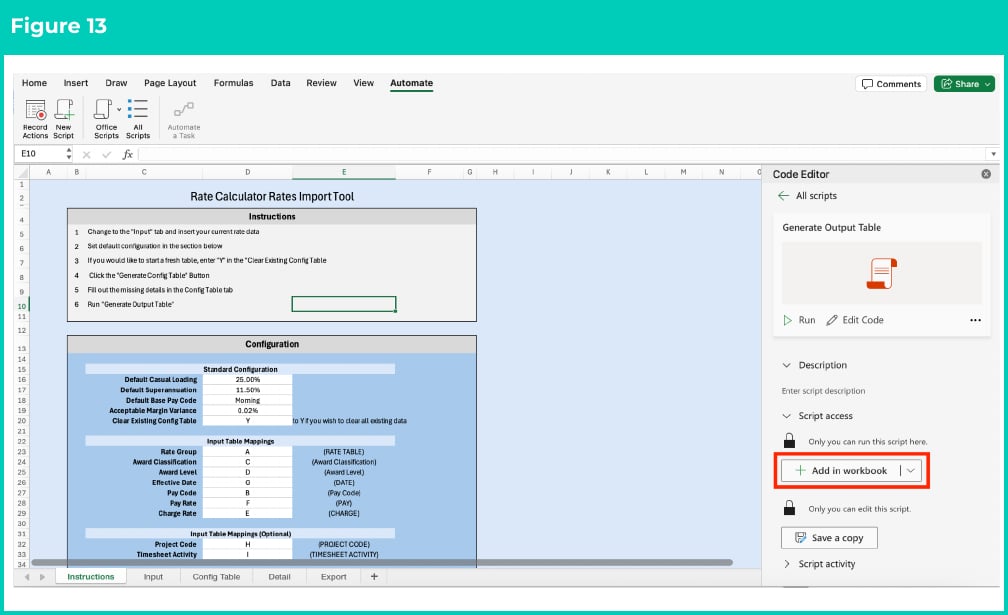
- A new button labelled Generate Output Table has been created in cell E10 (see Figure 14).
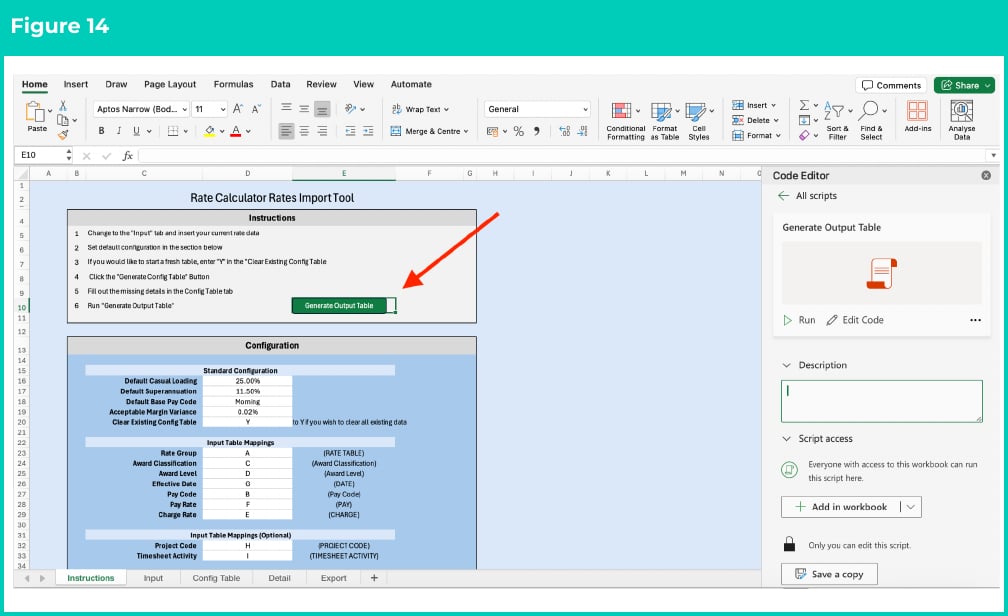
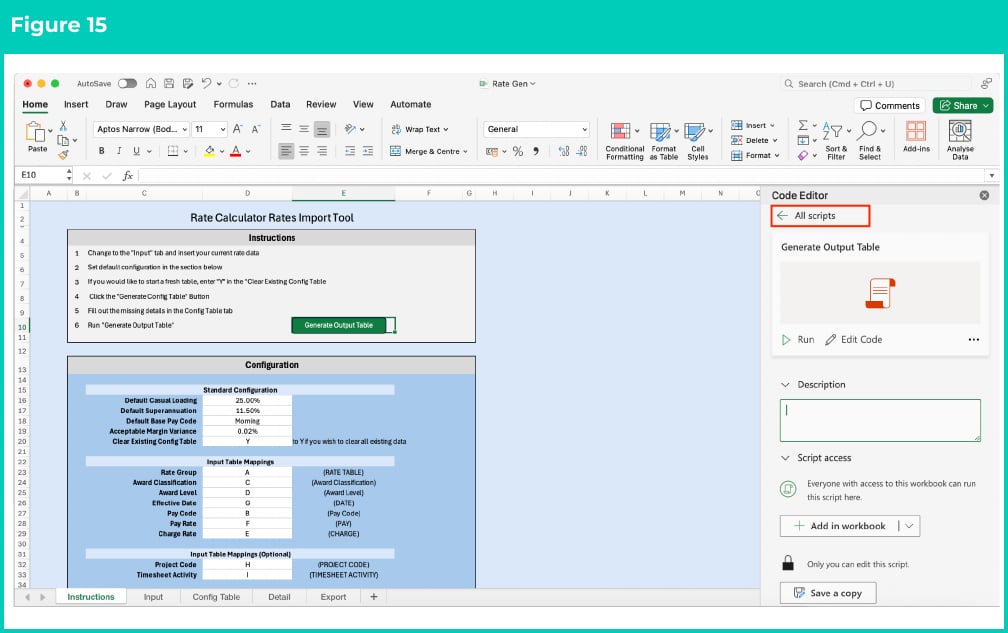
- Within the Code Editor, click the arrow at the top-left corner again to view all the available scripts (see Figure 15).
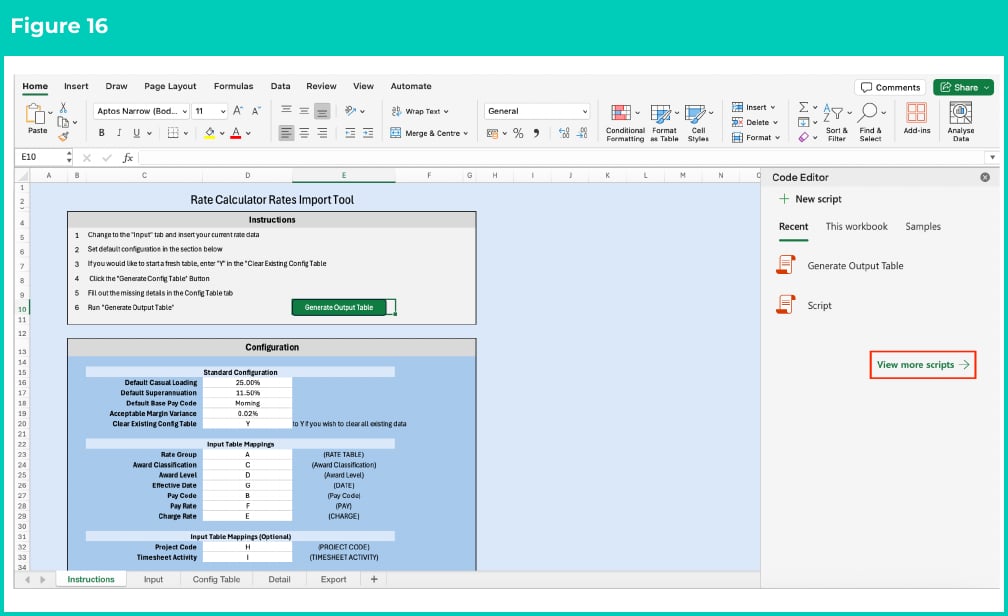
- Click View more scripts (see Figure 16).
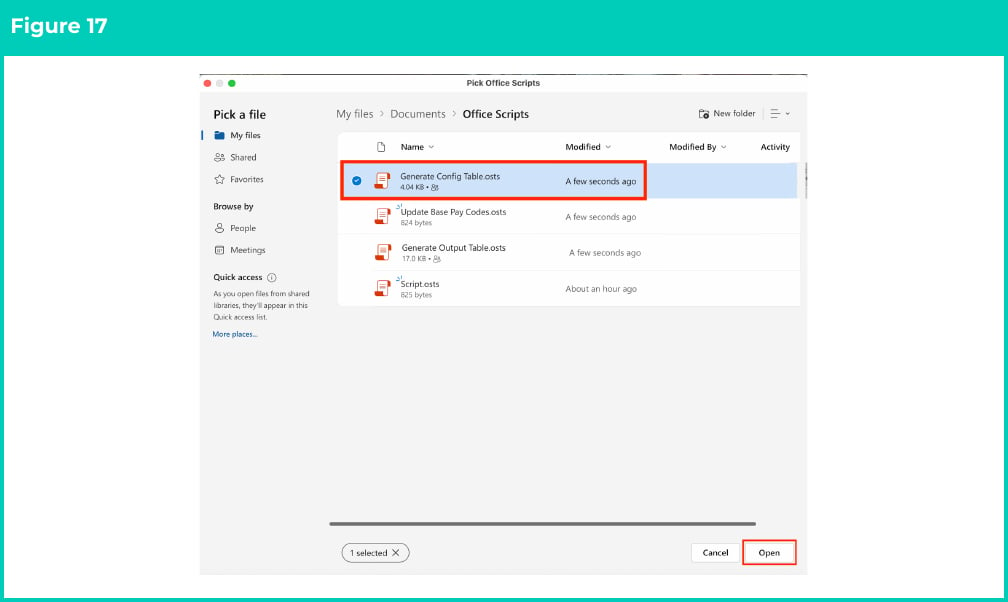
- Select the Generate Config Table file and click Open (see Figure 17).
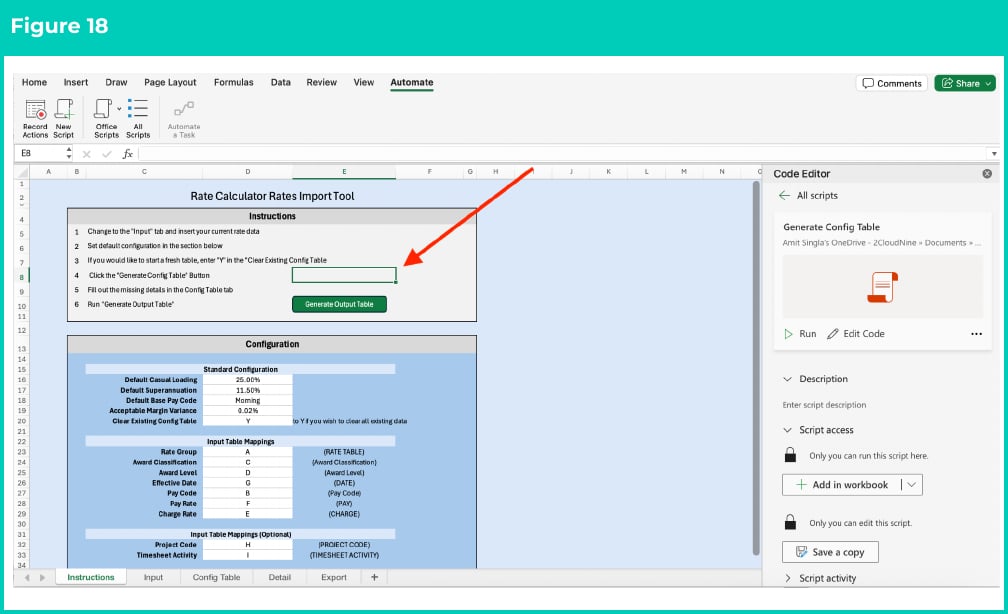
- Leave the Code Editor side window open. On the Instructions worksheet, click on cell E8 (see Figure 18).
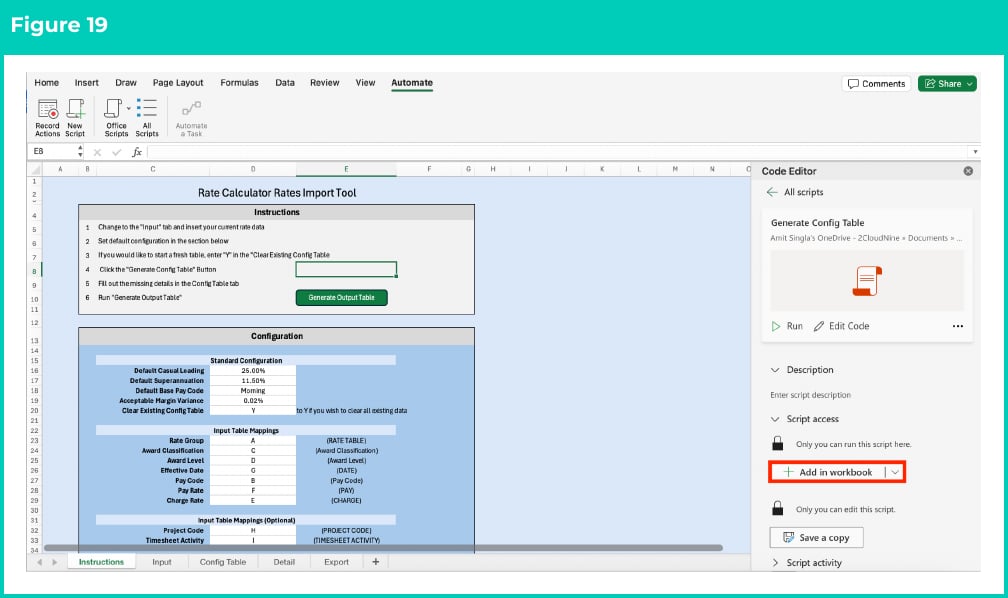
- In the Code Editor window under the Script Access section, click Add in workbook (see Figure 19).
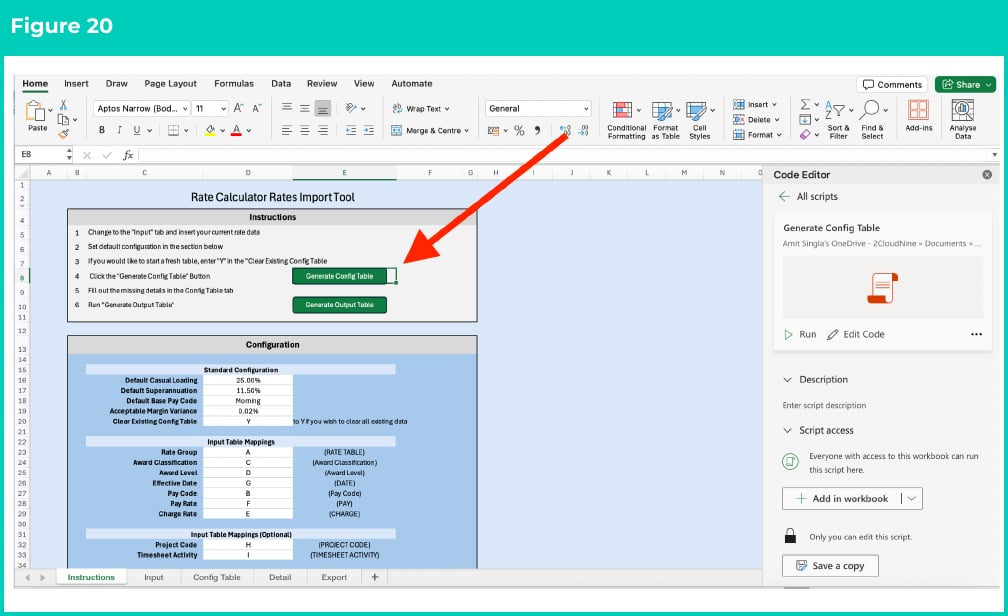
- A new button labelled Generate Config Table has been created in cell E8 (see Figure 20).
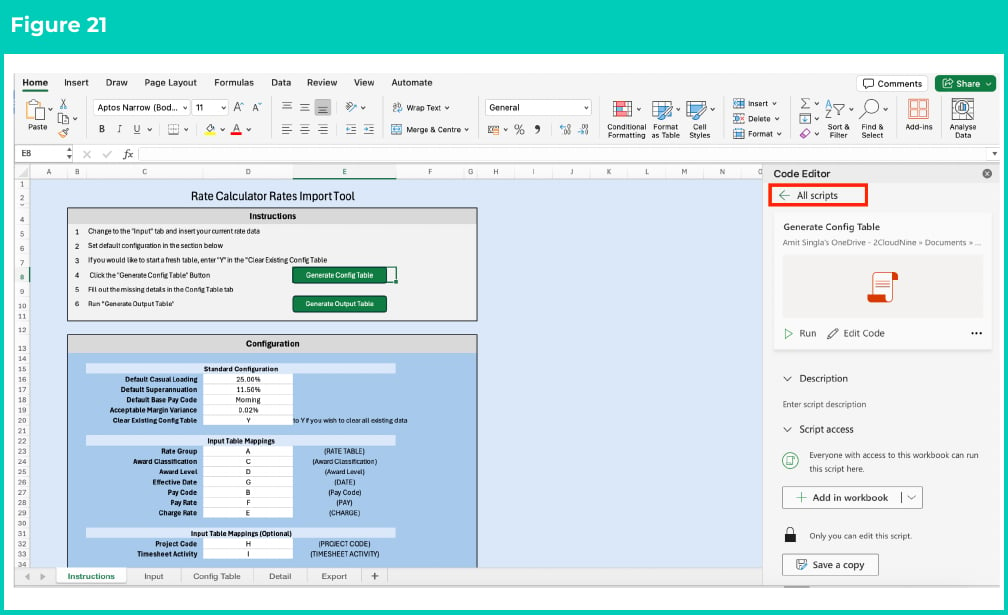
- Within the Code Editor, click the arrow at the top-left corner again to view all the available scripts (see Figure 21).
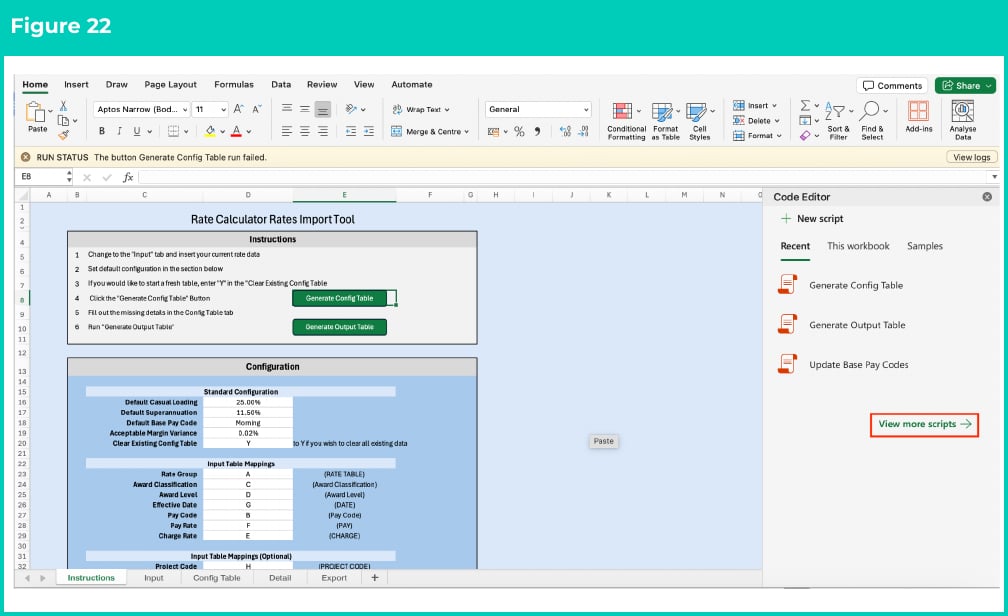
- Click View more scripts (see Figure 22).
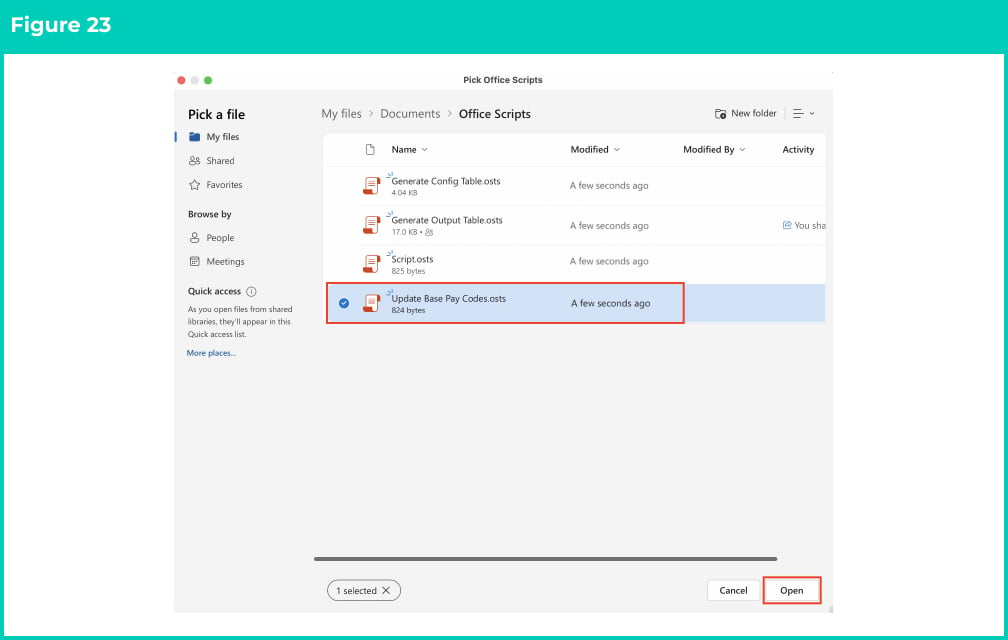
- Select Update Base Pay Codes and click the Open button (see Figure 23).
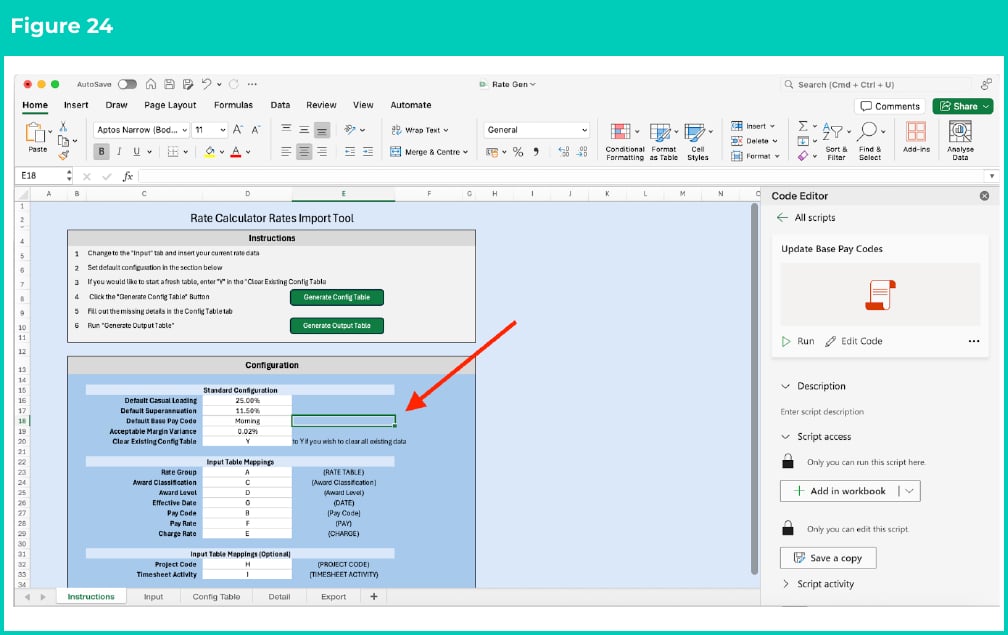
- Again, click on cell E18 this time (see Figure 24).
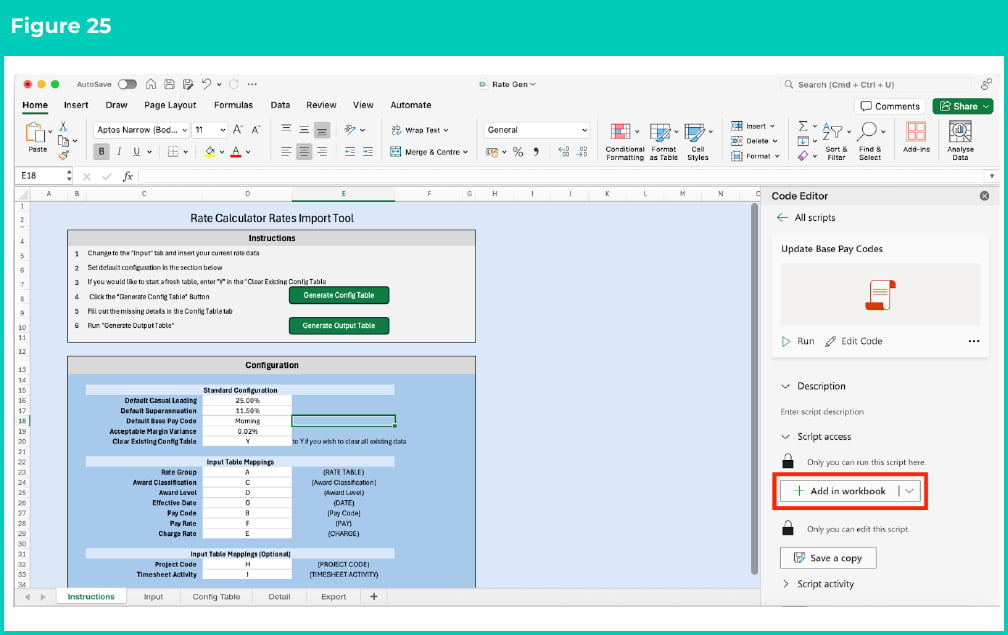
- Click Add in workbook (see Figure 25).
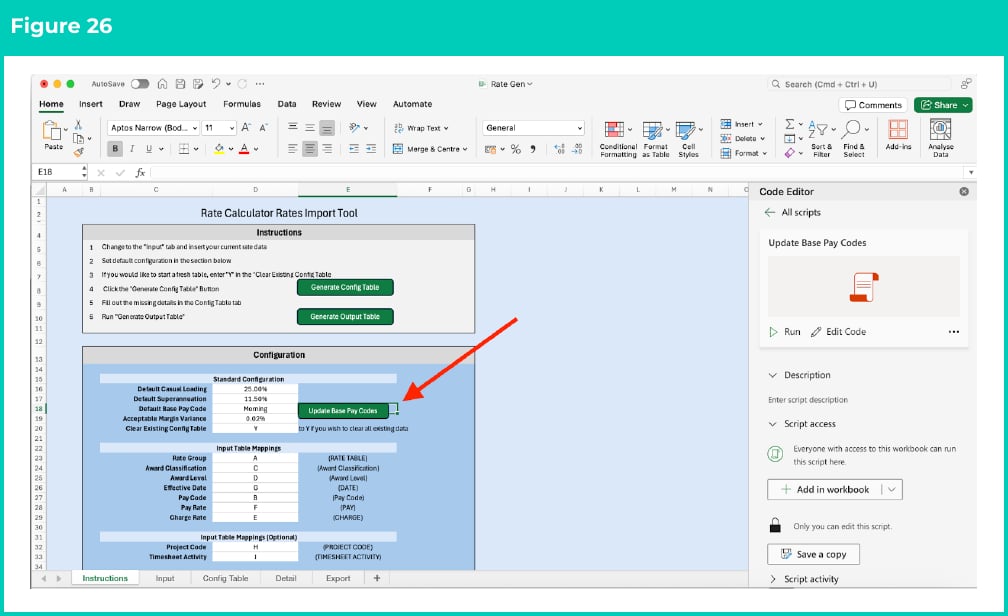
- A new button labelled Update Base Pay Codes has been created in cell E18 (see Figure 26).
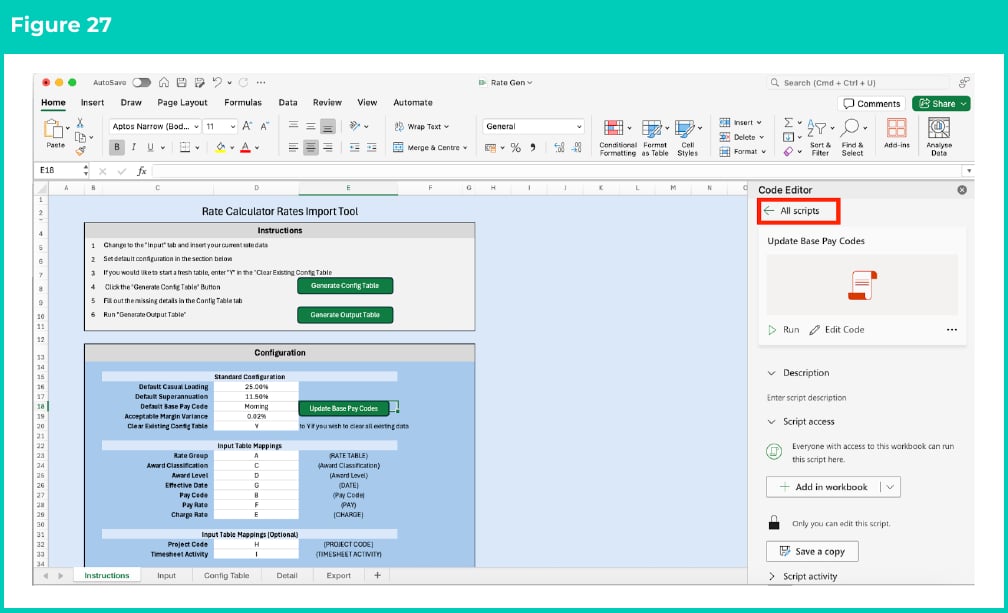
- Within the Code Editor, click the arrow at the top-left corner again to view all the available scripts (see Figure 27).
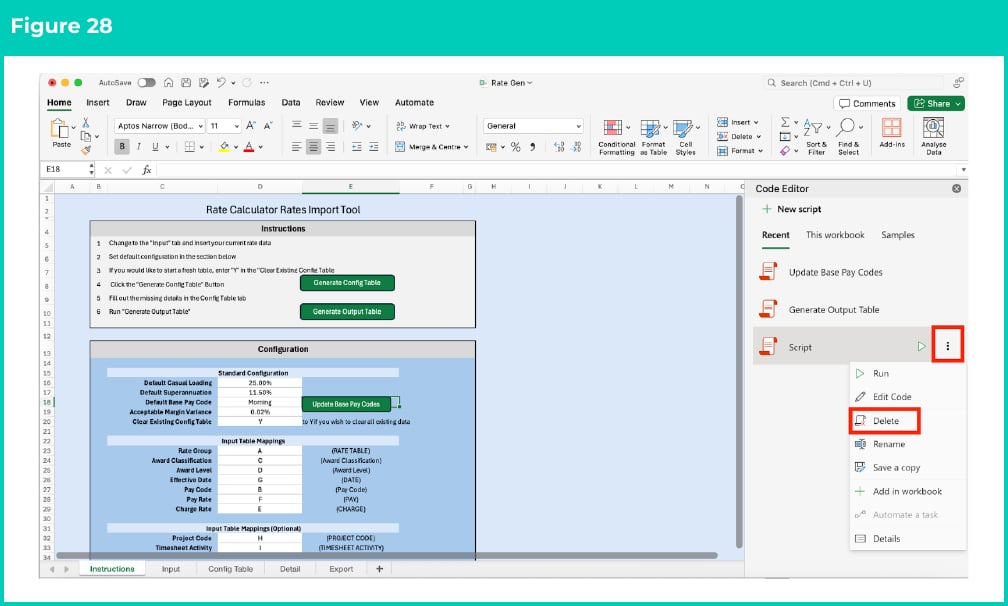
- If you wish, you can now delete the temporary script made at the start and close the Code Editor window (see Figure 28).
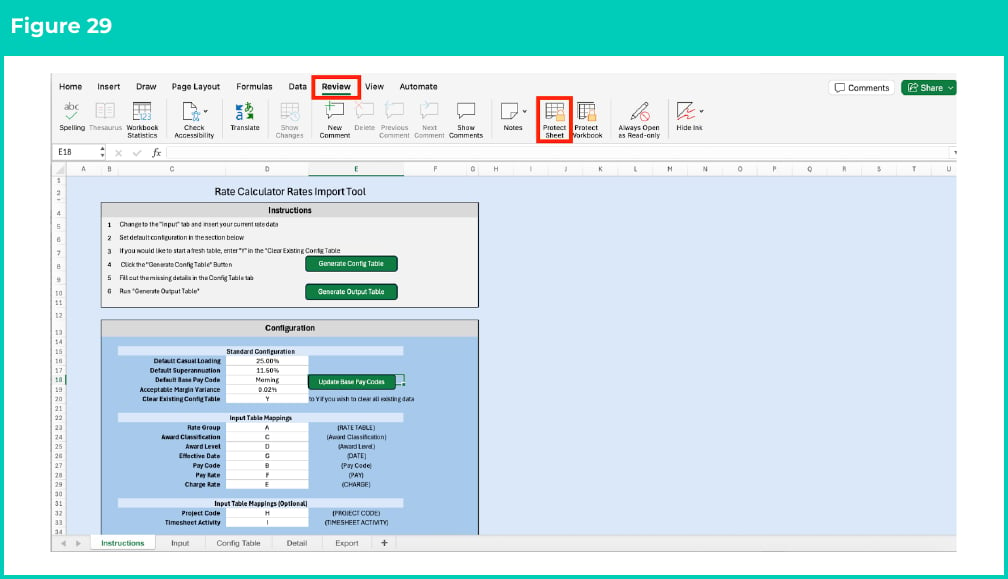
- Ensuring you have the Instructions Worksheet open, click on the Review tab, and click Protect Sheet (see Figure 29).
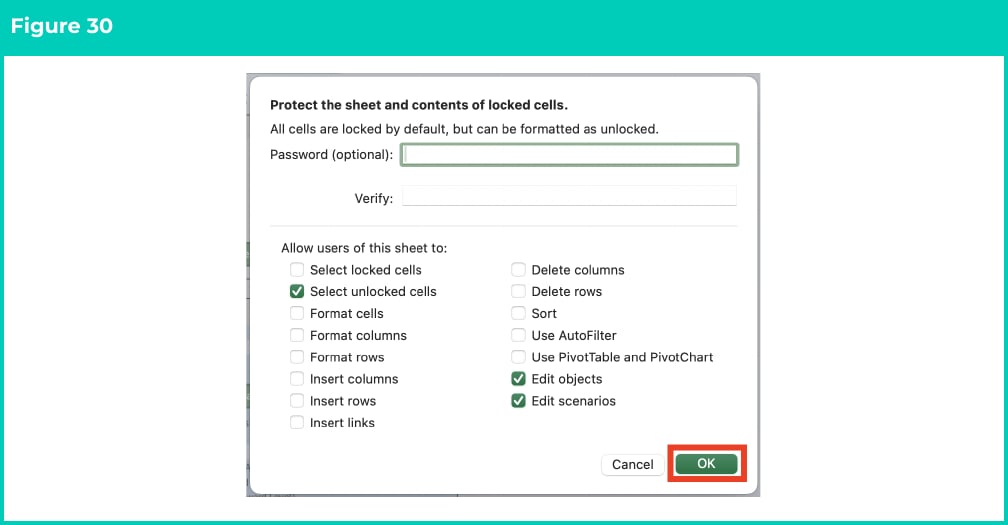
- Some checkboxes will be selected by default. You can ignore them and click the OK button (see Figure 30).
- Save the Excel file. It is now ready for use.