

Purpose
The purpose of this quick reference guide is to step through the process of creating Rate Calculator Previews, Clones, and Save as Template record updates. The intended audience for this document is System Administrators / Standard Users.Steps
To open an existing Rate Calculator record, please follow the steps below:- Click on the App Launcher icon (see Figure 1).

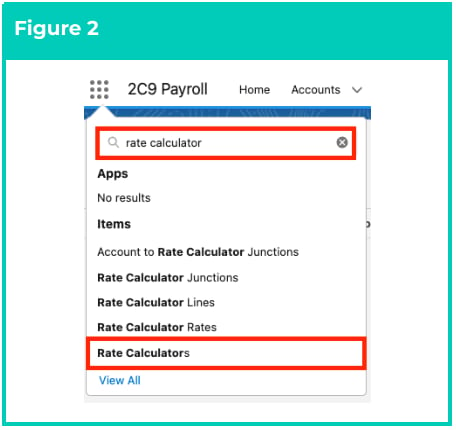
- Go to the Rate Calculators object by using the Search function (see Figure 2).
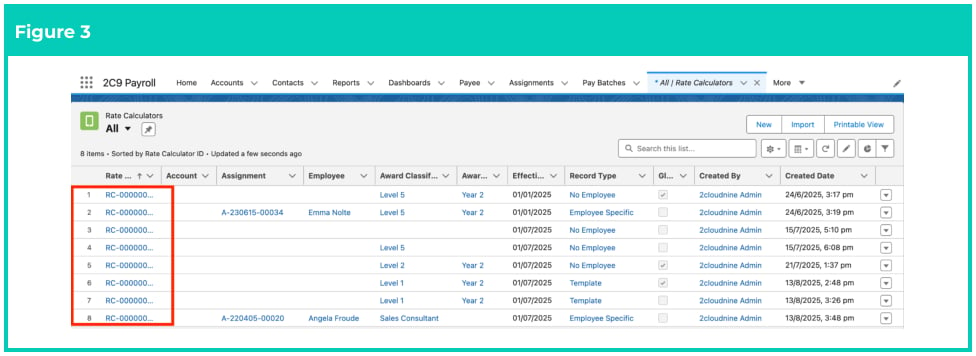
- Open an existing Rate Calculator record (see Figure 3).
Preview Rate Calculators
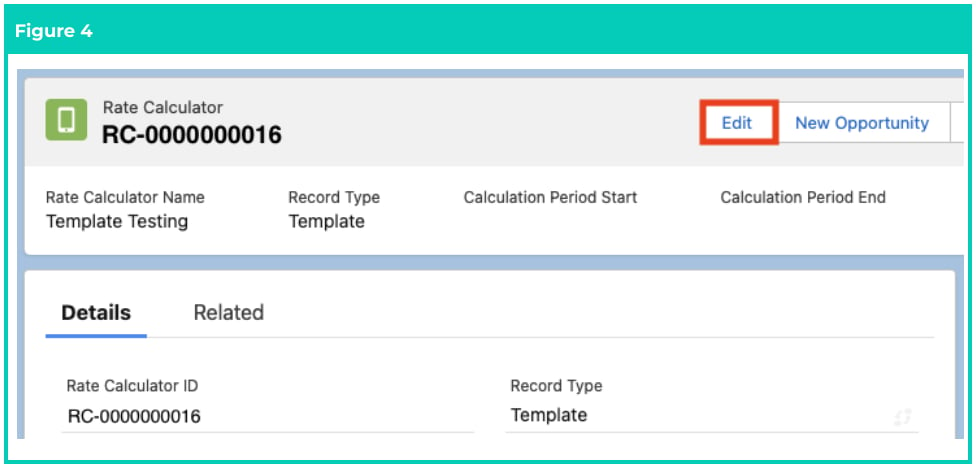
Previews allow Rate Calculators to be modified without applying changes to the active Rate Calculator or any of its related records. Changes made in Preview will be reflected in the Rate Calculator Lines displayed in the Preview, but no changes will be applied to the original record.- Click on the Edit button (see Figure 4).
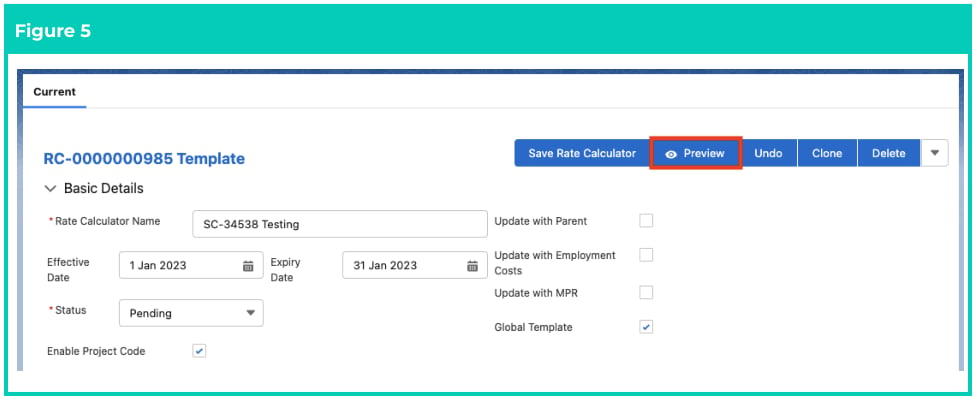
- Click on the Preview button located at the top of the Rate Calculator (see Figure 5).
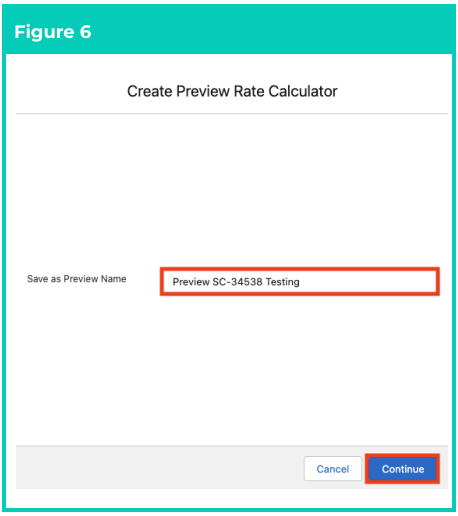
- In the window that appears, ensure the Save as Preview Name field is populated with a unique identifier for the Preview, and click on the Continue button (see Figure 6).
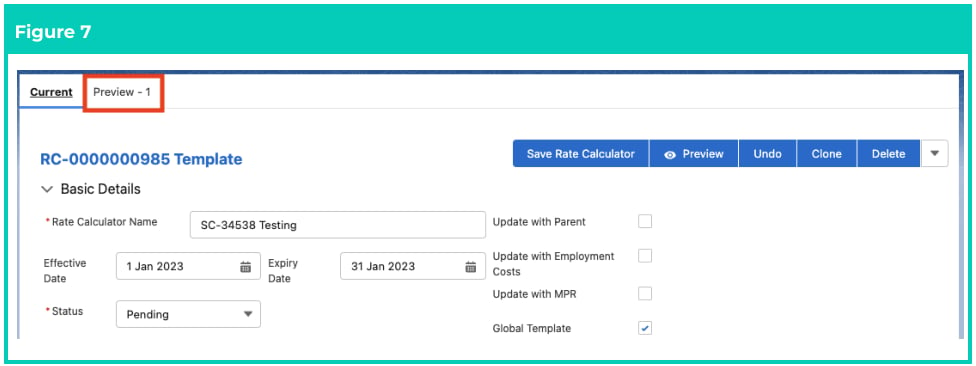
- Click on the new Preview tab along the top of the screen and make the necessary changes to the record (see Figure 7).
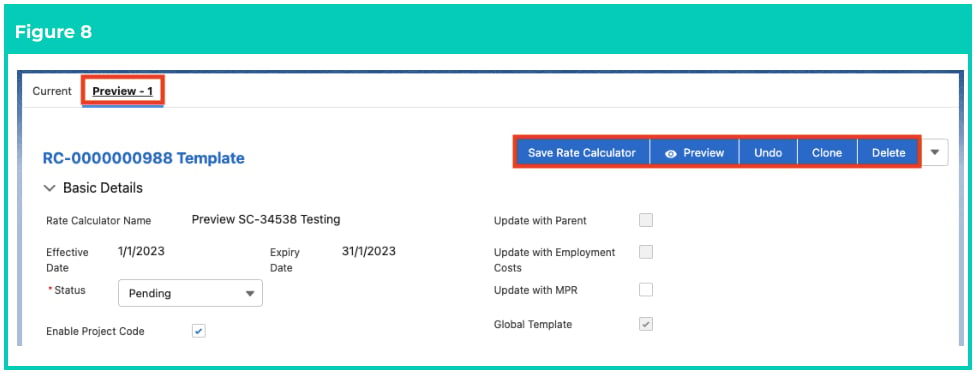
- Once all the necessary updates have been made to the Preview, select one of the following actions
available (see Figure 8):
- Click on the Save Rate Calculator button to transfer the changes made in the Preview tab.
- Click on the Preview button to create a new Preview which will be populated with the values of the current Preview.
- Click on the Undo button to undo the most recent change made in the Preview tab.
- Click on the Clone button to create a new Rate Calculator record populated with the values of the current Preview.
- Click on the Delete button to discard the Preview and all changes made.
Important Notes
(Figure 4)There are no restrictions on the number of Previews that can be created, but Previews should be deleted once they are no longer required, to avoid consuming too much data space.
(Figure 4)There are no restrictions on the number of Previews that can be created, but Previews should be deleted once they are no longer required, to avoid consuming too much data space.
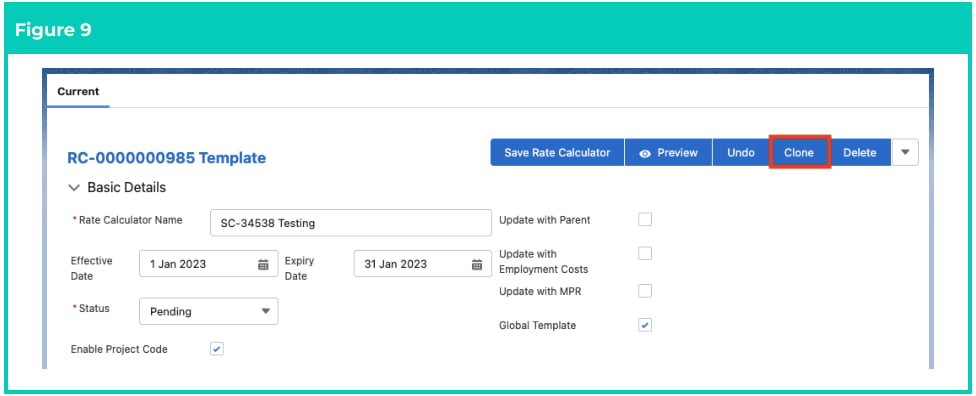
- Click on the Clone button located at the top of the Rate Calculator (see Figure 9).
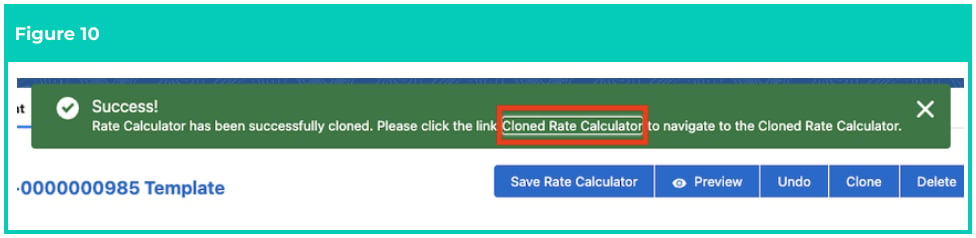
- To access the new cloned Rate Calculator, click on the Cloned Rate Calculator link that is displayed in the notification banner (see Figure 10).
Save as Template
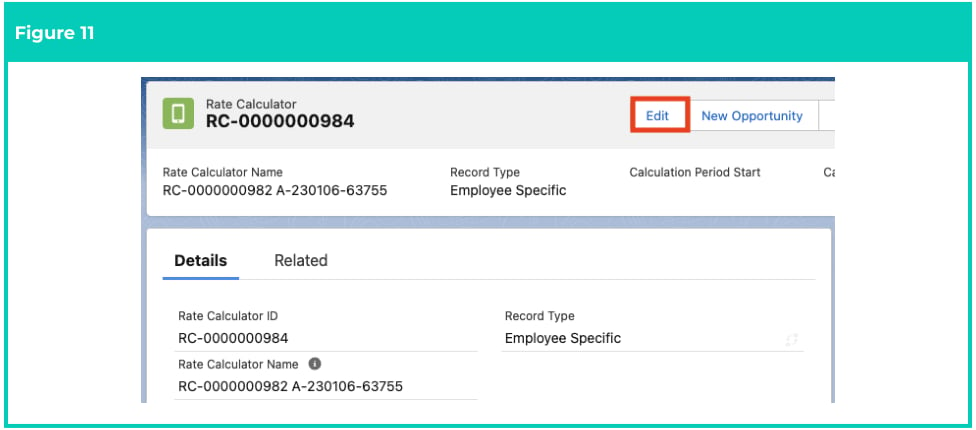
The Save as Template feature provides a way to clone an Employee Specific Rate Calculator as a Rate Calculator Template. This feature allows the new Template to either be applied to the same Client/Payment Entity that the original record has or to be Globally enabled. To save a Rate Calculator as a Template:- Click on the Edit button available on the top right side of the page (see Figure 11).
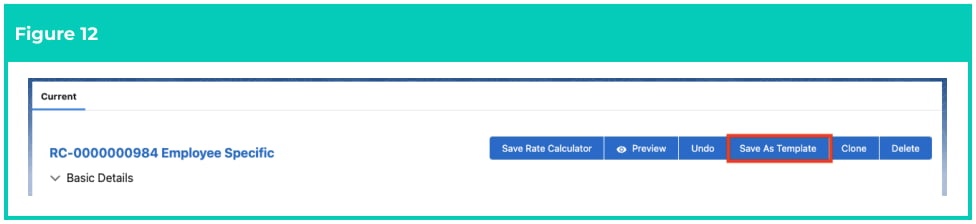
- Click on the Save as Template button (see Figure 12).
- Follow this step in the sequence given below:
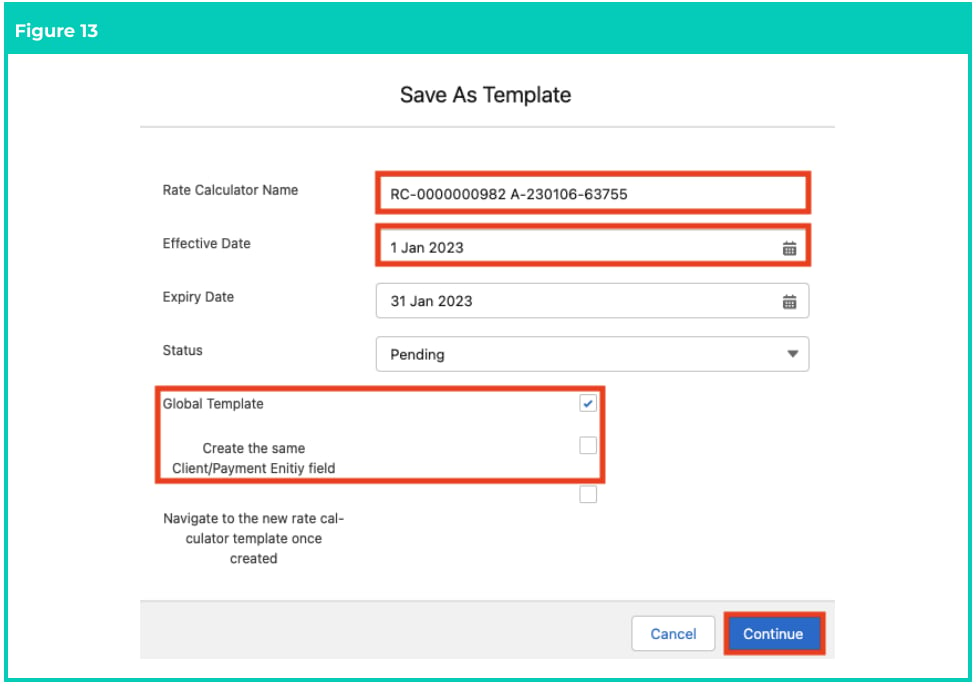
- In the window that appears, ensure the following required fields are populated with the
appropriate values (see Figure 13):
- Rate Calculator Name
- Effective Date
- Populate the following optional fields, as required:
- Expiry Date
- Status
- To allow the Rate Calculator Template to be related to an Assignment regardless of whether the same related Client Account or Payment Entity records are shared, check the Global Template checkbox. OR To determine that the Rate Calculator Template should only be available for the Client/Payment Entity applied to the existing record, check the Create the same Client/Payment Entity checkbox.
- To automatically open the Rate Calculator Template upon creation of the new record, check the Navigate to the new rate calculator template once created checkbox.
- In the window that appears, ensure the following required fields are populated with the
appropriate values (see Figure 13):
- Click on the Continue button (see Figure 13).
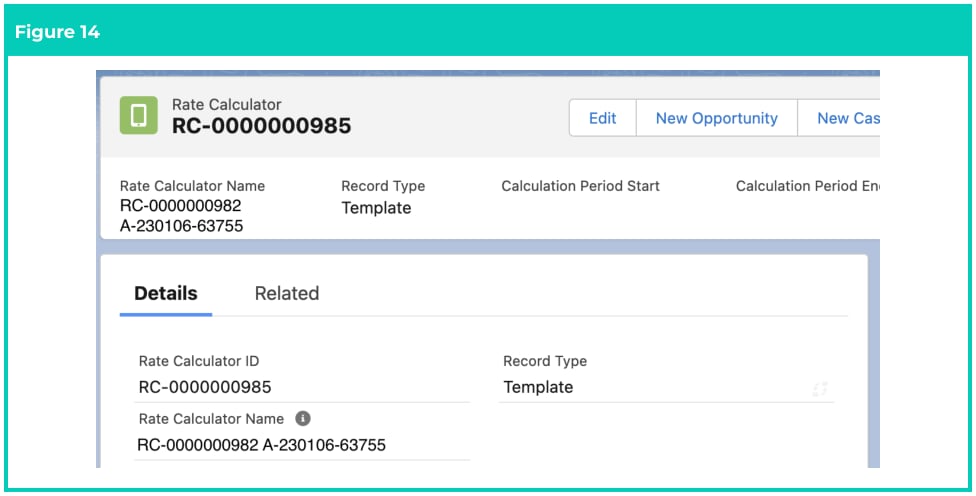
Important Notes
(Figure 20)If the checkboxes ‘Global Template’ or ‘Navigate to the new rate calculator template once created’ were NOT selected during Rate Calculator Template creation, follow the instructions in step 11 of QRG Rate Calculator Template - Initial Setup to apply the Rate Calculator Template to a different Client/Payment Entity.
(Figure 20)If the checkboxes ‘Global Template’ or ‘Navigate to the new rate calculator template once created’ were NOT selected during Rate Calculator Template creation, follow the instructions in step 11 of QRG Rate Calculator Template - Initial Setup to apply the Rate Calculator Template to a different Client/Payment Entity.