

Purpose
The purpose of this quick reference guide is to step through the process of managing Employment Costs using Employment Cost Manager. The intended audience for this document is System Administrators / Standard Users. The new Employment Cost Manager UI provides a tool to easily create, expire, clone, and validate the Employment Cost Items from one place, allowing for validation of the relationship between Employment Cost Item records and other related records.Steps
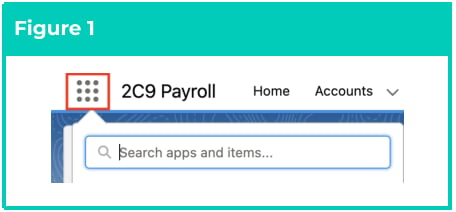
Create new Employment Cost Items using Employment Cost Manager To create Employer Cost Item records, follow the steps below:- Click on the App Launcher icon (see Figure 1).
- Go to the Employment Costs object by using the Search function (see Figure 2).

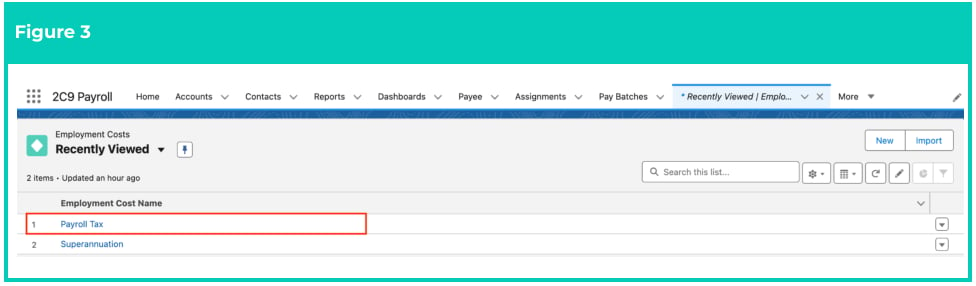
- Choose the required Employment Cost record (see Figure 3).
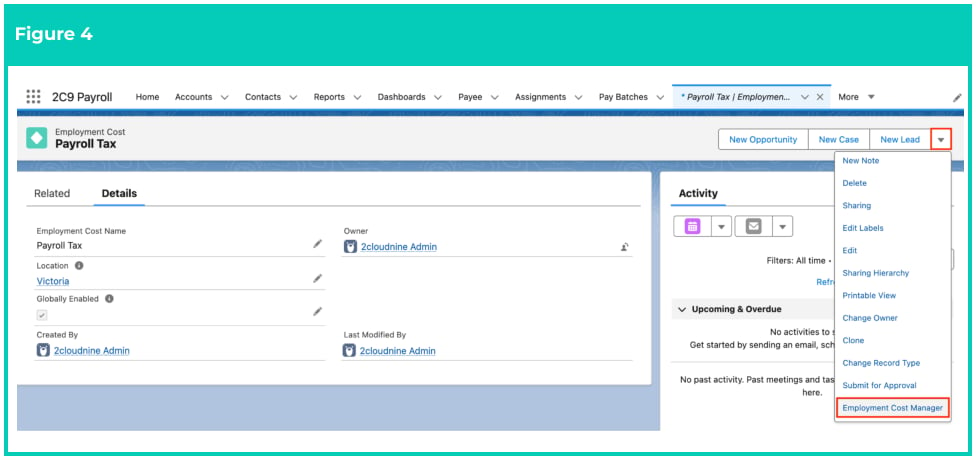
- On the Employment Cost record Page Layout, click on the drop-down arrow and select Employment Cost Manager (see Figure 4).
Important Notes
(Figure 4)While one Employment Cost Item must be created for every Location record, individual (i.e. state-based) Location records should NOT be populated for the parent Employment Cost record. Instead, a single catch-all Location record, such as All Locations or Any Location, should be created to enable Rate Calculator Templates and Employee Specific Rate Calculators to be identified and related.
(Figure 4)While one Employment Cost Item must be created for every Location record, individual (i.e. state-based) Location records should NOT be populated for the parent Employment Cost record. Instead, a single catch-all Location record, such as All Locations or Any Location, should be created to enable Rate Calculator Templates and Employee Specific Rate Calculators to be identified and related.
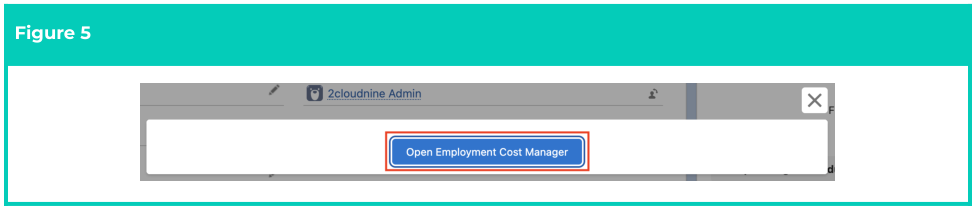
- A pop-up will appear. On the popup, click the Open Employment Cost Manager button (see Figure 5).
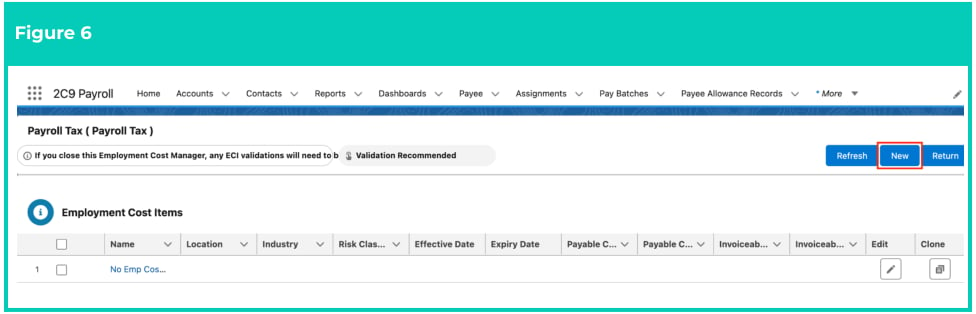
- The new Employment Cost Manager will open. Within the Employment Cost Manager, click on the New button (see Figure 6).
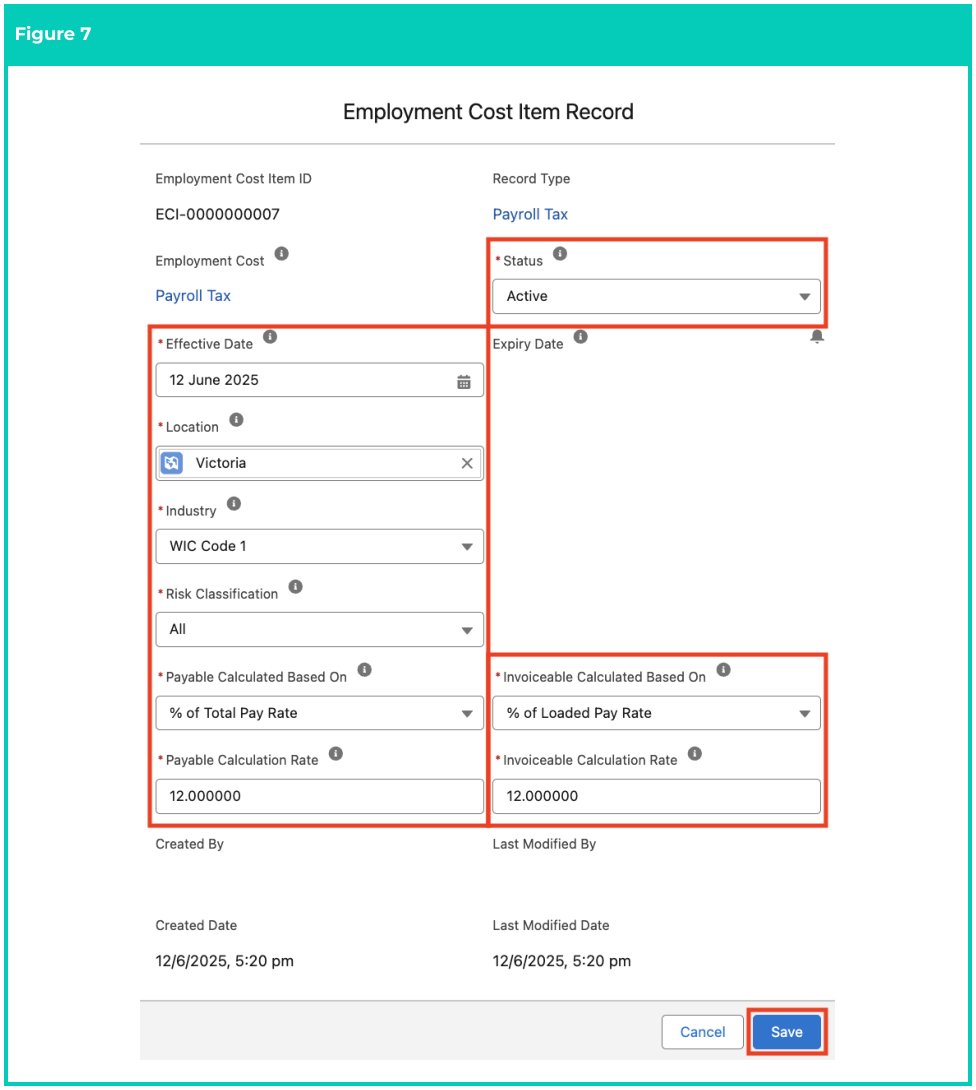
- Populate the following required fields to provide the base details of the Employment Cost Item record (see Figure 7):
- Effective Date
- Location
- Industry
- Risk Classification
- Payable Calculated Based On
- Payable Calculation Rate
- Invoiceable Calculated Based On
- Invoiceable Calculation Rate
- Status
- Click Save .
- You will receive a confirmation message when the record is created (see Figure 8):

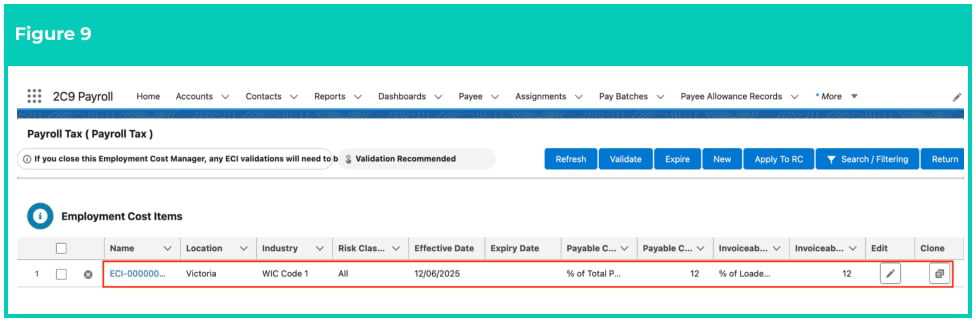
- A new Employment Cost Item record has been created (see Figure 9).
Employment Cost Items CAN NOT be deleted or modified if they have related records or are used in other records. Deleting records is not recommended unless absolutely essential.
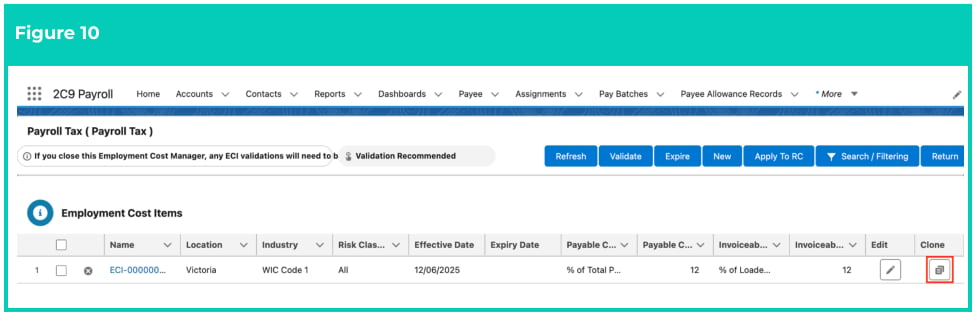
- In the Employment Cost Manager, click the Clone button next to the Employment Cost Item record, as shown in the screenshot below (see Figure 10).
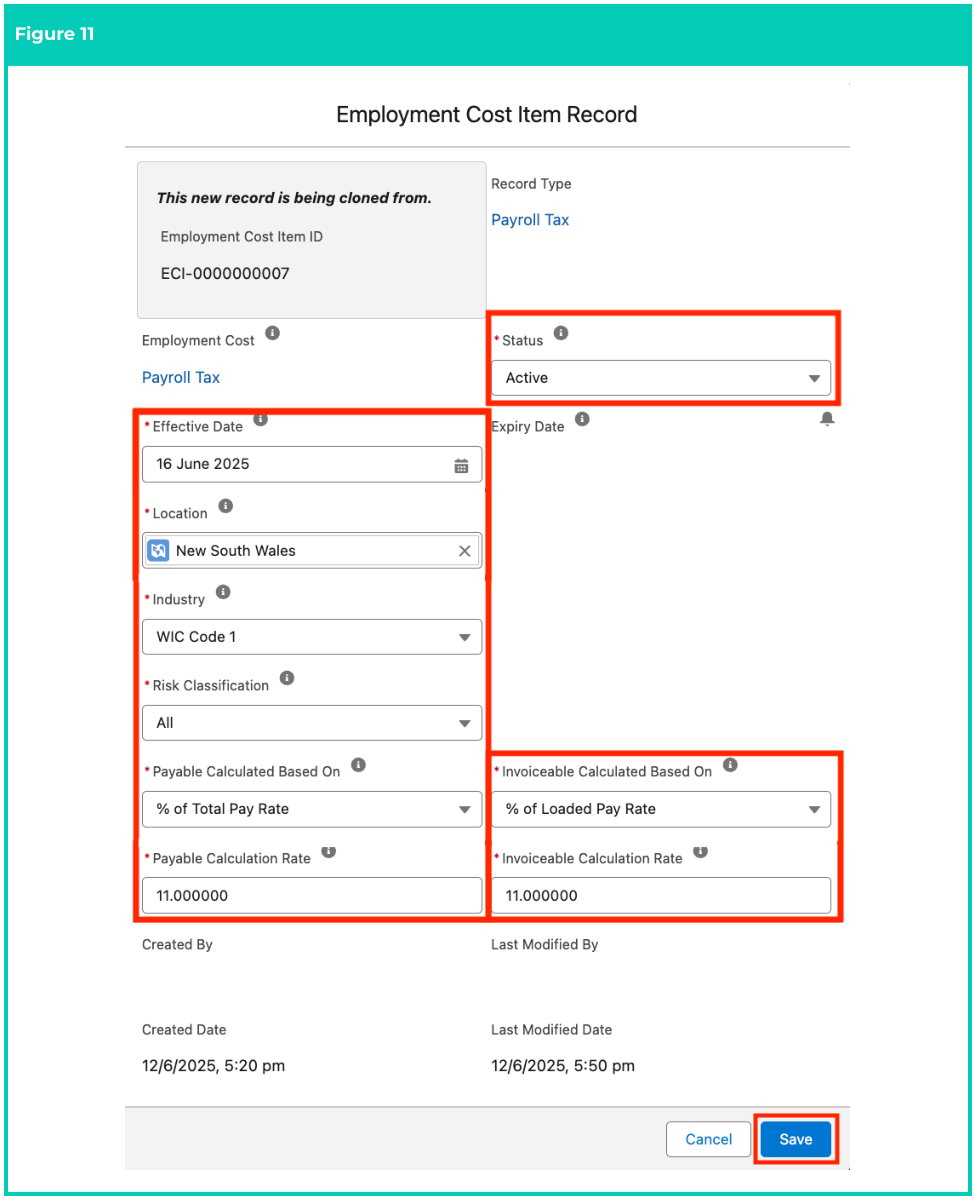
- A pop-up will appear with the same values copied from the existing record being cloned. You can update the values as required, and once done, click Save (see Figure 11).
- A new Employment Cost Item record has been created (see Figure 12).
 Employment Cost Item records CAN NOT be deleted or modified if they have related records or are used in other records. Deleting records is not recommended unless absolutely essential.
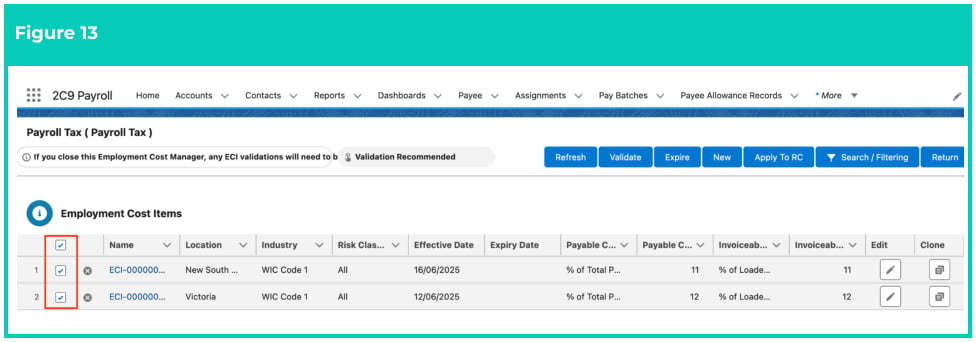
- In the Employment Cost Manager, select the record that you would like to validate by ticking the checkbox and click Validate (see Figure 13).
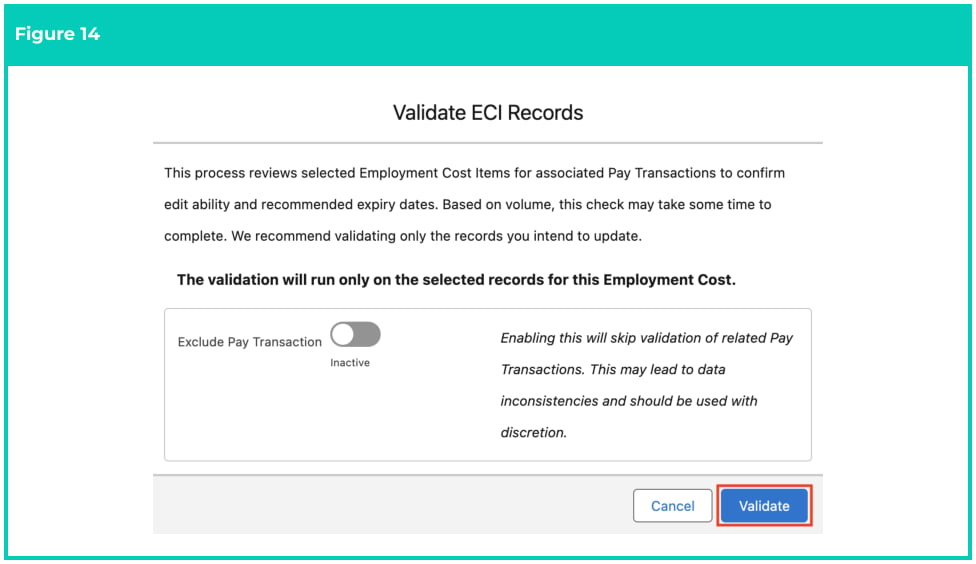
- A pop-up will appear with further instructions about the validation process. By default, the Exclude Pay Transaction Toggle will be disabled. Click on the Validate button (see Figure 14).
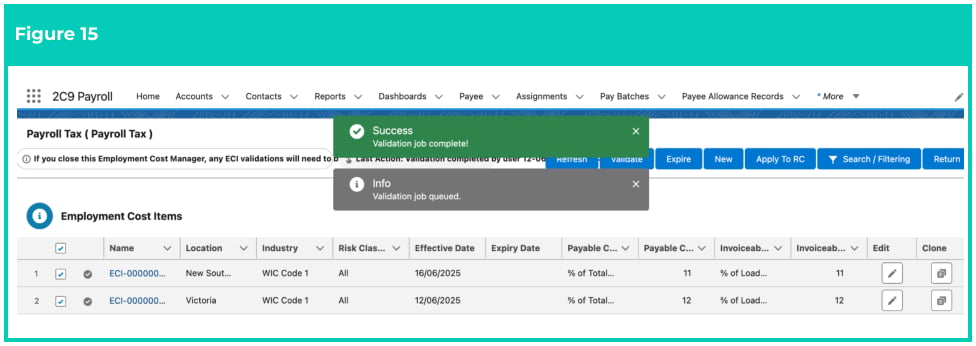
- You will receive a confirmation message when the validation is complete (see Figure 15).
- After successful validation, select the Employment Cost Items and click Apply to RC (see Figure 16).

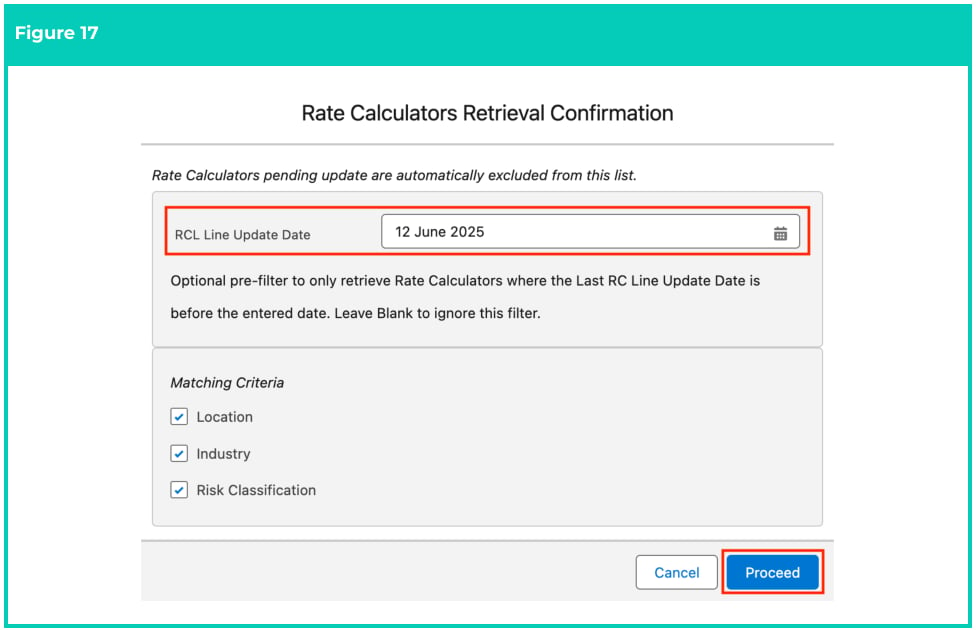
- A pop-up will appear. Populate the RCL Line Update Date to retrieve all Rate Calculator records where the Last RC Update Date is before the entered date (see Figure 17).
- Once done, click Proceed .
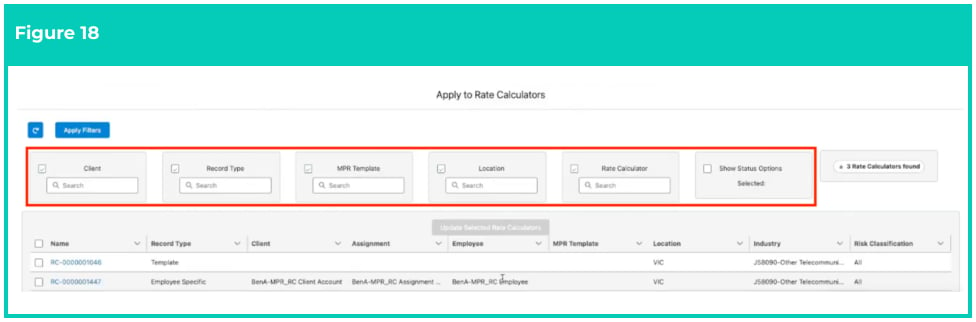
- From the records retrieved, you can utilise the available filters as shown in the screenshot below to further refine and select the required Rate Calculator record (see Figure 18).
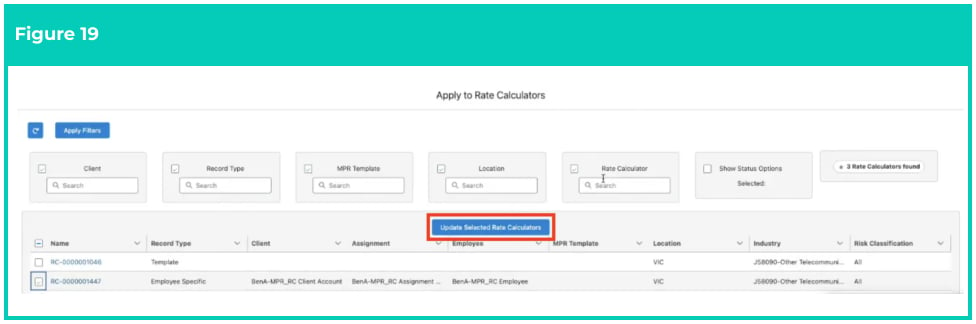
- Select the required Rate Calculator record(s) and click Update Selected Rate Calculators (see Figure 19).
Important Notes
(Figure 19)Once you apply the Employment Cost record to a Rate Calculator record, the field Last Calculator Line Update Date will be set to Now, and the recalculation will be performed by the next Scheduled Batch Job or by manually going into a Rate Calculator and selecting Calculate.
(Figure 19)Once you apply the Employment Cost record to a Rate Calculator record, the field Last Calculator Line Update Date will be set to Now, and the recalculation will be performed by the next Scheduled Batch Job or by manually going into a Rate Calculator and selecting Calculate.
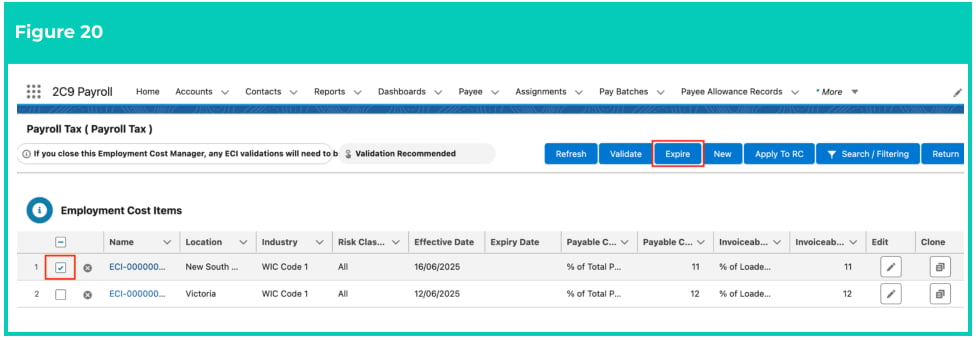
- In the Employment Cost Manager, select the record that you would like to expire by ticking the checkbox next to it and then click Expire (see Figure 20).
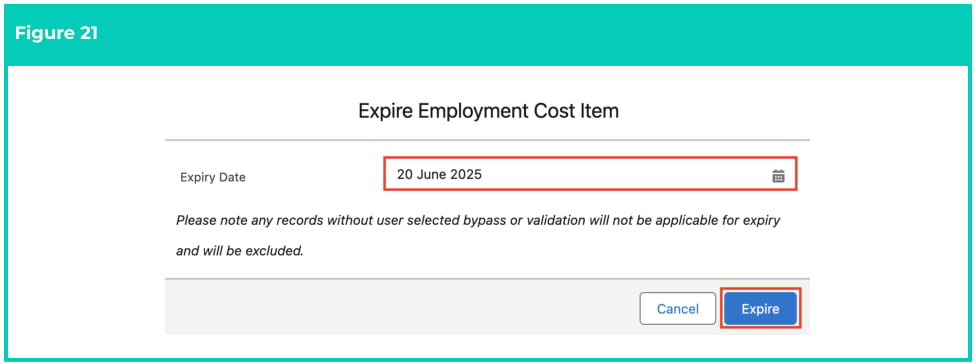
- Populate the Expiry Date field and click Expire (see Figure 21).
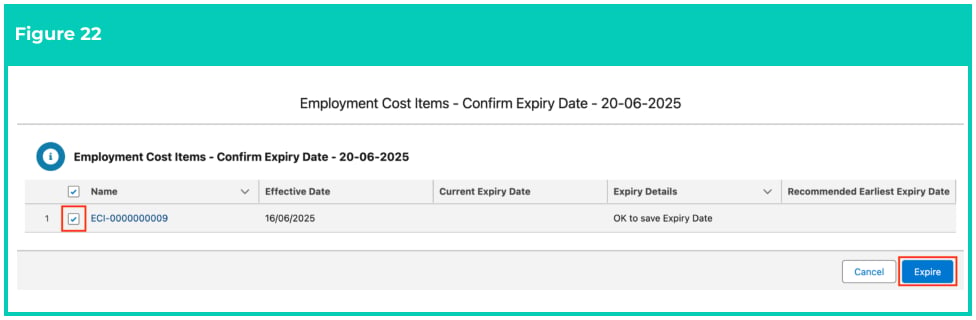
- On the next screen, tick the required record and click Expire to proceed (see Figure 22).
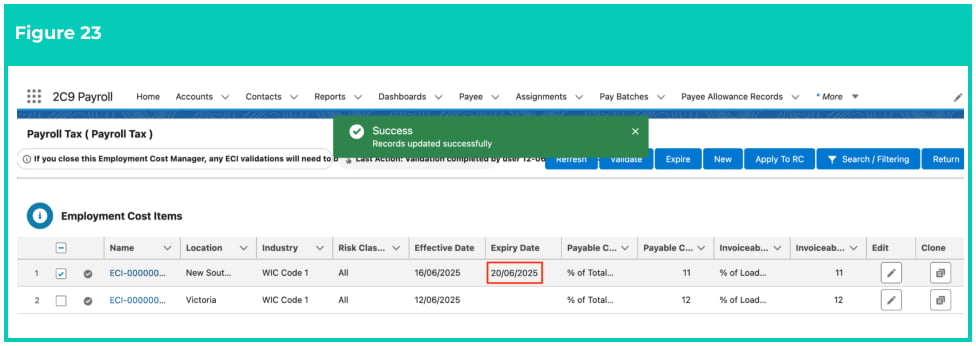
- The selected record will expire with the Expiry Date populated as shown in the screenshot below (see Figure 23).
- The expired record can now be cloned following the steps provided above in this document, under the section Clone Employment Cost Items.
Employment Cost Item records CAN NOT be deleted or modified if they have related records or are used in other records. Deleting records is not recommended unless absolutely essential.