Purpose
The purpose of this quick reference guide is to step through the process of allocating Shifts to a Work Schedule using the Work Schedule Manager. The intended audience for this document are Standard Payroll Users.Steps
Allocate Shifts to a Work Schedule
Once Work Schedule records are created, existing Shift Records can be allocated to the Work Schedule to define the Shifts that apply. While the Work Schedule Manager is in Edit Mode, there are 2 methods to Allocate Shifts:- The Picklist option, available in the Weekly Lists under the Shift Allocation section of the Work Schedule Manager, allows allocation on a day-by-day basis.
- The Allocate Shift Page option, available through both the Shift Allocation and Shift Records sections of the Work Schedule Manager, enables the allocation of existing Shift Records on a repetitive / sequence work pattern basis.
Allocate Shifts to a Work Schedule Using the Picklist method
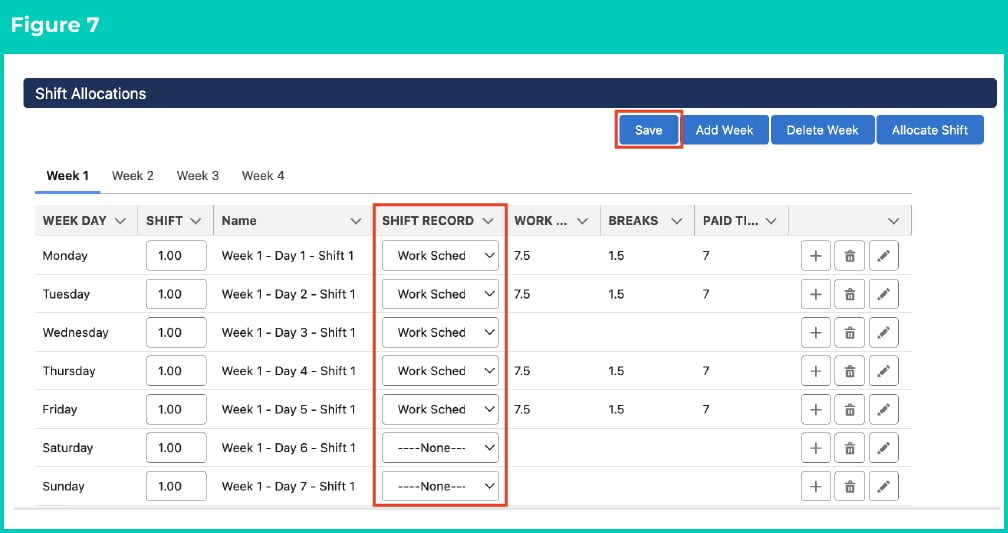
To assign or edit Shift Allocations for individual days listed in the Weekly List displayed within the Shift Allocation section:- While the Work Schedule is in Edit Mode, navigate to the Shift Allocations section of the Work Schedule Manager (see Figure 1).
- Within the Weekly List displayed, navigate to a daily record that needs a Shift Record assigned, or changed.
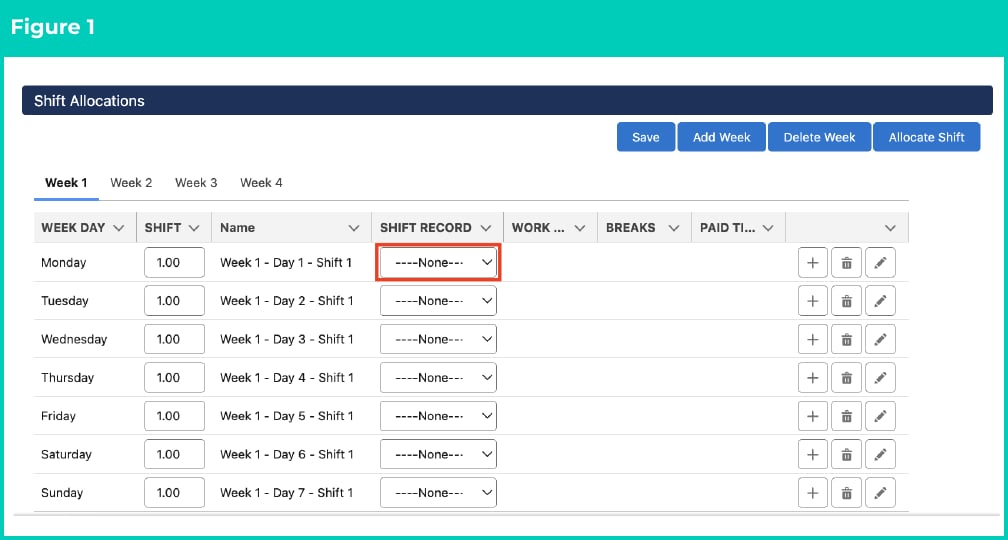
- Click on the Shift Record picklist to view the available Shift Records. Only Shift Records that have a matching Shift Time Format and Break Time Format to the Work Schedule will be listed for selection. They will be sorted based on the Last Modified Date of the Shift Record (see Figure 2).
- Scroll down and select the required Shift Record.
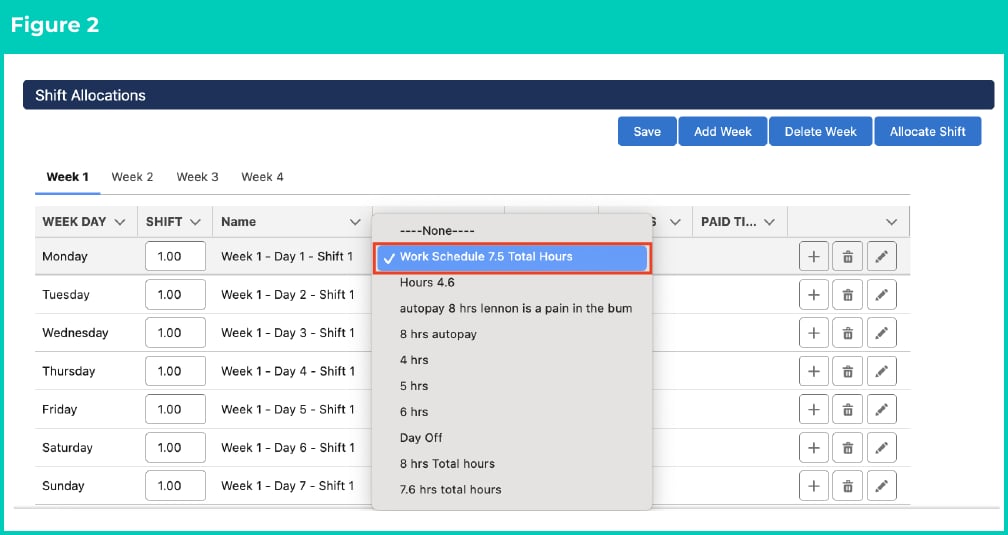
- Navigate through the Weekly List tabs as needed, repeating Steps 2 to 4 for each daily record that needs a Shift Record assigned or changed (see Figure 3).
- When all Daily Records have a shift allocated, click on the Save button. Shift Allocation records will be saved against the Work Schedule and are ready to be Validated.
Each day must have a Shift Record allocated to it even if no work will be done on that day. In that scenario, you will be required to assign the Day Off Shift Record.
Allocate Shifts to a Work Schedule Using the Allocate Shift Record Page
To complete Shift Record allocations against multiple days, on a repetitive/sequenced basis, using the Allocate Shift Record Page:- Open the Allocate Shift Record Page. This can be completed via 2 methods while the Work Schedule is in Edit Mode:
- Navigate to the Shift Allocations section of the Work Schedule Manager (see Figure 4):
- Click on the Allocate Shift button; or
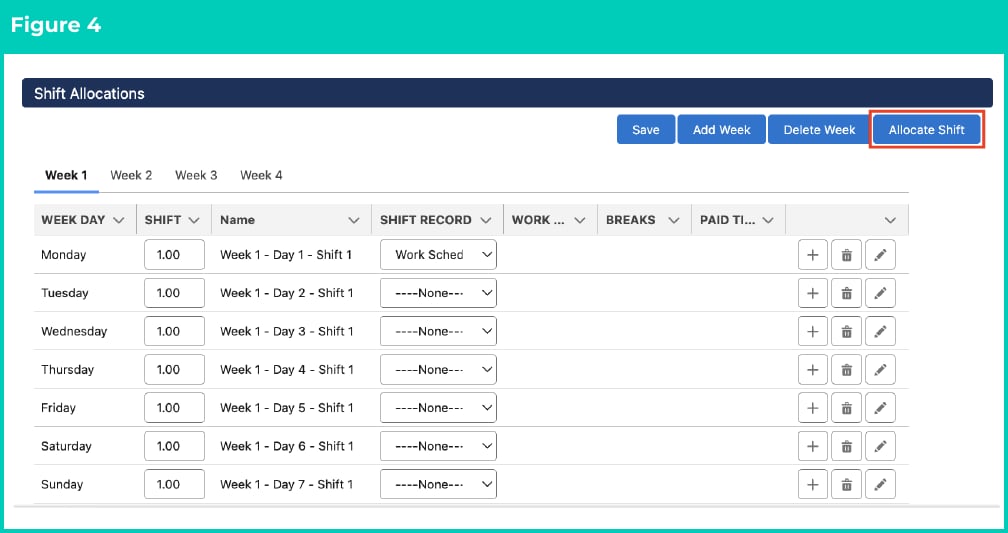
- Click on the Allocate Shift button; or
- Navigate to the Shift Records section of the Work Schedule Manager (see Figure 5):
- Click on the action button against a relevant Shift Record.
- Select the Allocate Shift Record option.
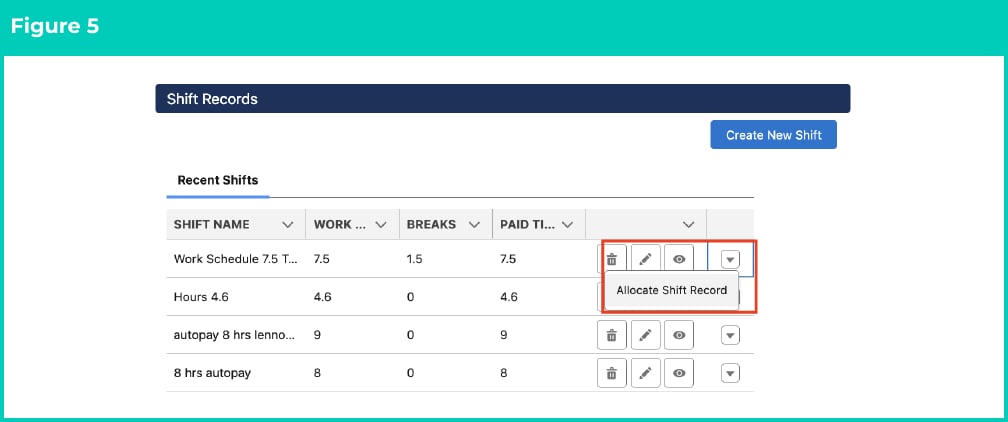
- Navigate to the Shift Allocations section of the Work Schedule Manager (see Figure 4):
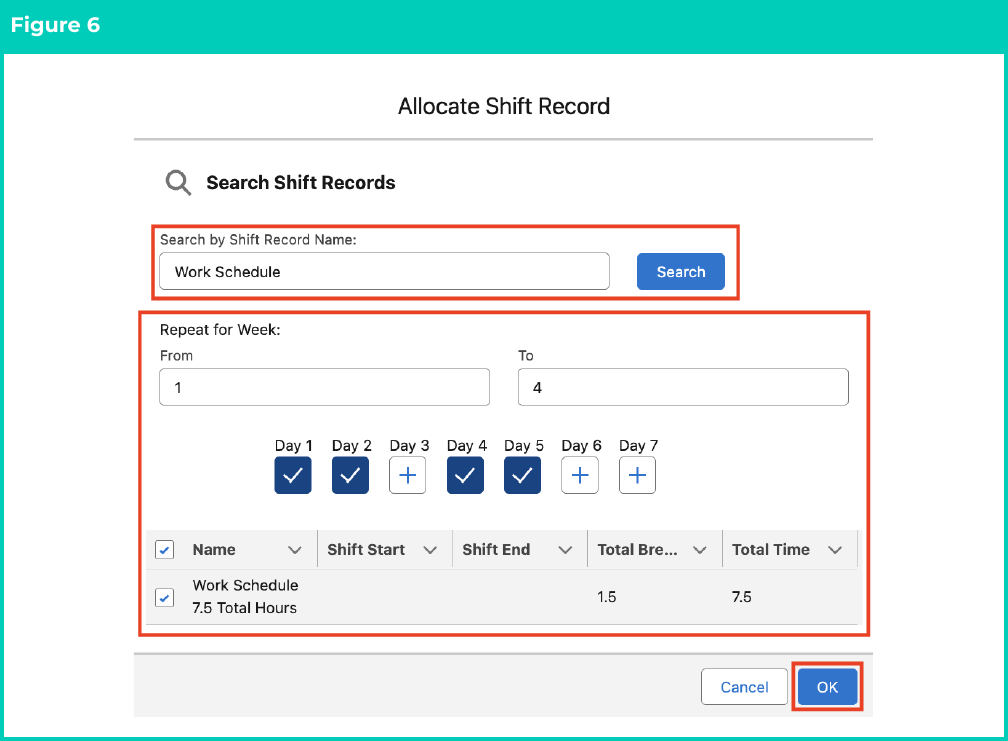
- Populate the Shift Record Name in the Search by Shift Record Name field. This can be the whole name or part of the name (see Figure 6).
- Click on the Search button.
- Select the Shift Record to be allocated from the list displayed.
- Define which weeks within the Work Schedule the Shift Allocation will be applied to, using the Repeat for Week: From and To fields.
- Select the days of the week that the Shift Allocation will be applied for the weeks defined in Step 5. Select the Days by clicking on the Day buttons.
- Click on the Ok button.
When populating the Day fields within the Allocate Shift Record Page, consider that Day 1 will always represent the Work Schedule First Day.
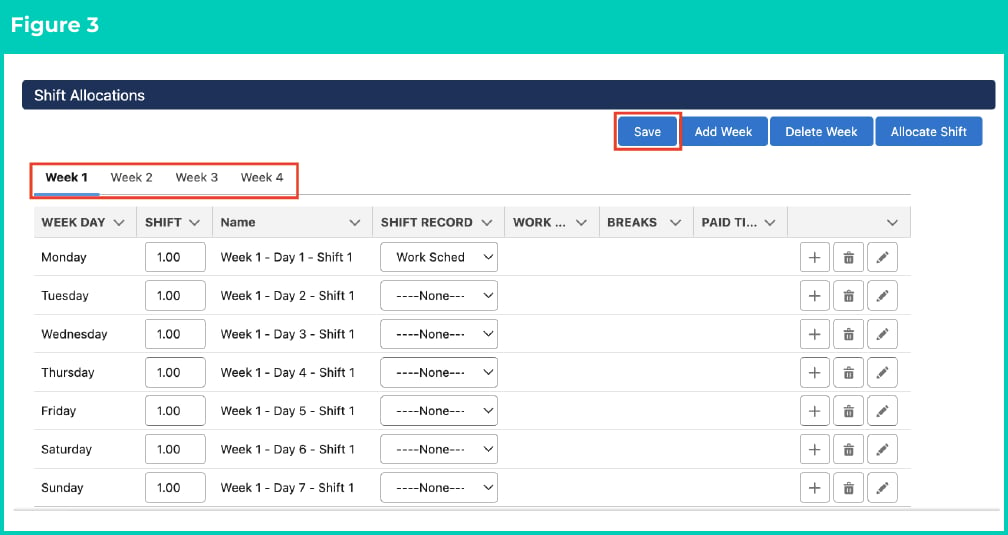
- The Allocate Shift Record Page will close. For the Weeks / Days specified, the Shift Records will be populated against the records shown in the Weekly Lists (see Figure 7). If required, these can be edited via the Picklist Method detailed in the above section.
- Repeat Steps 1 to 7 until Shift Records for all the Days / Rows shown under the Weekly List Tabs are allocated.
- Click on the Save button. Shift Allocation records will be saved against the Work Schedule, ready to be Validated.