Purpose
The purpose of this quick reference guide is to step through the process of creating a Temp Assignment record. The intended audience for this document is System Administrators / Standard Users.Steps
Create a Temp Assignment
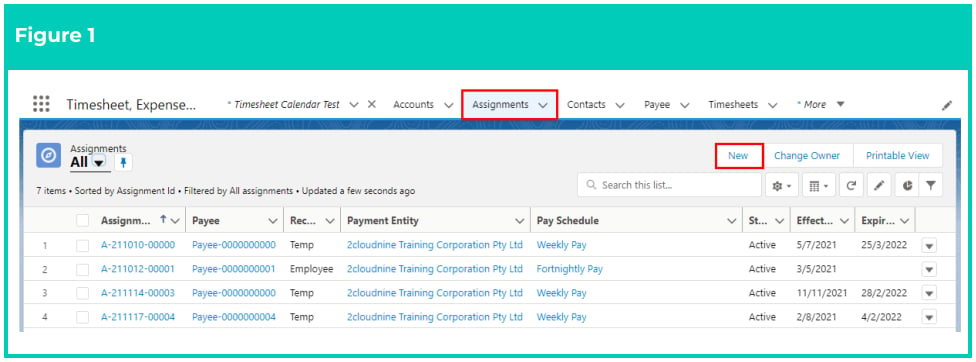
The Assignment holds general information, role details, Approver details, Payroll Settings, Timesheet Settings, Expense Claim Settings, and Invoice Settings for a Timesheet placement. Create an Assignment by following the steps below:- Go to the Assignments object (see Figure 1).
- Click on the New button.
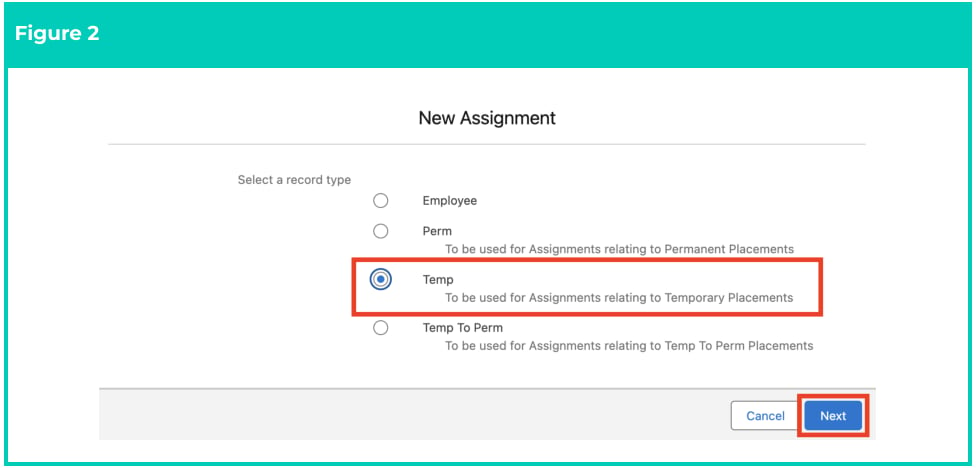
- Select Temp from the available record types, then click the Next button (see Figure 2).
- Populate the following required fields to provide the base details of the Assignment (see Figure 3):
- Assignment Name
- Client
- Client Hiring Manager
- Populate the following optional fields as needed (see Figure 3):
- To indicate that an Annualised Salary Arrangement is in place, populate the Annualised Salary Agreement field as Yes. Pay Transactions created by Interpretation will be marked as ‘Exclude from Pay Batch’ and ‘Invoice Not Required’.
- To set the Status of the new Minimum Pay Rate, select from the available picklist options in the Status field. The Status field can be manually set, but will be automatically updated based on the Effective Date and Expiry Date fields.
- To prevent the Status of the Timesheet Allowance Template Group from being automatically updated by the automatic status update scheduled job, check the Exclude From Auto Update checkbox.
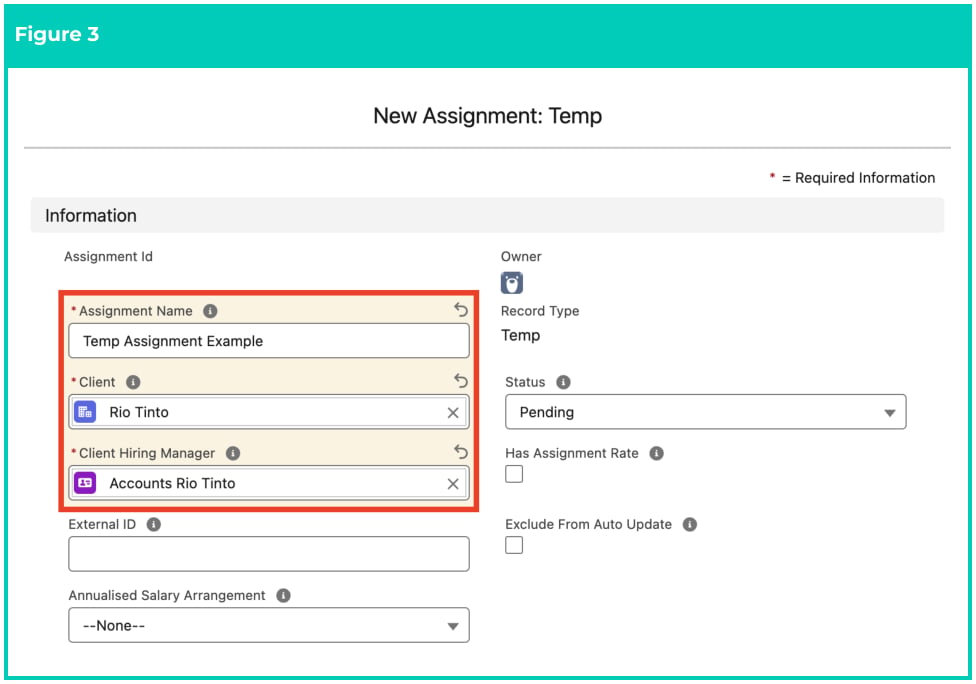
Important Notes(Figure 3)The External ID is used to integrate a record with an external system. This field can be populated automatically or manually if required for system integration.The checkbox field ‘Has Assignment Rate’ is automatically populated when an Assignment Rate is related to the Assignment, and should not be manually checked. 6. Populate the following required fields to provide the base details of the Assignment (see Figure 4):
- Employee
- Payee
- Assignment Start Date
- Assignment End Date
- Populate the following optional fields as needed (see Figure 4):
- If a Purchase Order is required, tick the Requires Purchase Order checkbox.
- To apply a Purchase Order number to Invoices created for the Assignment, populate the Purchase Order Number field.
- To define a Pay Rate to be used with Pay & Invoice Rate Multiplier automation, populate the Assignment Rate Template Group Pay Rate field.
- To define an Invoice Rate to be used with Pay & Invoice Rate Multiplier automation, populate the Assignment Rate Template Group Inv Rate field.
- To define how Assignment Rates are applied to Pay Transactions during Timesheet Interpretation by evaluating exact matches across Pay Code, Project Code, and Timesheet Activities, populate the Assignment Rate Matching Mode field.
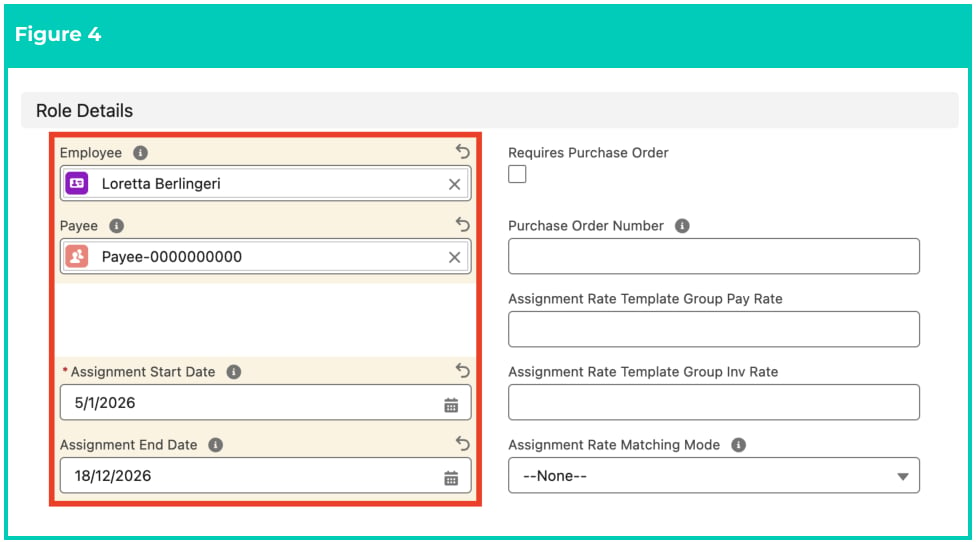
Important Notes(Figure 4)The selected Payee must relate to the same Employee populated for the Assignment. 8. Populate the following required fields to provide the base details of the Assignment (see Figure 5):
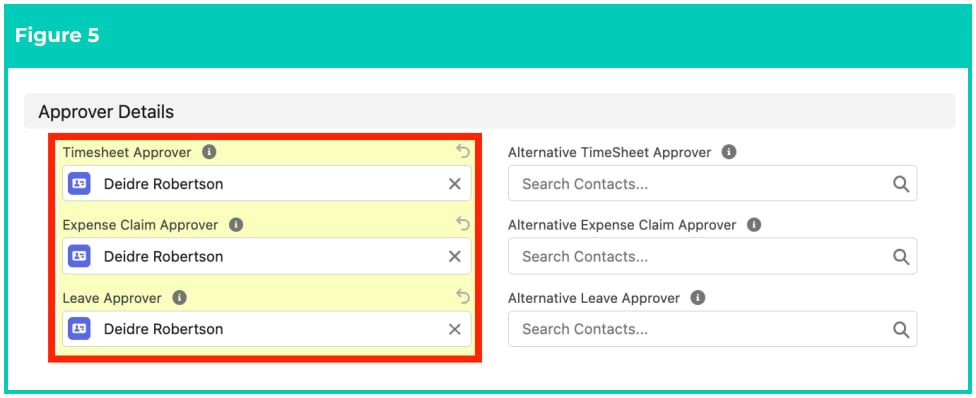
- Timesheet Approver
- Expense Claim Approver
- Leave Approver
- Populate the following optional fields as needed (see Figure 5):
- To nominate the alternative Approvers for this Assignment, populate a Contact for the following fields:
- Alternative Timesheet Approver
- Alternative Expense Claim Approver
- Alternative Leave Approver
- To nominate the alternative Approvers for this Assignment, populate a Contact for the following fields:
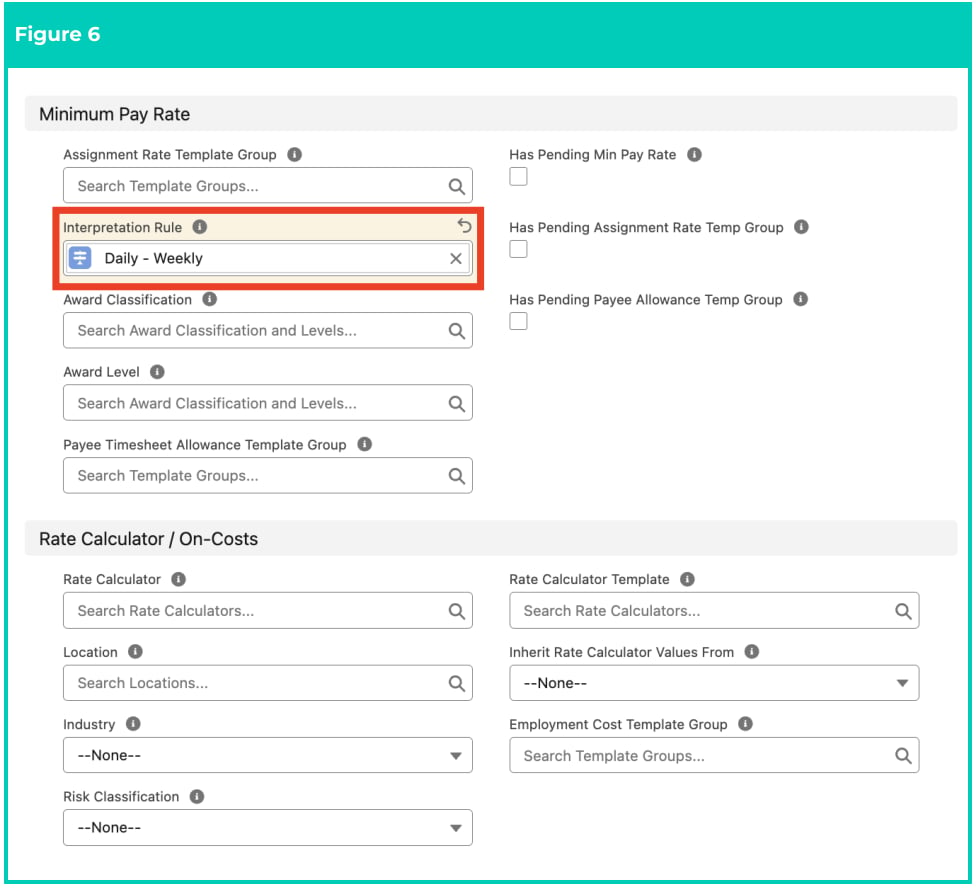
- Populate the following required fields to provide the base details of the Assignment (see Figure 6):
- Interpretation Rule
- Populate the following optional fields as needed (see Figure 6):
- To use Template Groups to automatically create Assignment Rates and Payee Allowances for this Assignment, populate the following fields:
- Assignment Rate Template Group
- Payee Timesheet Allowance Template Group
- To ensure Minimum Pay Rate automation is applied to the Assignment, populate the Award Classification field and optionally the Award Level field using the lookup options available.
- To define a Location that applies to this Assignment, populate the Location lookup field.
- To define an Industry that applies to this Assignment, populate the Industry field using the picklist options available.
- To define a Risk Classification that applies to this Assignment, populate the Risk Classification field using the picklist options available.
- To define a Rate Calculator Template that applies to this Assignment, populate the Rate Calculator Template field using the picklist options available.
- To choose where to inherit Rate Calculator values from, you can populate the Inherit Rate Calculator Values From field with one of the following values:
- Assignment
- Rate Calculator Template
- To define an Employment Cost Template Group that applies to this Assignment, populate the Employment Cost Template Group lookup field.
- To use Template Groups to automatically create Assignment Rates and Payee Allowances for this Assignment, populate the following fields:
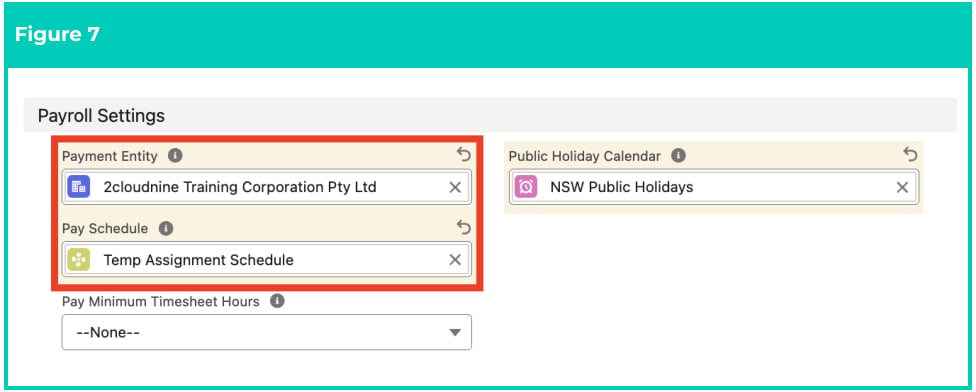
- Populate the following required fields to provide the base details of the Assignment (see Figure 8):
- Timesheet Calendar
- Populate the following optional fields as needed (see Figure 8):
- To define the first start date for the 4-weeks period for the Timesheet Calendar, populate the First 4 week period start date field.
- To define any required rules and limits that will be used in assessing and determining the Assignment, populate the following optional fields as needed. If left blank, the rule/limit will not apply:
- Does Not Use Online Timesheets
- Auto Approve 0 Timesheets
- No Approver Email on 0 Timesheets
- Exclude from Auto Timesheet Creation
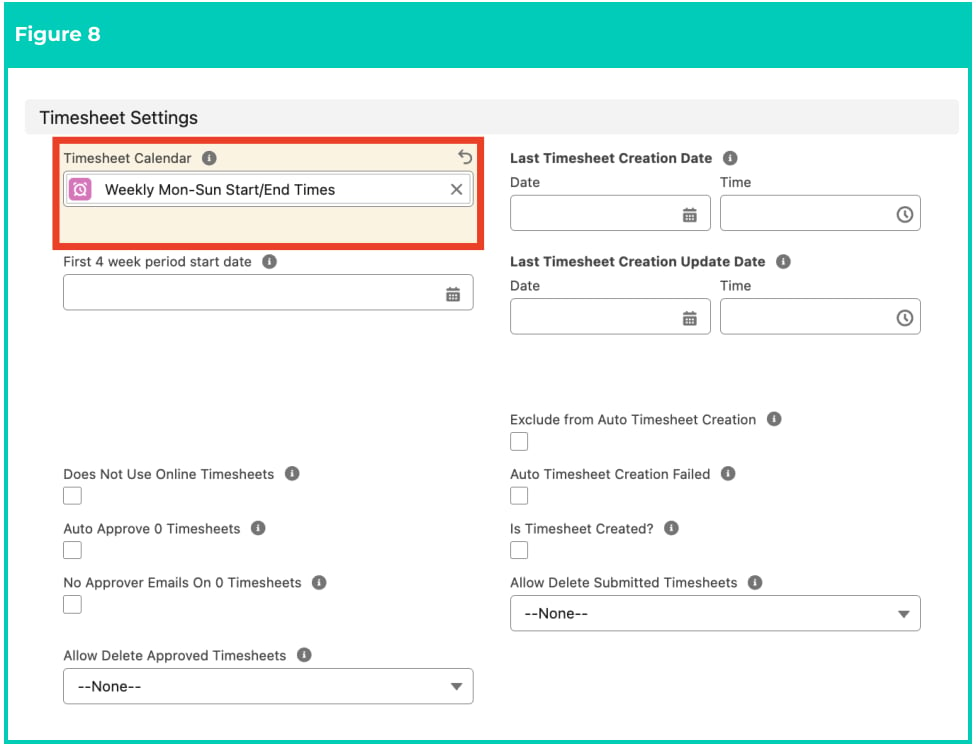
Important Notes(Figure 8)Populating the Assignment Rate Template Group field without Award Classification being populated will initiate the creation of Assignment Rates, but the method of automation will be Template Group Automation. Please ensure only one method of Rates Automation has been used per Assignment.Populating the ‘Allow Delete Approved Timesheets’ and ‘Allow Delete Submitted Timesheets’ fields can impact normal Payroll processes. These fields should only be populated by those who understand the risks, like System Administrators.The Date, Time, and checkbox fields for Timesheet Creation and Updates are automatically populated and should not be manually overridden.The frequency of the Timesheet Calendar may differ from the Pay Schedule. For instance, the Pay Schedule might be Fortnightly, but Weekly Timesheets are submitted. 16. Populate the following required fields to provide the base details of the Assignment (see Figure 9):
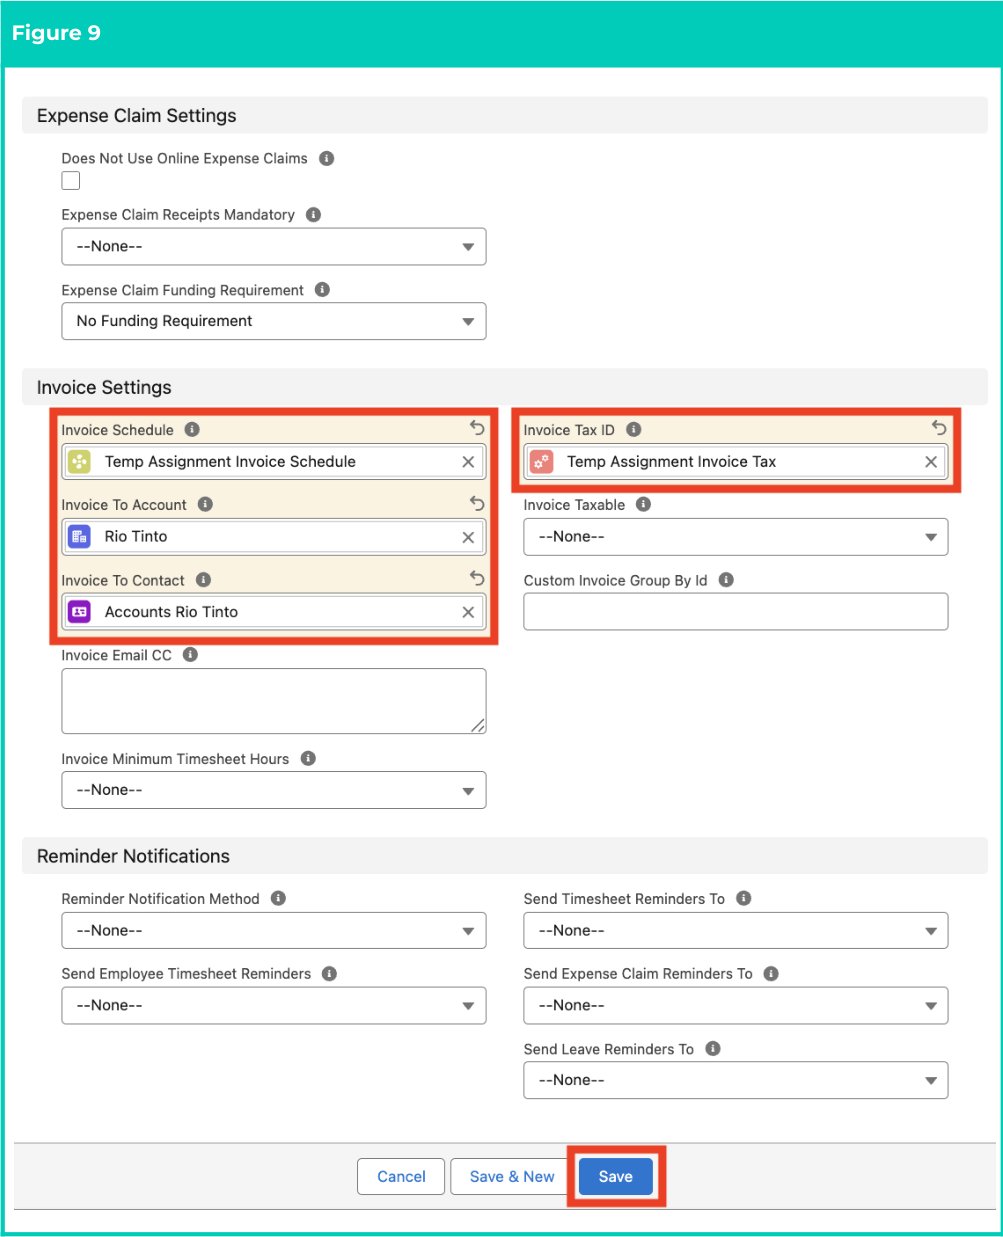
- Invoice Schedule
- Invoice To Account
- Invoice To Contact
- Invoice Tax ID
- Populate the following optional fields as needed (see Figure 9):
- To determine how Expense Claims should be invoiced, select from the available picklist options in the Expense Claim Funding Requirement field.
- To define any required rules and limits that will be used in assessing and determining the Assignment, populate the following optional fields as needed. If left blank, the rule/limit will not apply:
- Does Not Use Online Expense Claims
- Expense Claim Receipts Mandatory
- Invoice Email CC
- Invoice Minimum Timesheet Hours
- Invoice Taxable
- Custom Invoice Group By id
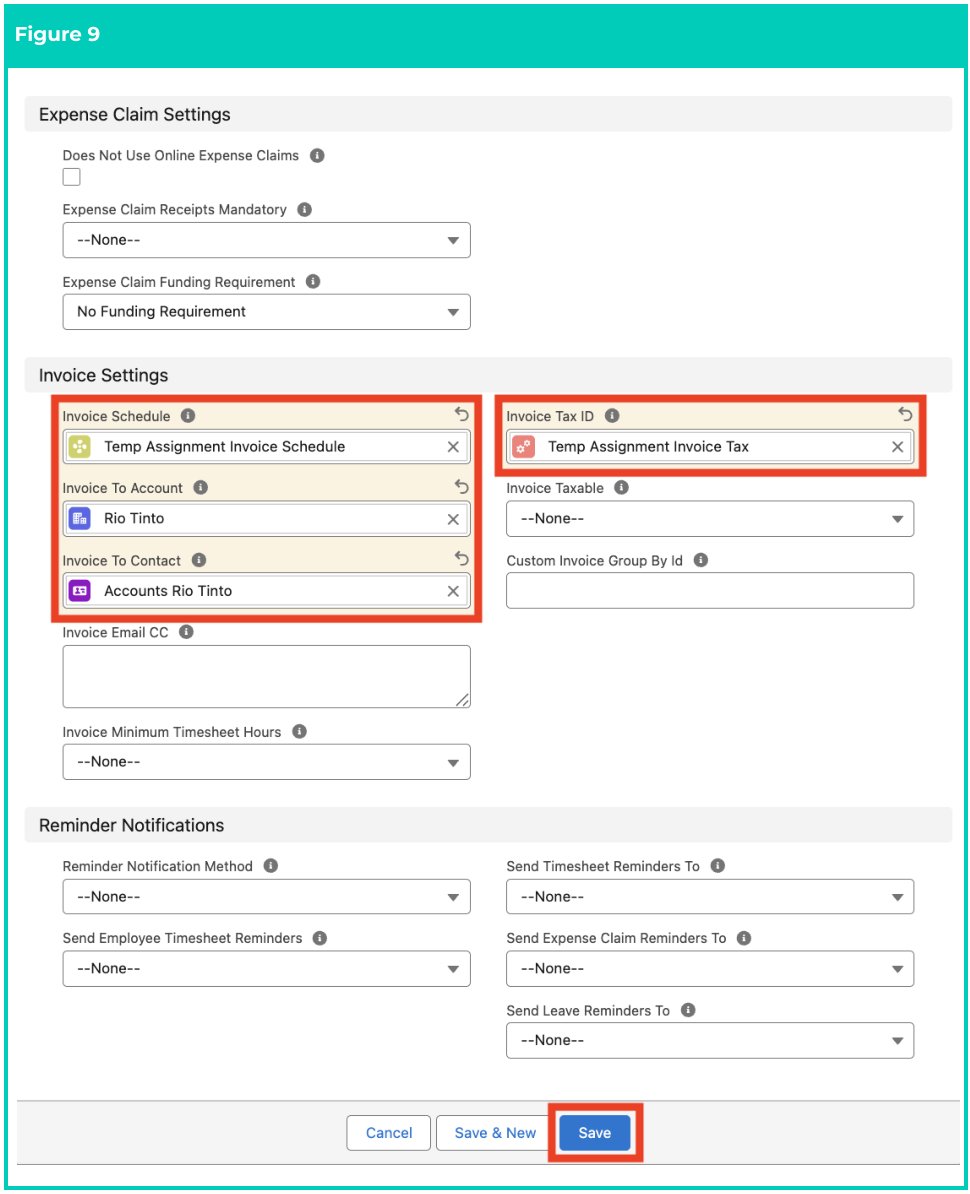
- Click the Save button (see Figure 9).
Picklist Buttons
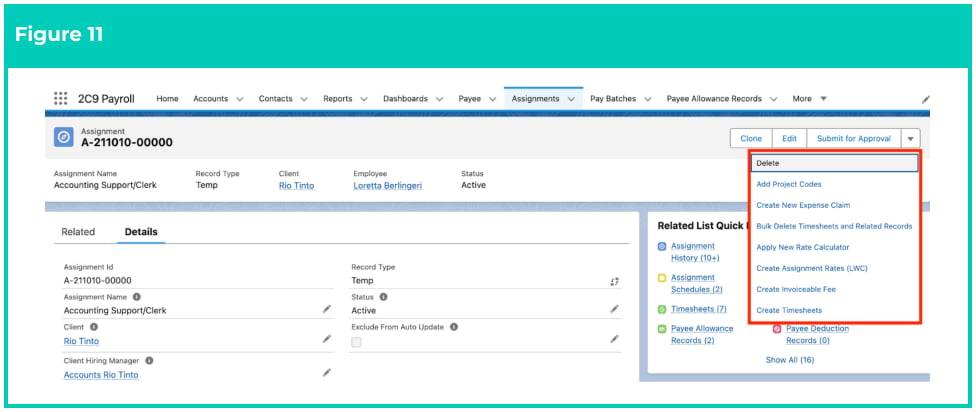
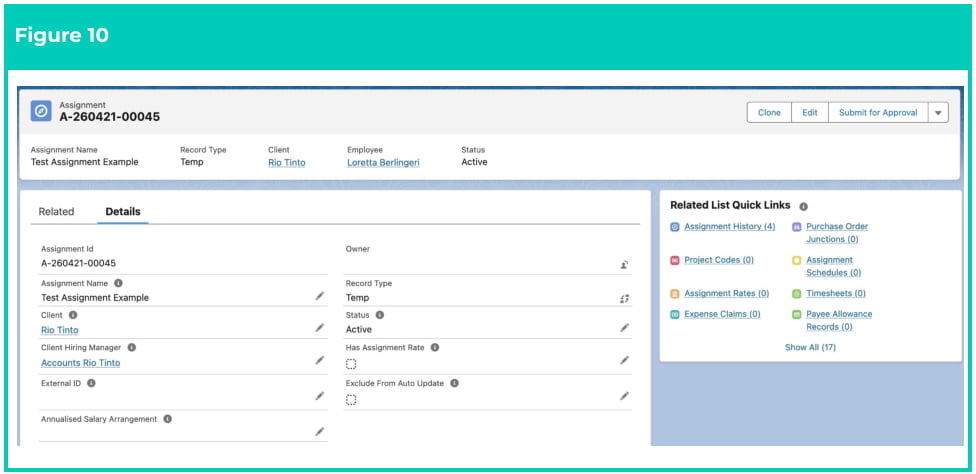
Assignments have a variety of custom buttons as part of 2cloudnine Payroll. These buttons provide access to perform additional actions related to the Assignment. Further details about each button are provided below (see Figure 11):