

Purpose
The purpose of this quick reference guide is to step through the process of creating a Purchased Leave Payee Deduction record. The intended audience for this document is system administrators / standard users.Steps
Create a new Purchased Leave Payee Deduction record
The Purchased Leave Payee Deduction record holds general Information, Pay Code and Rates, Quantity Worked Deductions, Deduction Limits, Recipient Details and Deduction Statistics for a Payee Deduction Record. Create a Purchased Leave Payee Deduction by following the below steps:- Navigate to the Payee record.
- To identify a Payee record from an Employee record, enter the Employee name into the Global Search (see Figure 1).
- Select the Employee record from the suggestions provided.
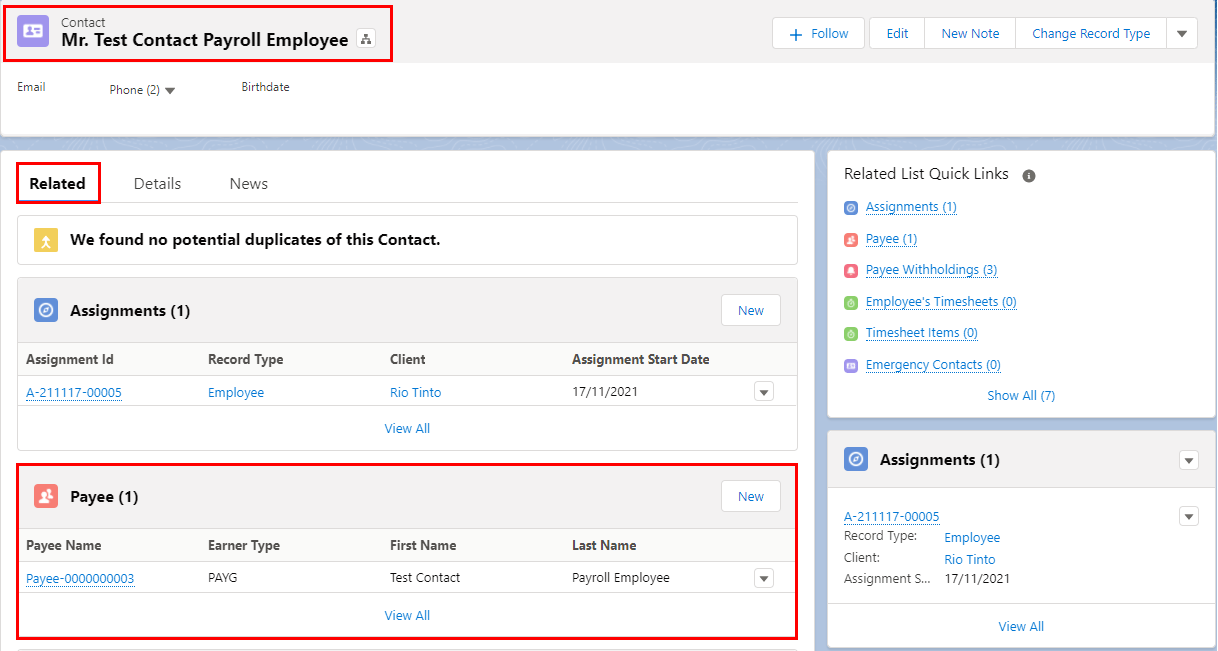
- Open the Related tab (see Figure 2).
- Identify the Payee related list.
- Select the Payee record.

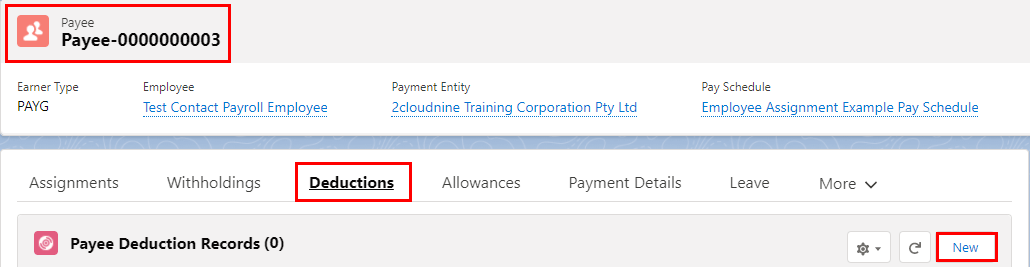
- Click Deductions from the tab options (see Figure 3).
- Click on the New button.
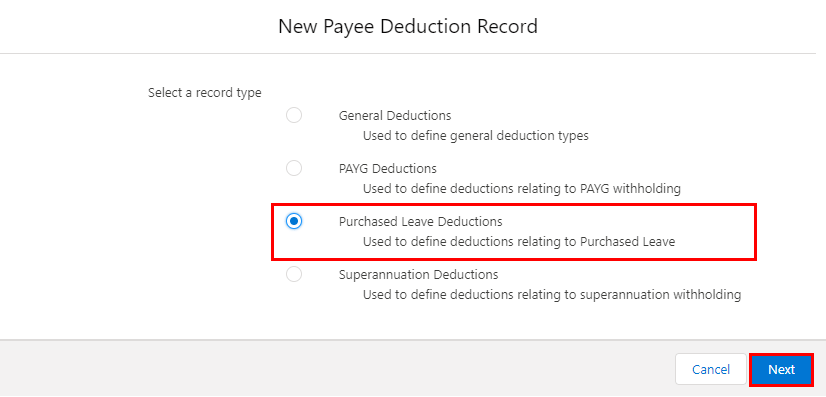
- Select Purchased Leave Deductions from the available Record Types (see Figure 4).
- Click on the Next button.
- Populate the following required fields, regardless of whether you are using Payee Deduction Templates or not (see Figure 5):
- Payee Deduction Record
- Payee
- Employee
- Payment Entity
- Populate the following optional fields as needed (see Figure 5):
- If the Payee Deduction is specific only to one Assignment, populate the Assignment field. If blank, this Payee Deduction will apply to all Assignments for this Payee.
- To prevent the Status of the Payee Deduction from being updated by the automatic status update scheduled job, check the Exclude From Auto Update checkbox.
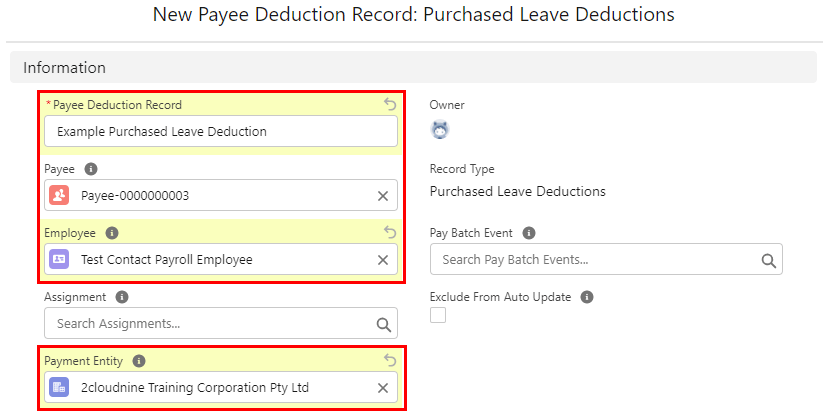
The Pay Batch Event field will be automatically populated upon saving the record, and should not be manually entered.
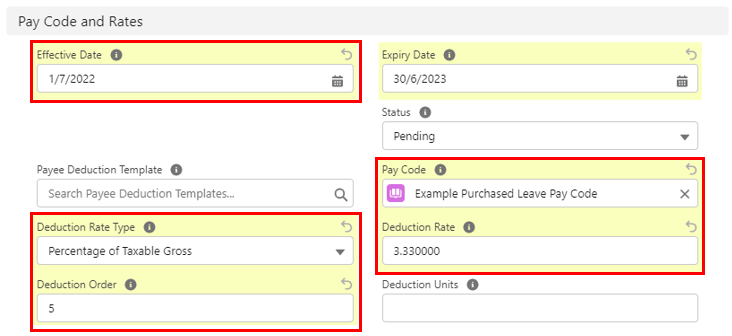
- Populate the following required fields (see Figure 6):
- Effective Date
- Status
- If using the Payee Deduction Template, the Payee Deduction Template field becomes a required field (see Figure 6).
- If the Payee Deduction Template is NOT being used, the following additional fields become required (see Figure 6):
- Pay Code
- Deduction Rate Type
- Deduction Rate
- Deduction Order
- To define any rules and limits that apply to the Payee Deduction record, populate the following optional fields as needed (see Figure 6):
- Expiry Date
- Deduction Units
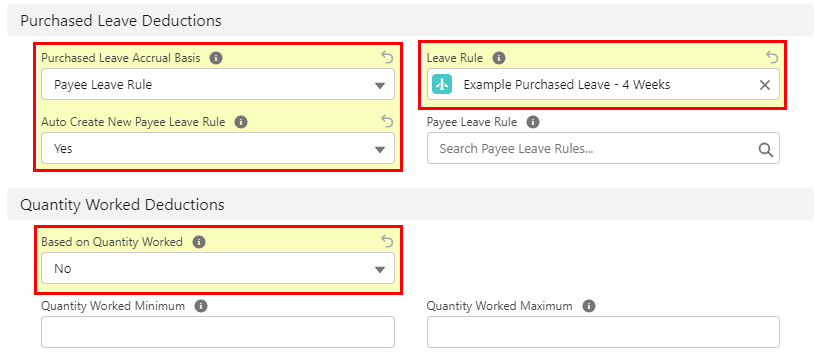
- Populate the following required fields to provide the base details of the record (see Figure 7):
- Based on Quantity Worked
- To define the behaviour for Purchased Leave accrual, select either Deduction Units or Payee Leave Rule from the picklist options available from the Purchased Leave Accrual Basis field (see Figure 7).
- To define the Payee Leave Rule that will be used for the Purchased Leave Deduction, select from one of the following options (see Figure 7):
- If you wish to use an existing Payee Leave Rule, select No in the Auto Create New Payee Leave Rule field, and populate the Payee Leave Rule field with the Payee Leave Rule.
- If you need a new Payee Leave Rule created, select Yes in the Auto Create New Payee Leave Rule field, and populate the Leave Rule field, so the system knows which Leave Rule to be used as the basis for the new Payee Leave Rule.
- To define any rules and limits that apply to the Payee Deduction record, populate the following optional fields as required (see Figure 7):
- Quantity Worked Minimum
- Quantity Worked Maximum
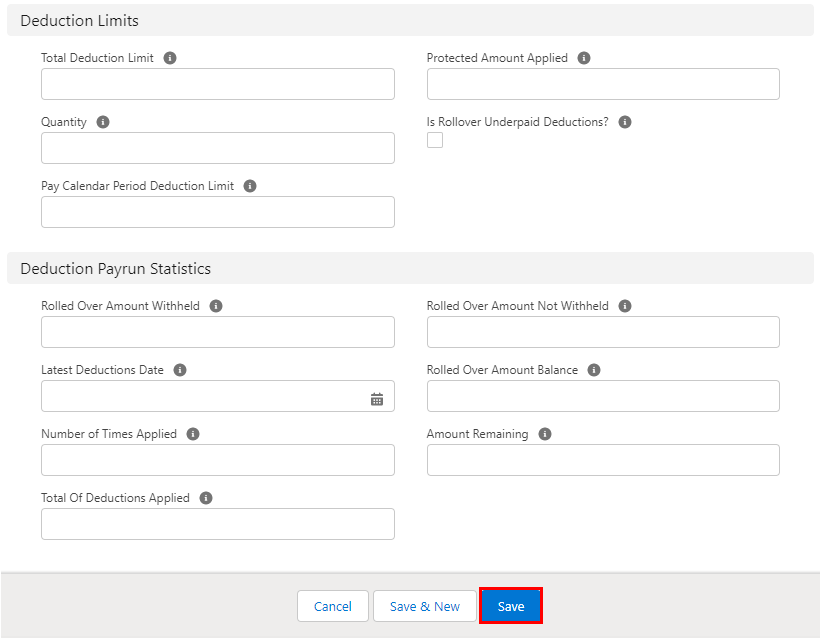
The Deduction Payrun Statistics will update automatically with historical statistics of the Deduction record, and should never be manually populated.
- To define any rules and limits that apply to the Payee Deduction record, populate the following optional fields as required (see Figure 8):
- Total Deduction Limit
- Quantity
- Pay Calendar Period Deduction Limit
- Protected Amount Applied
- Is Rollover Underpaid Deductions?
- The Deduction Payrun Statistics section will be updated automatically by the product in line with the relevant figures for the statistics after each time it’s been processed as a Deduction Pay Transaction.
- Click on the Save button.
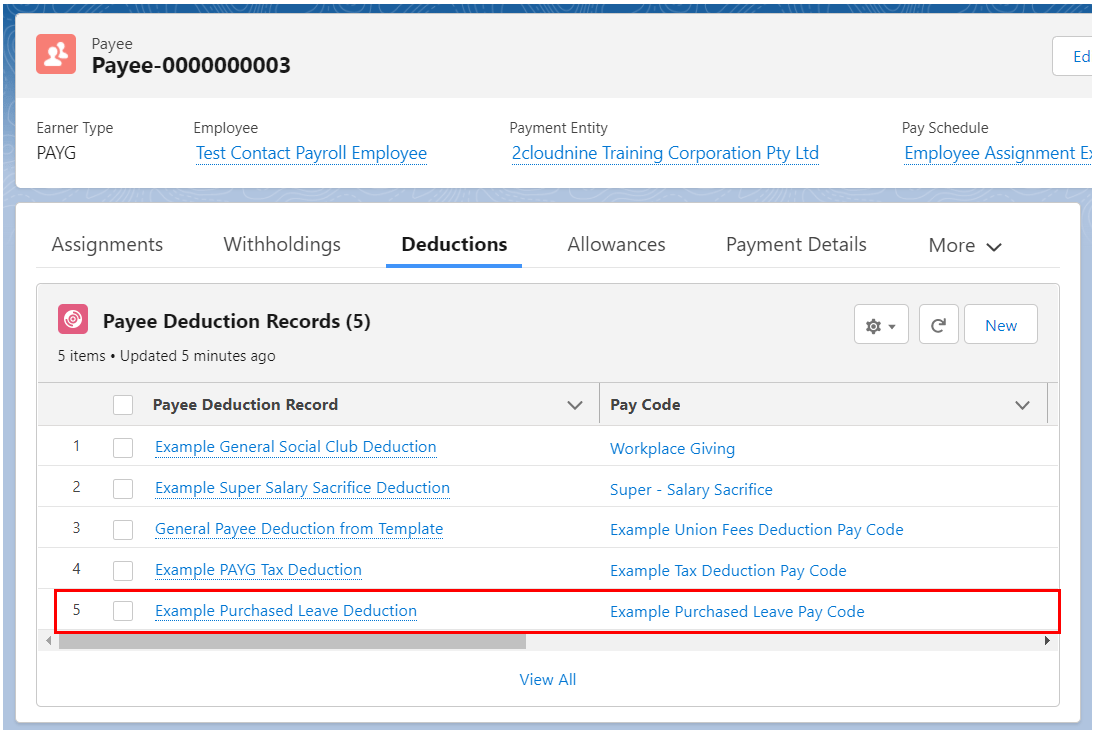
- To modify an existing Payee Deduction record, open the required record and select the Edit button available on the top right side of the page. You can also double click within fields that need editing or just click on the pencil icon that appears within fields when hovering with your cursor.
- When complete, click on the Save button (see Figure 10).