

Purpose
The purpose of this quick reference guide is to step through the process of defining the Payee Opening Balances. The intended audience for this document is Standard Users.Steps
Create Payee Opening Balances - Payment
To create a Payee Opening Balance record:-
Go to the Payee record.
- To identify a Payee record from an Employee record, enter the Employee name into the Global Search (see Figure 1).
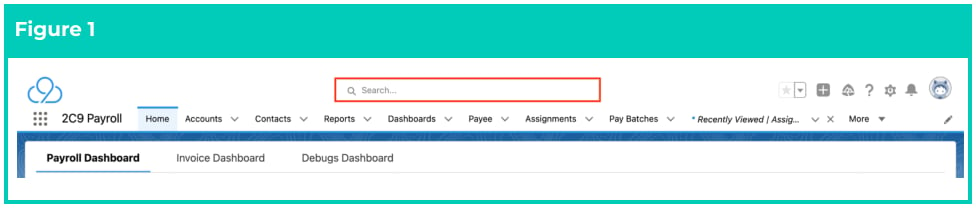
- Select the Employee record from the suggestions provided.
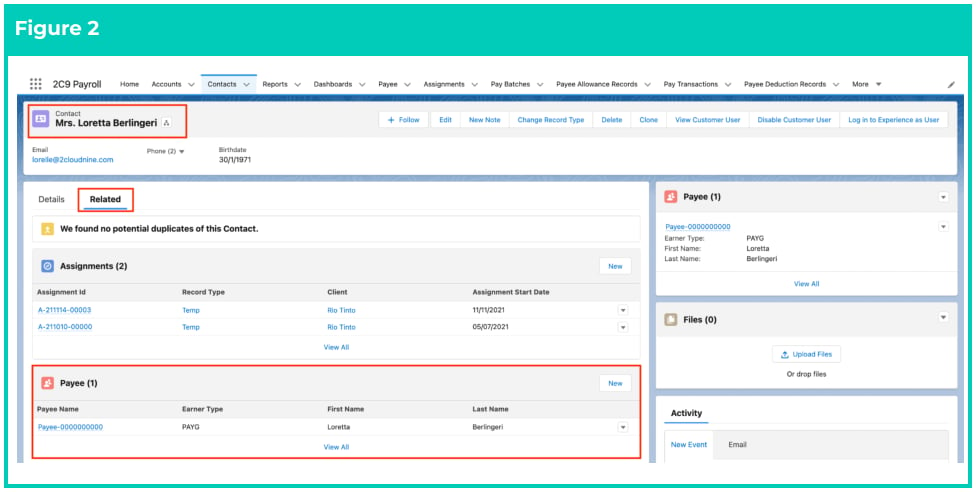
- Open the Related tab (see Figure 2).
- Identify the Payee related list.
- Select the Payee record.
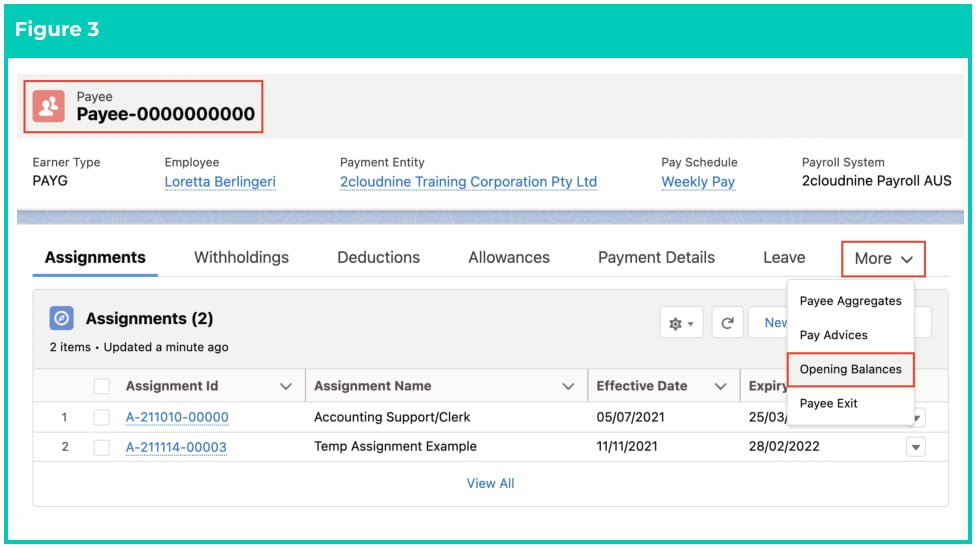
- Within the Payee record, click on the More button (see Figure 3).
- Click on Opening Balances .
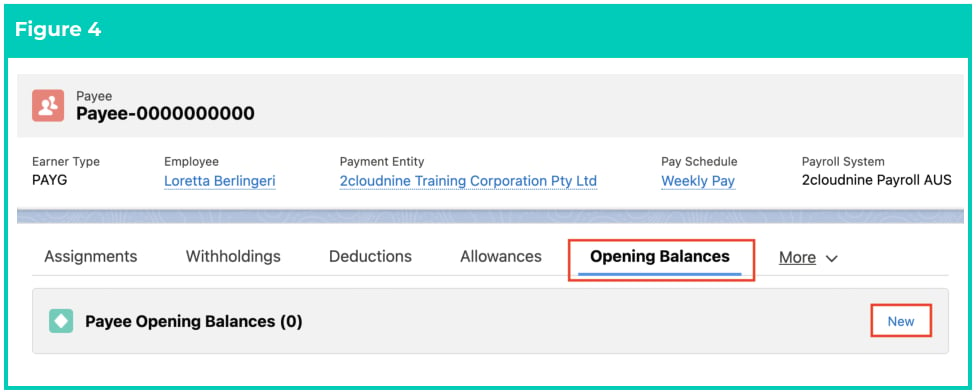
- In the Payee Opening Balances tab, click on the New button (see Figure 4).
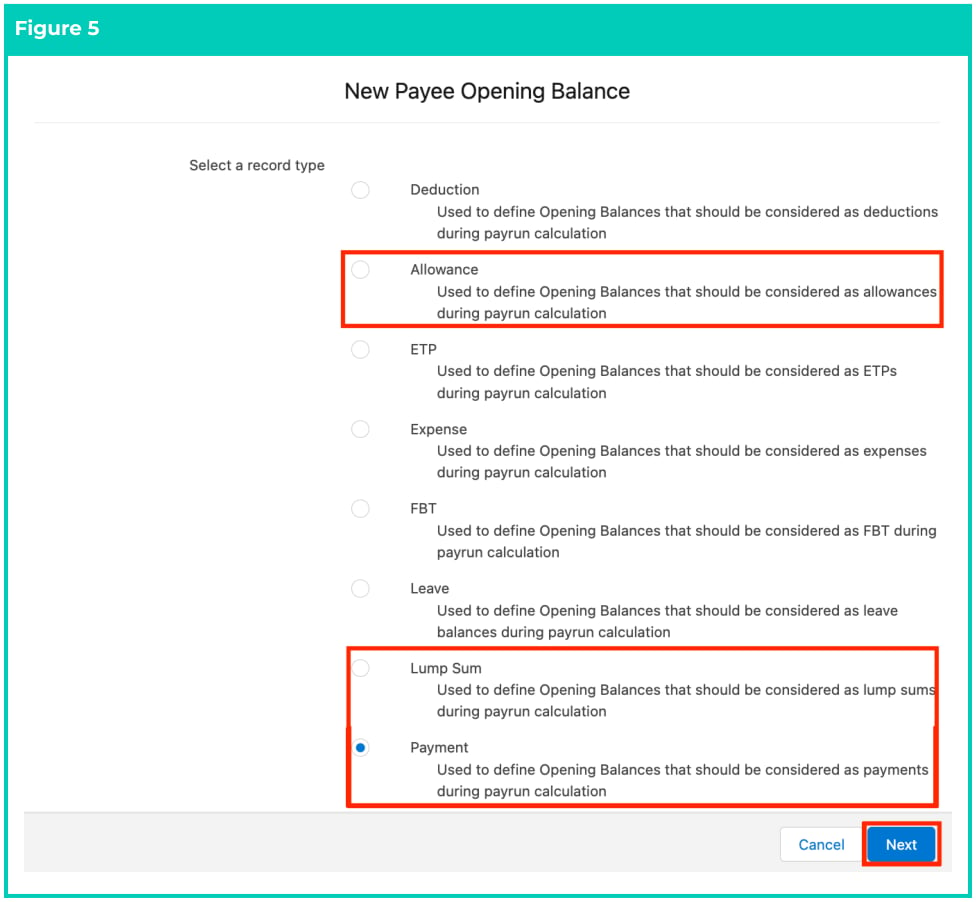
- To create a Payee Opening Balance record, select either the Allowance, Lump Sum, or Payment Record Type as required (see Figure 5).
- Click Next.
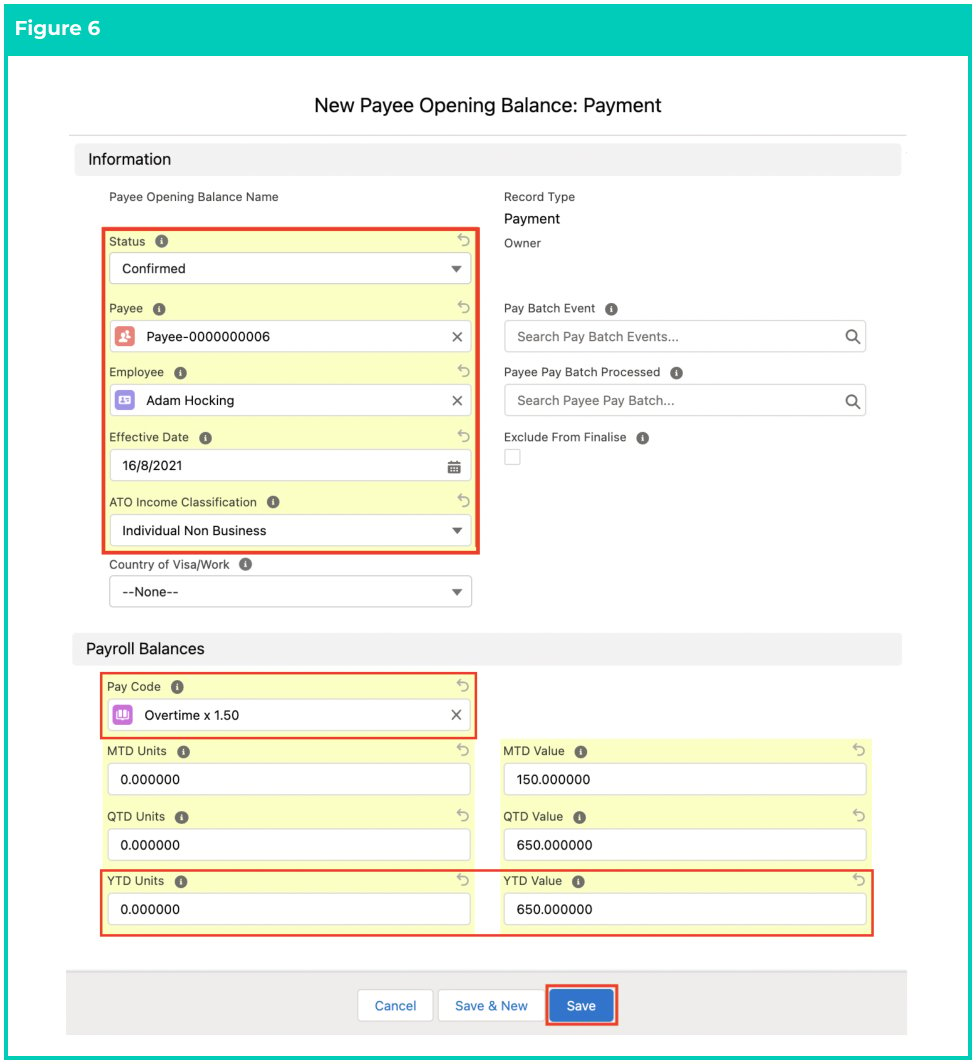
- Populate the following required fields to provide the base details of the Payee Opening Balance
record: (see Figure 6)
- Payee
- Employee
- Effective Date
- Status
- ATO Income Classification
- Pay Code
- MTD Units, QTD Units, YTD Units
- MTD Value, QTD Value, YTD Value
Important Notes
(Page 4)The Status must be entered as Confirmed which creates a Pay Batch Event, and automatically populates the fields of Pay Batch Event and Pay Batch Event Processing Status upon saving this Record. Ensure that the Payee Opening Balance records are processed in a Pay Batch so that they are included in the Payee Aggregate Records. The correct Effective Date must be populated, otherwise, it can’t be picked up in a Pay Batch to be included in the Payee Aggregates for a Pay Code for an Employee.
(Page 4)The Status must be entered as Confirmed which creates a Pay Batch Event, and automatically populates the fields of Pay Batch Event and Pay Batch Event Processing Status upon saving this Record. Ensure that the Payee Opening Balance records are processed in a Pay Batch so that they are included in the Payee Aggregate Records. The correct Effective Date must be populated, otherwise, it can’t be picked up in a Pay Batch to be included in the Payee Aggregates for a Pay Code for an Employee.
- Populate the following optional fields as needed:
- If the ATO Income Classification is an Approved Working Holiday Maker, Inbound Assignee to Australia, or Foreign Employment Income, populate the field Country of Work/Visa with the relevant country from the list available. This should match the details provided in their PAYG Payee Withholding Record.
- To indicate that this Payee Opening Balance record will be used only during the Pay Batch calculations, but not included in the Finalisation process, tick the optional Exclude from Finalise checkbox. This would normally be populated when the Payee has a Payee Withholding Rule for the PAYG record type. This record will be used in the calculation of YTD earnings for Working Holiday Maker PAYG and also for observing superannuation caps during Pay Batch calculations.
- If you selected the Lump Sum Record Type and wish to populate the Financial Year End Date applicable to this Lump Sum E payment, populate the Lump Sum E Year End Date field.
- Click on the Save button.
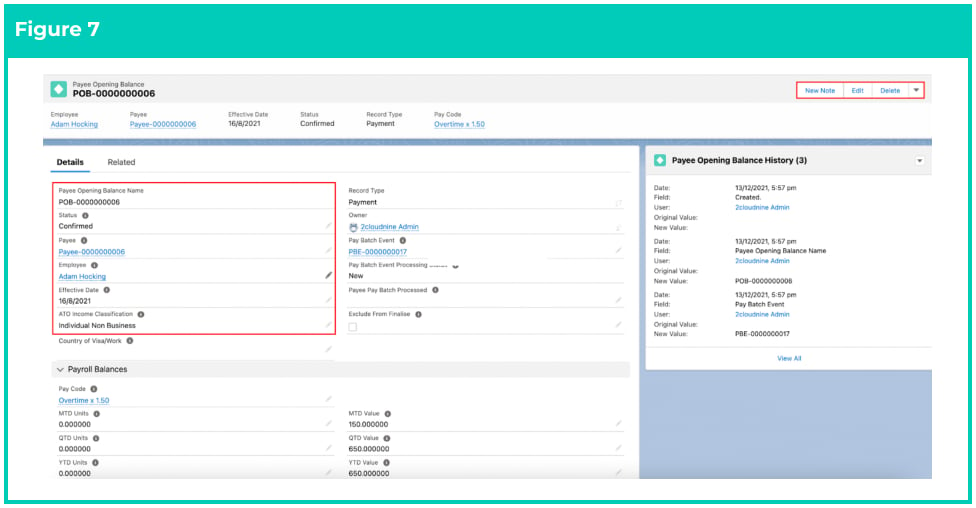
- A new Payee Opening Balance Record has been created (see Figure 7).
Important Notes
(Figure 7)If you try to delete a Payee Opening Balance that has been included in a Pay Batch, you will receive an error message ‘ERROR: You cannot delete a Payee Opening Balance when it has been included in a Pay Batch.’
(Figure 7)If you try to delete a Payee Opening Balance that has been included in a Pay Batch, you will receive an error message ‘ERROR: You cannot delete a Payee Opening Balance when it has been included in a Pay Batch.’
- To modify an existing Payee Opening Balance record, open the required record and select the Edit button available on the top right side of the page. You can also double-click in any of the fields that need editing, or just click on the pencil icon that appears within fields when you move your cursor over the field.
- When complete, click on the Save button.