

Purpose
The purpose of this quick reference guide is to step through the process of creating Payment Pay Codes. The intended audience for this document is System Administrators / Standard Users.Steps
Create a new Payment Pay Code record
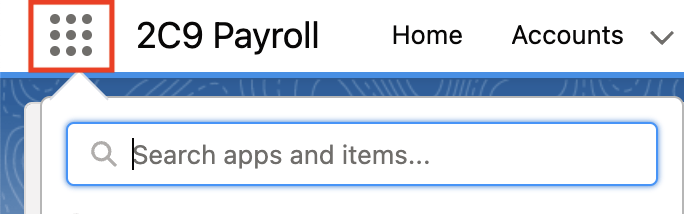
Pay Codes are applied to Pay Transactions, Leave Rules, Leave Events, and Interpretation Rules processed for an Employee. The Payment Pay Code record is used to define Pay Codes for Payments made to a Payee. The record holds General Information and Pay Code Setup details. Create a new Payment Pay Code by following the steps below:- Click on the App Launcher icon (see Figure 1).
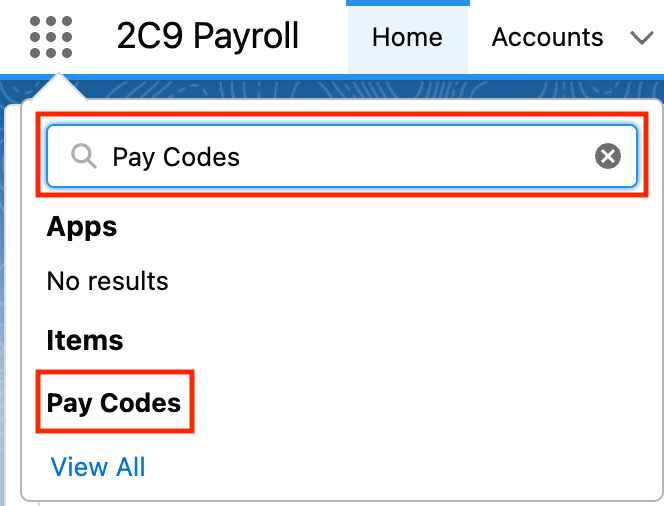
- Go to the Pay Codes object using the Search function (see Figure 2).
- Click on the New button (see Figure 3).

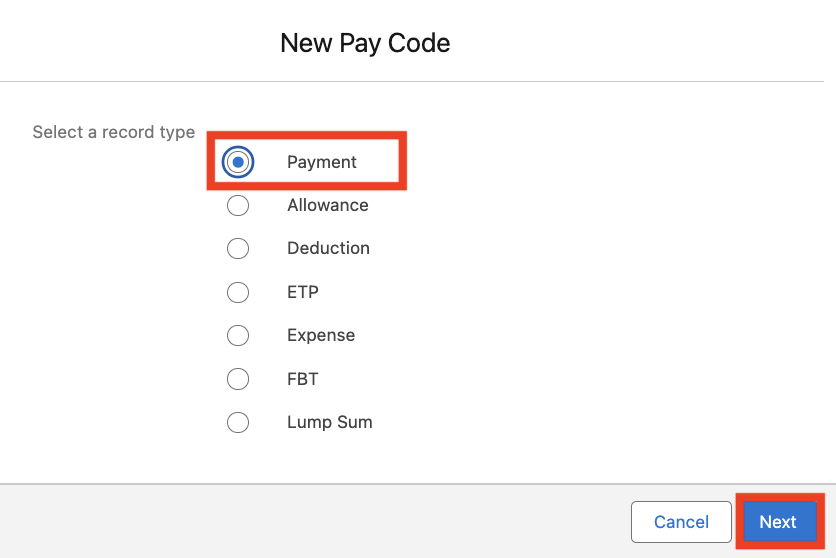
- Select the Payment Record Type and click Next (see Figure 4).
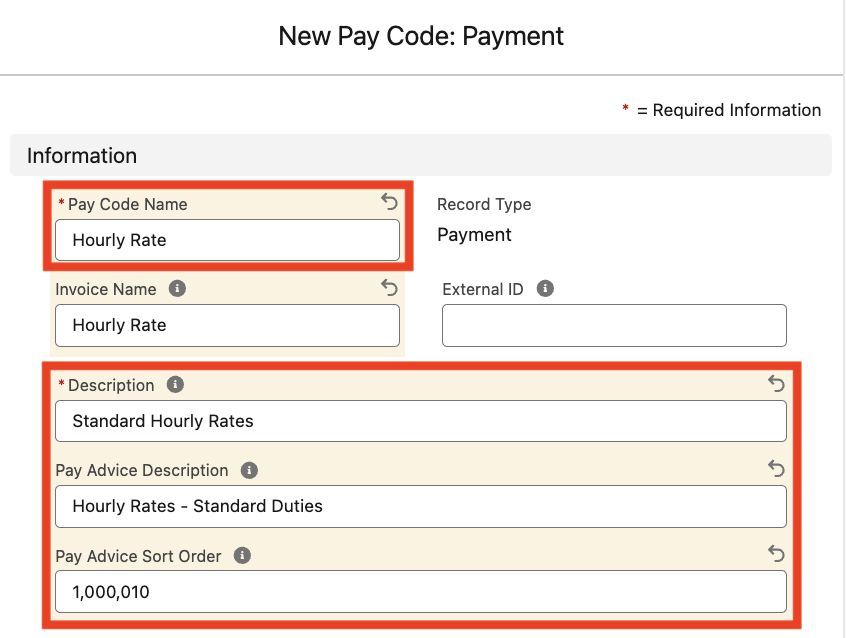
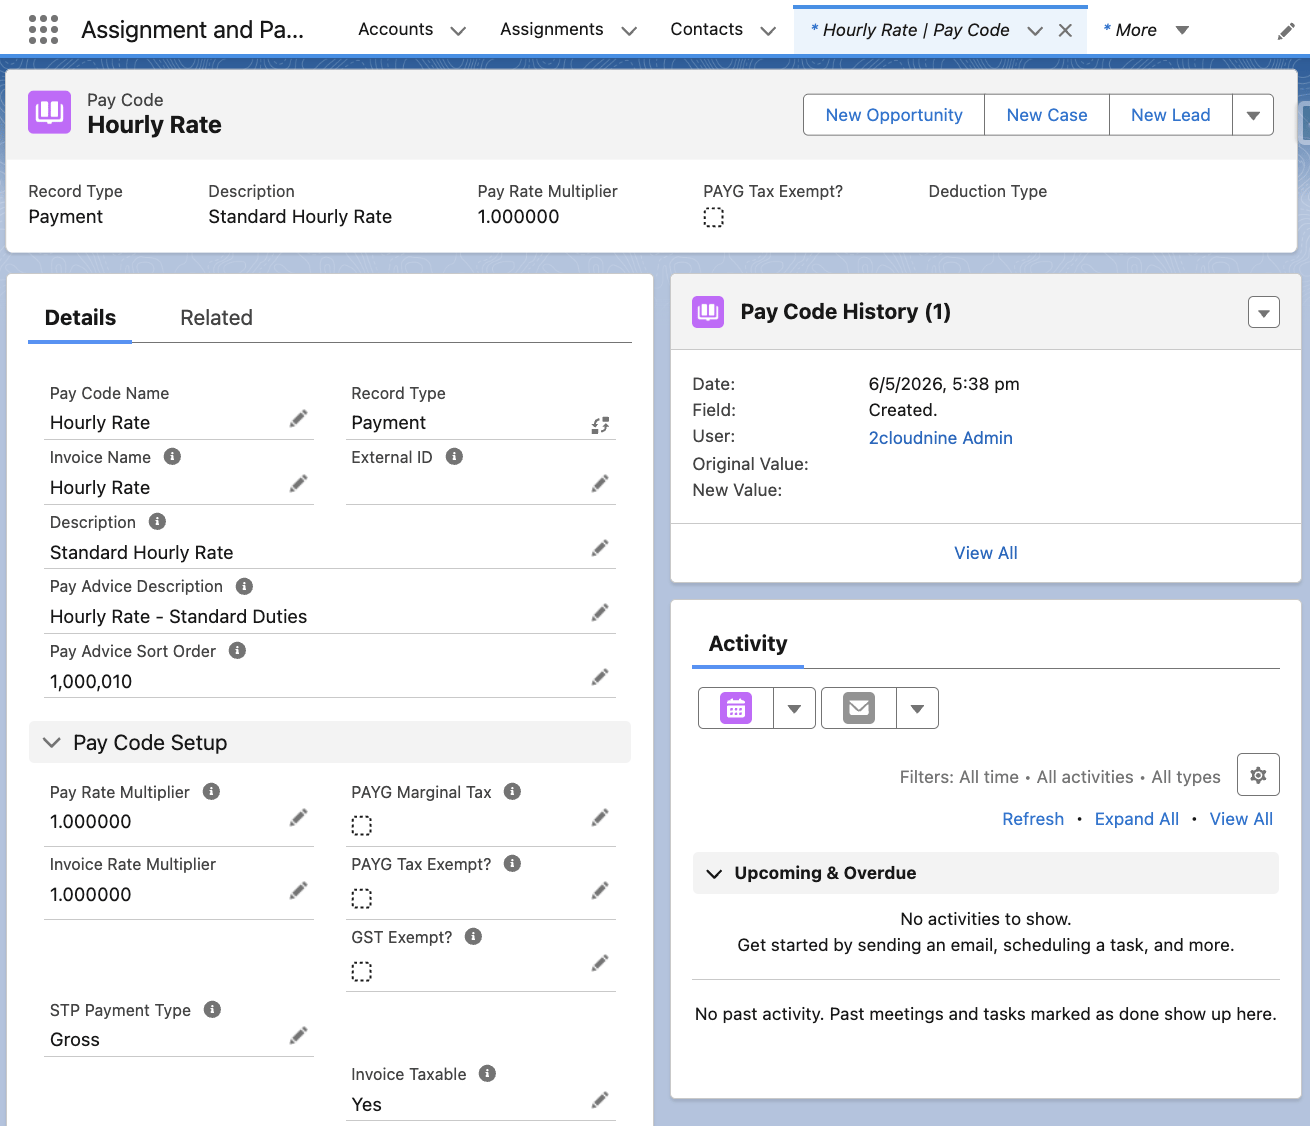
- Populate the following fields to provide the base details for the Payment Pay Code (see Figure 5):
- Populate the Pay Code Name field with a unique descriptor for the Pay Code.
- Briefly summarise the Pay Code’s purpose in the Description field.
- Define the name displayed on Pay Advice PDFs for Pay Transactions related to the Pay Code by populating the Pay Advice Description field.
- Enter a value in the Pay Advice Sort Order field to define the position of related Pay Transactions on Pay Advice PDFs.
- If Invoicing applies, populate the Invoice Name field with the identifier to be displayed against Invoice Lines for this Pay Code. When blank, Invoice data will instead reference the Pay Code Name (capped to 15 characters).
Pay Code InformationThe External ID field is used to reference corresponding records from external systems, and is only applicable if completing data import using the Integrated Import Tool.
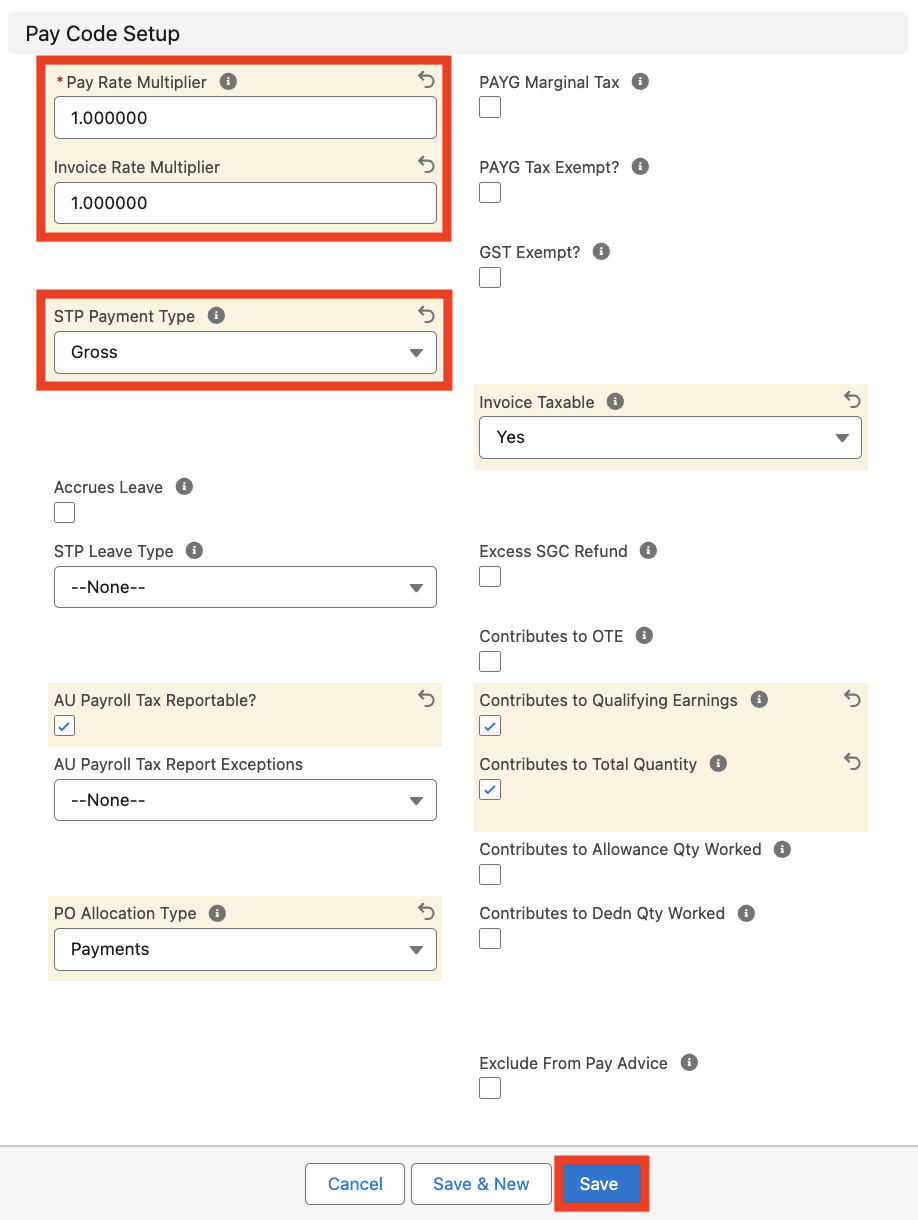
- Populate the following required fields to define the conditions for the Pay Code (see Figure 6):
- Define the Pay Rate Multiplier used to calculate related Pay Transactions by populating the Pay Rate Multiplier field.
- Define the Invoice Rate Multiplier used to create related Pay Transactions by populating the Invoice Rate Multiplier field.
- Define the Payment Type for related Pay Transactions to reference during STP reporting by selecting from the STP Payment Type picklist field.
- Populate the following optional fields to define any additional conditions for the Pay Code:
- To indicate that Leave Accrual should be calculated when related Pay Transactions are created, select the Accrues Leave checkbox field. If True, define the Payee Leave Type that Leave Accruals are attributed to by selecting from the available options in the STP Leave Type picklist field.
- If Payroll Tax needs to be reported for related Pay Transactions, select the AU Payroll Tax Reportable? checkbox field.
- If regional Payroll Tax exemptions apply to related Pay Transactions, use the AU Payroll Tax Report Exceptions picklist field to select the appropriate value.
- If the Org is utilising Purchase Order functionality, specify the Pay Transaction and Purchase Order Record Types that may be related by selecting from the PO Allocation Type picklist field.
- To calculate Marginal Tax for related Pay Transactions, select the PAYG Marginal Tax checkbox field.
- If related Pay Transactions are exempt from PAYG taxable earnings calculations, select the PAYG Tax Exempt? checkbox field.
- If related Pay Transactions for Australian Contractors should be excluded from GST calculations, select the GST Exempt? checkbox field.
- To indicate that GST must be calculated for Pay Transactions invoiced and related to this Pay Code, select Yes from the Invoice Taxable picklist field.
- To apply this Pay Code when calculating Payee excess contributions (i.e. where Ordinary Time Earnings exceed the Maximum Contribution Base), select the Excess SGC Refund checkbox field.
- To calculate Payee contributions for related Pay Transactions, select from the following checkbox fields:
- To include related Pay Transactions to Ordinary Time Earnings calculations, select Contributes to OTE?
- To include related Pay Transactions to Payee Qualifying Earnings for Payday Super, select Contributes to Qualifying Earnings?
- To include related Pay Transactions to Total Quantity calculations, select Contributes to Total Quantity?
- To include related Pay Transactions to Allowance Quantity Based calculations, select Contributes to Allowance Qty Worked
- To include related Pay Transactions to Deduction Quantity Based calculations, select Contributes to Dedn Qty Worked
- To exclude related Pay Transactions from Pay Advice PDFs, select the Exclude From Pay Advice checkbox field.
- Click on the Save button.
Payment Pay Code Record ManagementPayment Pay Codes CAN NOT be deleted if they have related records or are used in other records. Deleting records is not recommended unless absolutely essential.
- To modify an existing Payment Pay Code record, open the required record and select the Edit button available on the top right side of the page. You can also double-click in any of the fields that need editing or just click on the pencil icon that appears within fields when you move your cursor over the field.
- When complete, click on the Save button.