

Purpose
The purpose of this quick reference guide is to step through the process of creating Invoice Calendar & Calendar Periods. The intended audience for this document is system administrators.Steps
Create Invoice Calendar
To create an Invoice Calendar record, follow the steps below:- Click on the App Launcher icon (see Figure 1).
- Go to the Schedules object by using the Search function (see Figure 2).
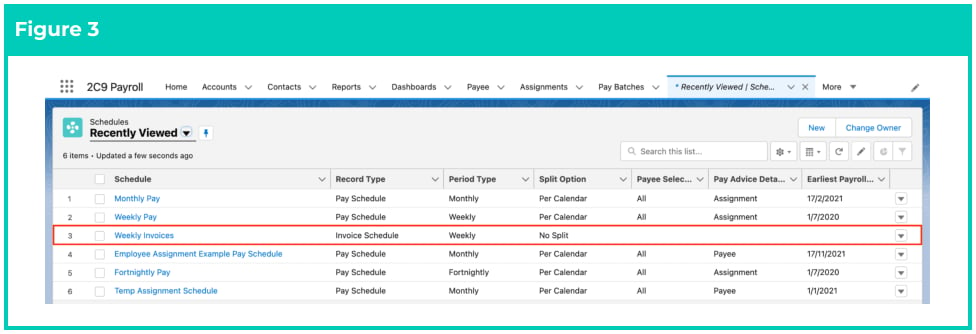
- Open the required Schedules record with the record type of Invoice Schedule (see Figure 3).
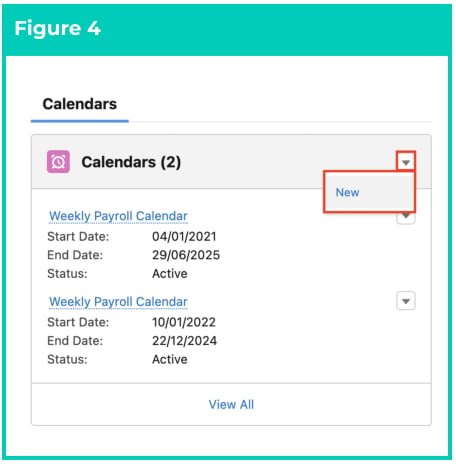
- On the Schedule record, locate the Calendars panel on the right hand side and click on and then click on the New button (see Figure 4).
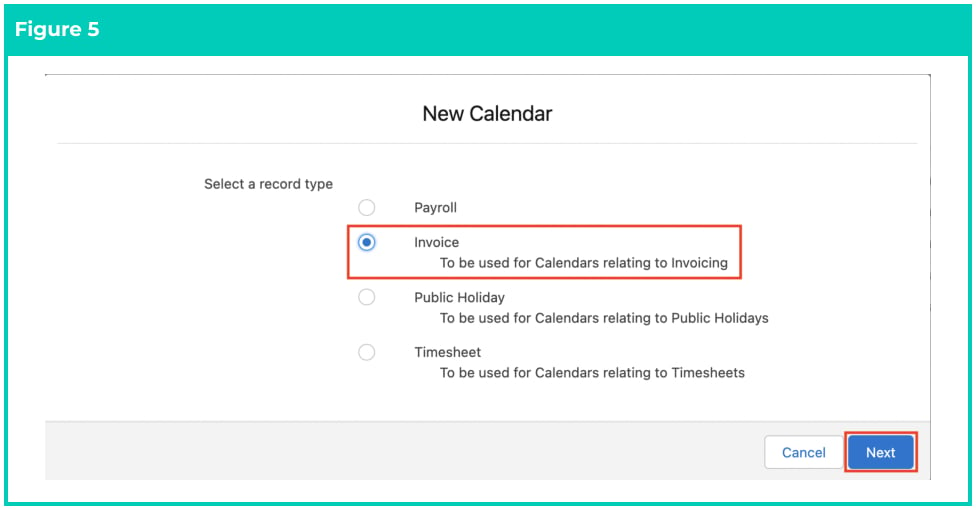
- Choose the record type of Invoice and click Next (see Figure 5).
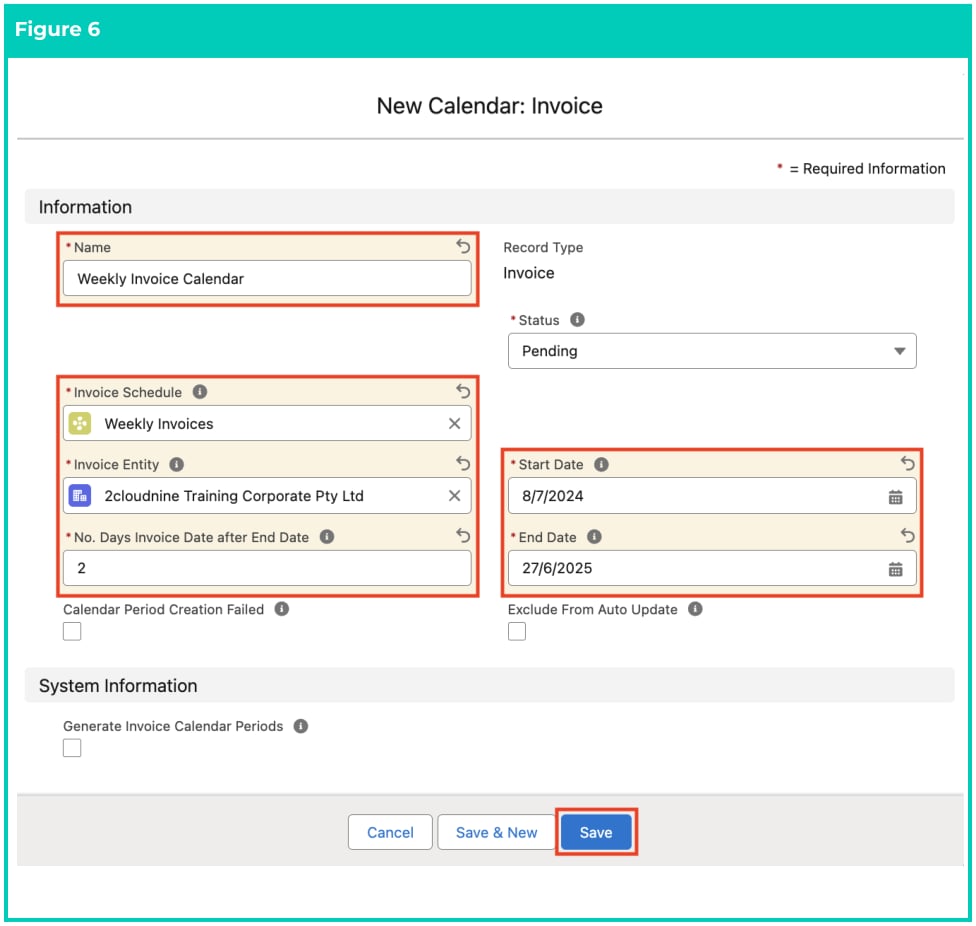
- Populate the following required fields to provide the base details of the Invoice Calendar record:
(see Figure 6)
- Name
- Invoice Schedule
- Invoice Entity
- No. Days Invoice Date after End Date
- Start Date
- End Date
- Populate the following optional fields as needed (see Figure 6):
- To prevent the Status of the Invoice Calendar from being automatically updated by the automatic status update scheduled job, check the Exclude From Auto Updat e checkbox.
- To kick off the creation of the Calendar Periods automatically without the requirement to select the button on the Calendar (as used by Integrations to 2cloudnine Payroll), tick the Generate Invoice Calendar Periods checkbox (see Figure 6).
- Click on the Save button.
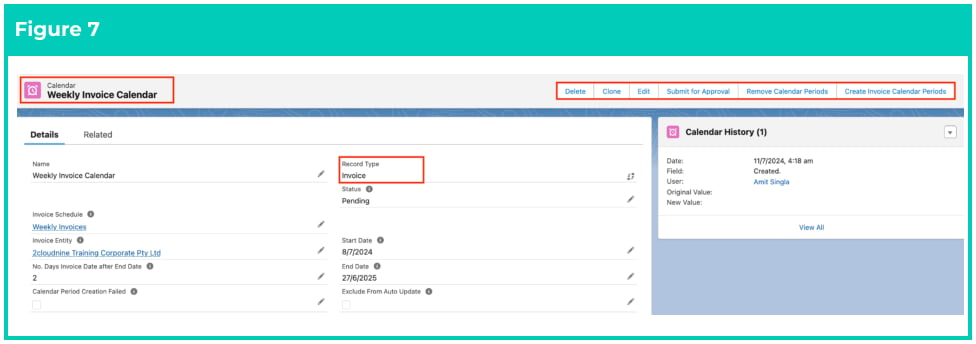
- A new Invoice Calendar record has been created (see Figure 7).
- To modify an existing Invoice Calendar record, open the required record and select the Edit button available on the top right side of the page. You can also double click in any of the fields that need editing or just click on the pencil icon that appears within fields when you move your cursor over the field.
- When complete, click on the Save button.
Invoice Calendar records CANNOT be deleted if they have related records or are used
in other records. Deleting records is not recommended unless absolutely essential.
Create Invoice Calendar Periods
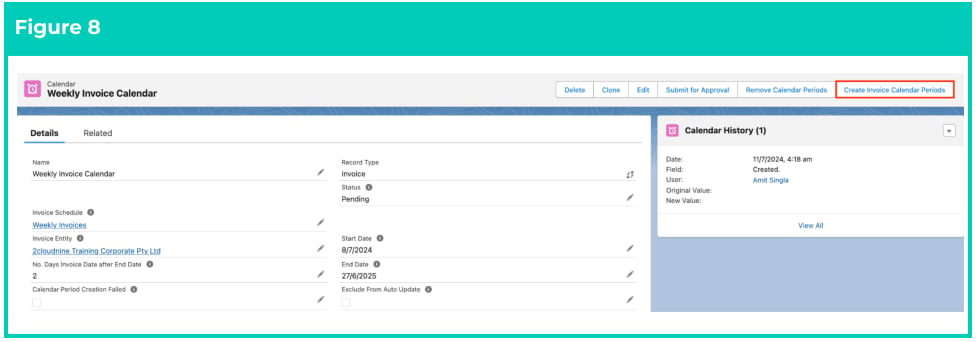
The limit of related Calendar Periods that can be initially created is 2.5 years maximum. If you require Calendar Periods for more than 2.5 years, you will need to batch into sections of no greater than 2.5 years. To create Invoice Calendar Periods, follow the steps below:- Click on the Create Invoice Calendar Periods button (see Figure 8).
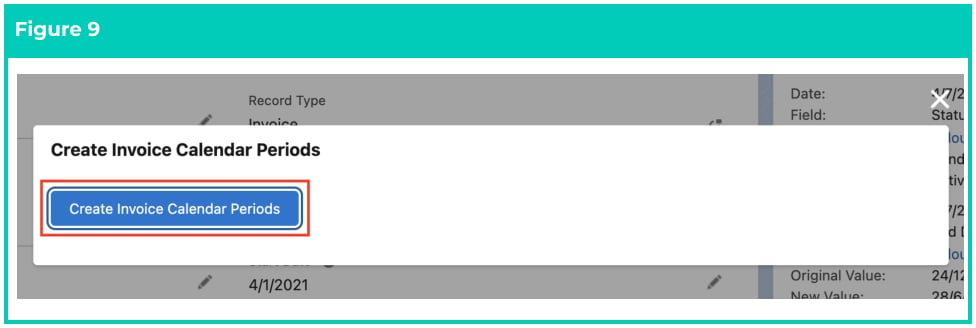
- A popup will open, click on the Create Invoice Calendar Periods button (see Figure 9).
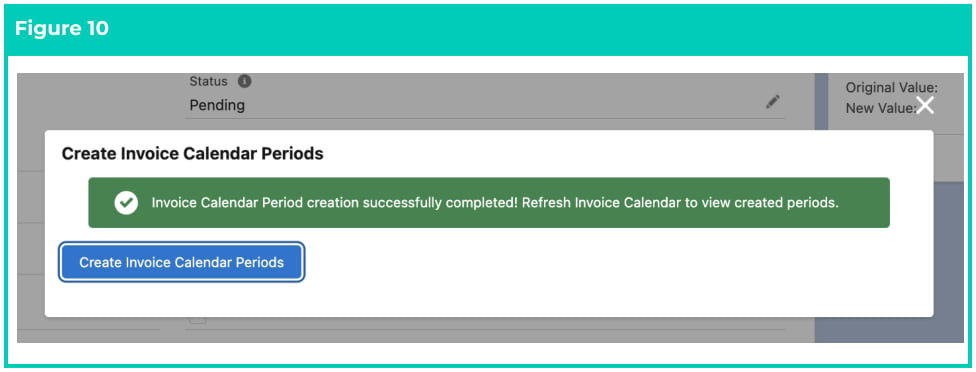
- You will see a confirmation message saying ‘Invoice Calendar Period creation successfully completed!’ (see Figure 10).
- Refresh the web browser to view the newly created Calendar Periods.
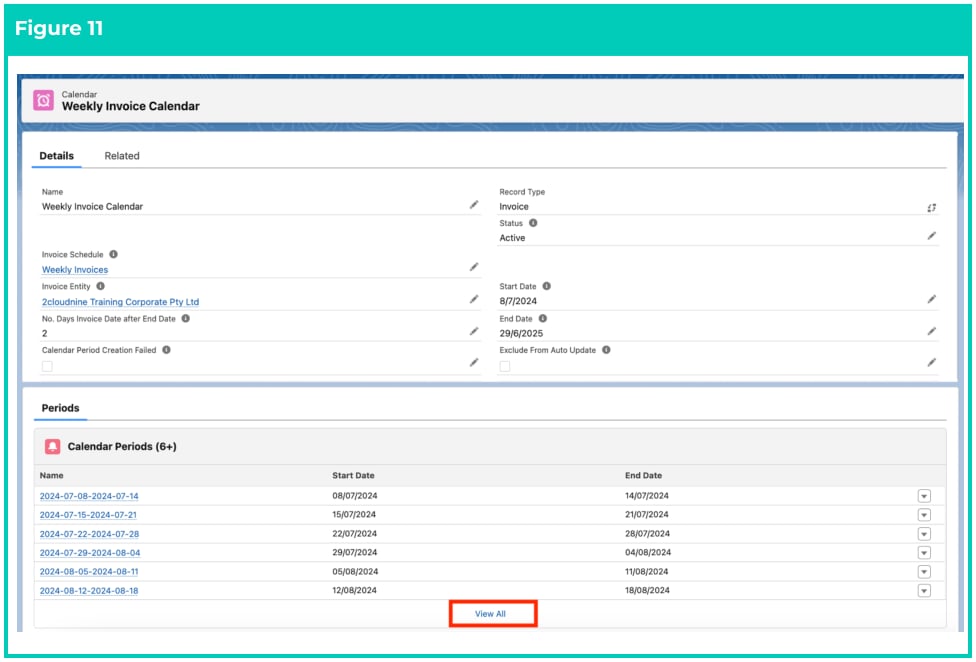
- On the Calendar record page, you will notice that the Calendar Periods have been created and are displayed at the bottom of the page in the Periods related list (see Figure 11).
- Click on View All button to see a full list of the Calendar Periods.
If the Calendar Periods that have been created are incorrect, have not yet been used in
any other records, and need to be deleted, then users should click the Remove
Calendar Periods button. This will remove all the Calendar Periods relating to this
Calendar, allowing for changes to be made to the Calendar, and then repeat steps to
recreate the Invoice Calendar Periods.
Create Invoice Calendar Periods for longer Periods
To create Calendar Periods after the initial 2.5 years, you will need to follow the steps below:- Change the End date to be a further 2.5 years from the current End Date.
- Click Create Calendar Periods.
- Wait and confirm the batch job has successfully finished creating Calendar Periods for that new extended date range.
- Repeat steps 1-3 as many times as required.
Field Descriptions
Calendar Period Creation Failed (checkbox) indicates that the Calendar Period creation Batch Job failed. End Date is the last date the automation will create Calendar Periods up to for this Calendar. Name is the name given to the Calendars record that is being created. No. Days Invoice Date after End Date defines the number of days after the Calendar Period End Date that Invoices will be generated. Invoice Schedule defines the Invoice Schedule that applies to the Calendar. Invoice Entity is the related Invoice Entity. Start Date is the first date the automation will create Calendar Periods from. Status is required to be Pending when the Calendar Periods are awaiting creation, however, will be Active once the Calendar Periods have been created.Further Information
