

Purpose
The purpose of this quick reference guide is to step through the process of setting up a Client Contact record. The intended audience for this document is System Administrators / Standard Users.Steps
Create a new Client Contact record
The Client record holds the contact details, and optional Notification Settings, for a Client Contact. The information in these records is used to address emails to recipients for approval of various documents, and the sending of Invoices for payment. To create a Client Contact record, follow the steps below:- Go to the Contacts object and click on the New button (see Figure 1).

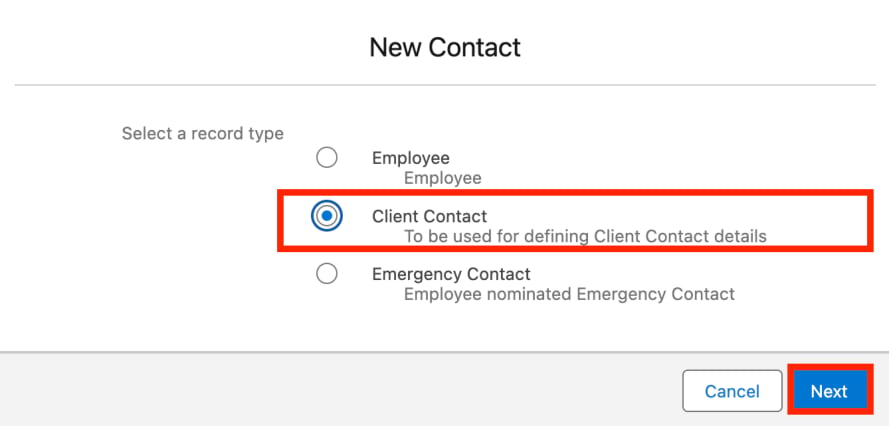
- Select the Client Contact record type from the picklist options and click the Next button (see Figure 2).
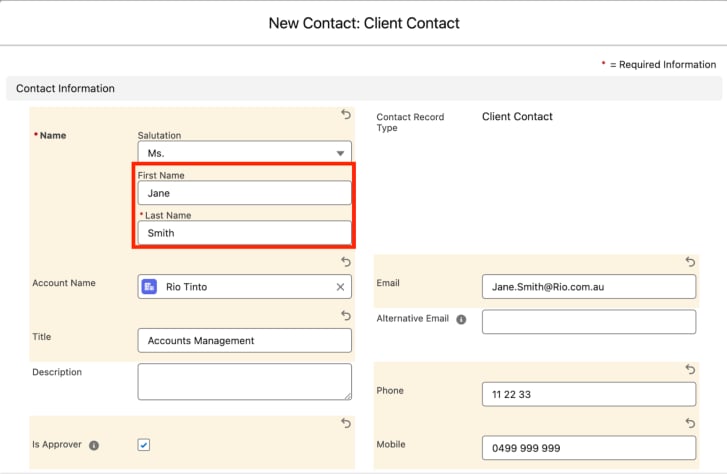
- Populate the following required fields to provide the base details of the Client Contact record (see Figure 3):
- First Name
- Last Name
- Account Name
- Populate the following optional fields to provide additional details for the Client Contact (see Figure 3):
- To record the preferred title prefix for the Client Contact, use the available picklist options to populate the Salutation field.
- To record any relevant details or information for the Client Contact, populate the Description field.
- If the Client Contact has been set up with access to the Community via Authenticated Login (i.e. access has NOT been provisioned via Link Tokens), populate the checkbox for the Is Approver field.
- If the Client Contact should receive Email Notifications for Invoicing or Approvals, populate the Email field with the primary email address for the Contact.
- If any Email Notifications for the Client Contact should be issued to a secondary email address, populate the Alternative Email field with an additional email address.
- To record the primary business contact number for the Client Contact, populate the Phone field.
- To record a mobile number for the Client Contact, populate the Mobile field.
To provision Approver Community access via Link Token, rather than Authenticated Login, the Is Approver field MUST remain blank. If you are unsure which type of access should be provisioned, please contact your System Administrator.
Once the Is Approver field has been selected, a User must be manually created to enable Approver Community access for the Client Contact. If you are unsure how to create a User, please contact your System Administrator.
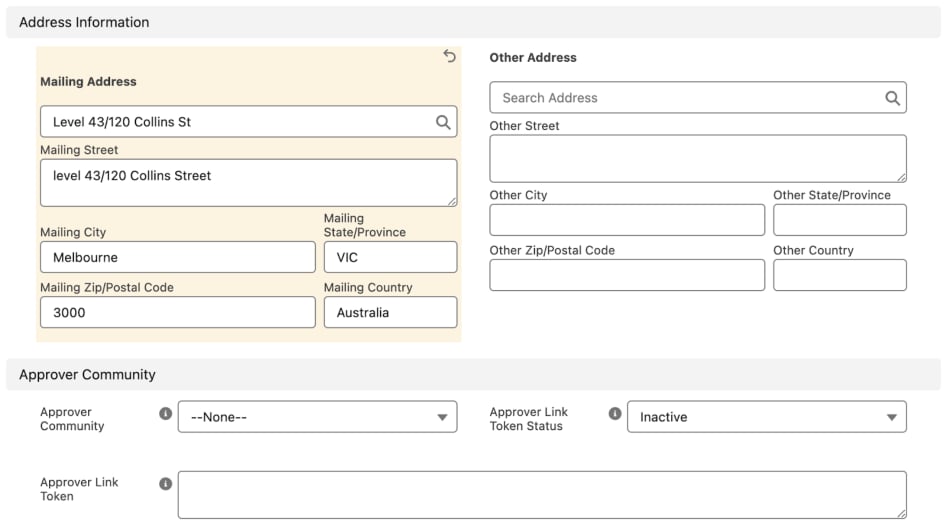
- Populate the following fields to provide Address information for the Client Contact (see Figure 4):
- To populate the primary mailing address for the Client Contact, populate the Mailing Address field using the lookup options available.
- To populate a secondary business address for the Client Contact, populate the Other Address field using the lookup options available.
- If your Org uses Link Tokens for Approver Community access, and you need to enable access for the Client Contact, follow the sub-steps below, otherwise skip to step 7:
- To provision access to the Approver Community, select from the available picklist values in the Approver Community field (see Figure 4).
- To update the status of the assigned Approver Link Token, select from the available picklist options in the Approver Link Token Status field (see Figure 4).
- If access to the Approver Community should be later revoked, please ensure this field is updated to Inactive.
The Approver Community section of the Client Contact should only be populated when your Org has access to the Approver Community via Link Tokens. To confirm how your Org is configured, please liaise with your System Administrators.
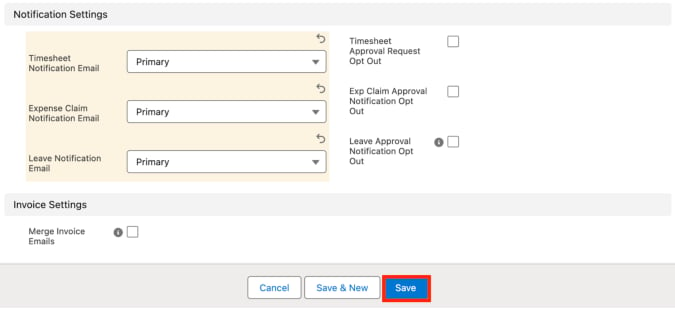
- Populate the following optional fields to provide the Notification and Invoice Settings for the Client Contact (see Figure 5):
- Timesheet Notification Email
- Expense Claim Notification Email
- Leave Notification Email
- Timesheet Approval Request Opt Out
- Exp Claim Approval Request Opt Out
- Leave Approval Request Opt Out
- To determine that multiple Invoices should be merged and issued together within the single email, rather than individually, populate the checkbox for the Merge Invoice Emails field (see Figure 5).
- Click on the Save button.
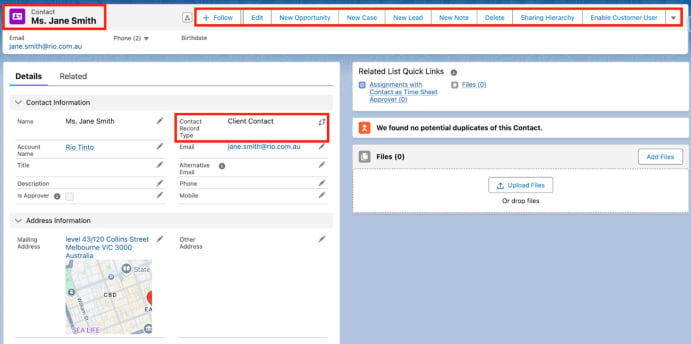
- A new Client Contact record has been created (see Figure 6).
Client Contact records CANNOT be deleted if they have related records or are used in other records. Deleting records is not recommended unless absolutely essential.
- To modify an existing Client Contact record, open the required record and select the Edit button available on the top right side of the page. You can also double click in any of the fields that need editing or just click on the pencil icon that appears within fields when you move your cursor over the field.
- When complete, click the Save button.