Purpose
The purpose of this quick reference guide is to step through the process of sending Invoices and Credit Notes. The intended audience for this document is Standard Payroll Users.Steps
Sending Bulk Invoices and Credit Notes
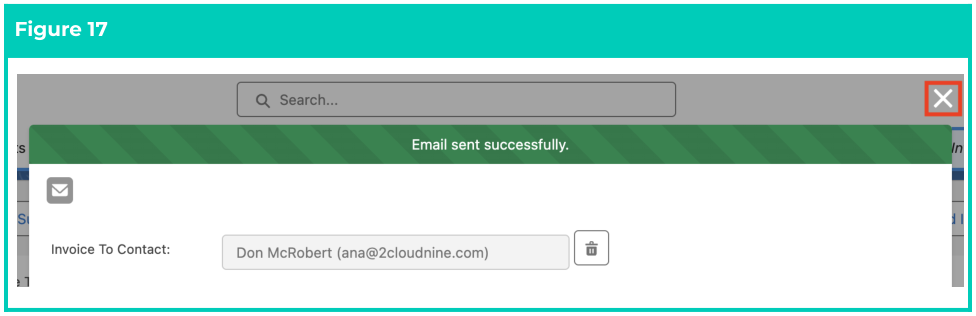
To send Invoices and Credit Notes in bulk, follow the steps below:- Click on the App Launcher icon (see Figure 1).
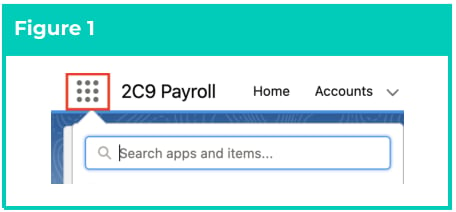
- Go to the Invoices object by using the Search function (see Figure 2).
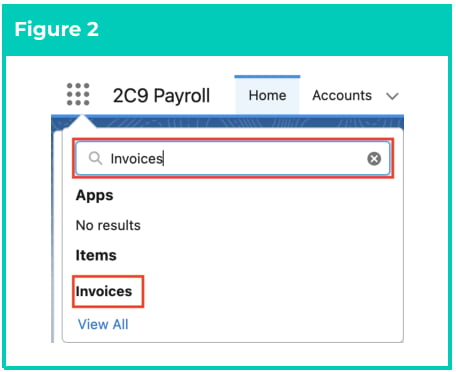
- From the displayed List View, if required, click on the down arrow and select a relevant List View (see Figure 3).
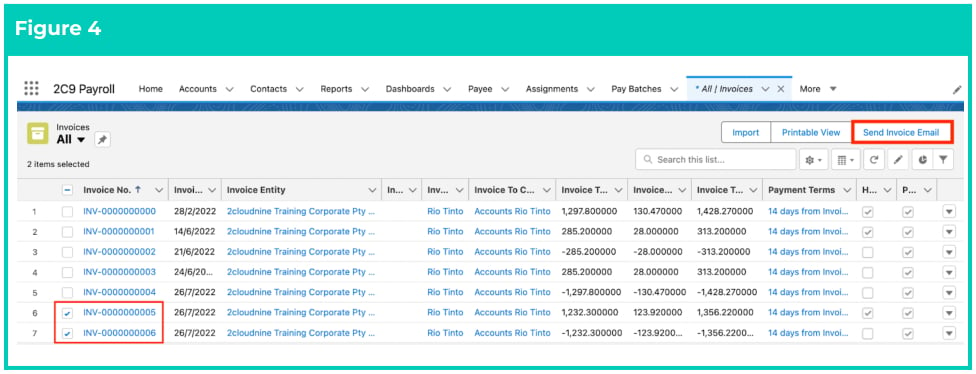
- Select the required Invoices and Credit Notes for sending by ticking the checkboxes as shown below, and click on the Send Invoice Email button. To send all the listed Invoices, you can select the checkbox in the heading line next to the Invoice No. column (see Figure 4).
Important Notes(Enable Bulk Resend)If you received an error message saying “Invoice not sent as ‘Enable Bulk Resend’ is false and invoice
has previously been emailed. Either check ‘Enable Bulk Resend’ or send email via Invoice.”, you will
need to tick the Enable Bulk Resend checkbox on the relevant Invoice or the Credit Note.
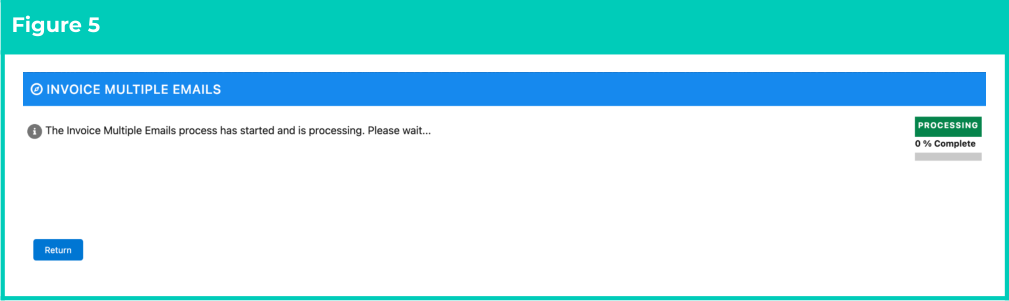
- You will see a confirmation message as per the below (see Figure 5).
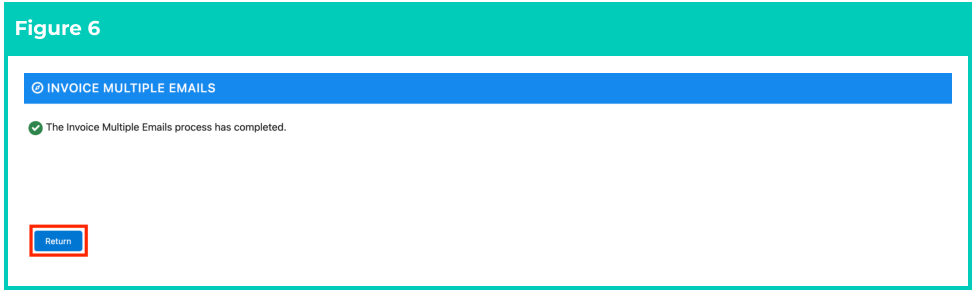
- If successful, you will see another confirmation message as per the below (see Figure 6).
- Click on the Return button.
Important Notes(New PDF replacing the existing PDF)After selecting the Send Invoice Email button, a new PDF of the Invoice will be created for each record selected and sent to the Invoice to Contacts, replacing any existing PDF. The existing PDFs, if any, will be updated and renamed with the prefix ‘Superseded’, but will remain attached as Files to this Invoice Record.
Sending Individual Invoices and Credit Notes
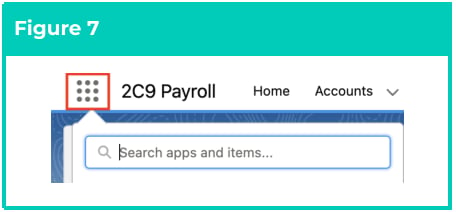
To send Invoices and Credit Notes individually, follow the steps below:- Click on the App Launcher icon (see Figure 7).
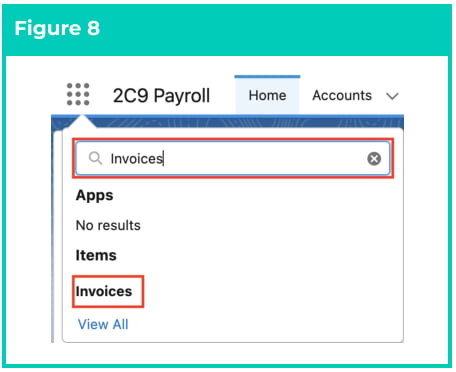
- Go to the Invoices object by using the Search function (see Figure 8).
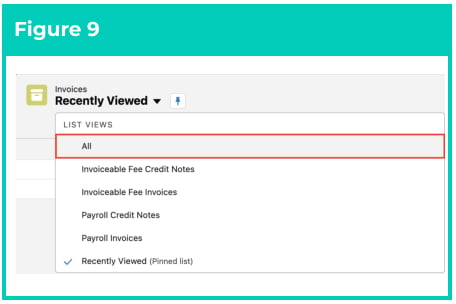
- From the displayed List View, if required, click on the down arrow and select a relevant List View (see Figure 9).
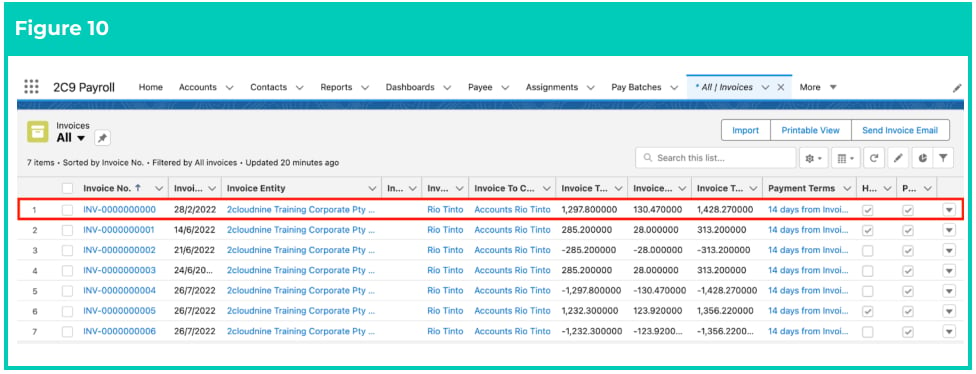
- Open the required Invoice or Credit Note record (see Figure 10).
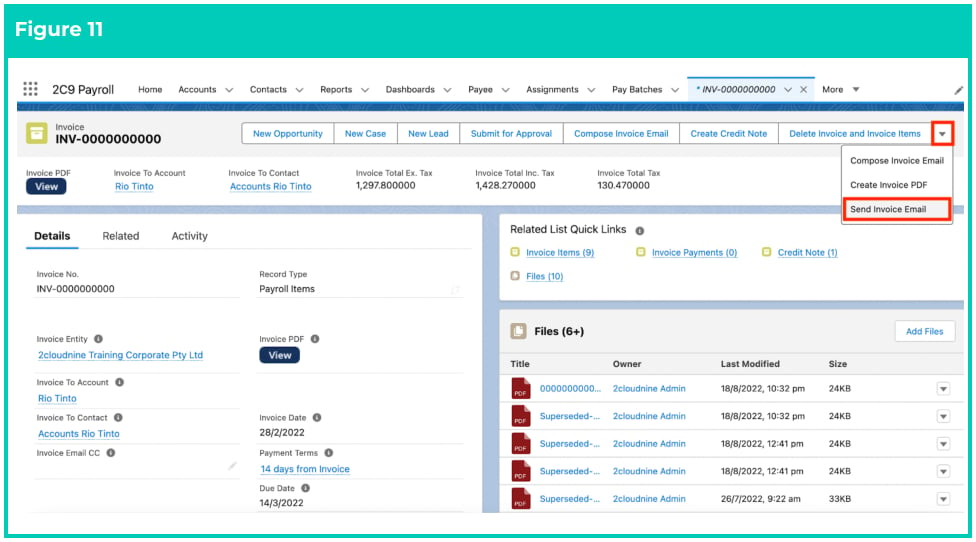
- To send an Invoice without customising the email message or recipients, click on the down arrow and then click on the Send Invoice Email button (see Figure 11). To customise the email message and recipients, skip to step 8.
- A pop-up will appear. Click on the Send Email button (see Figure 12).

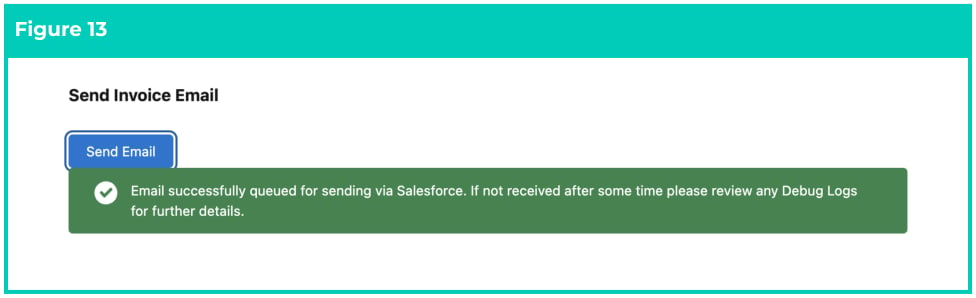
- If successful, you will see a confirmation message as shown in the screenshot below (see Figure 13).
Important Notes(New PDF replacing the existing PDF)After selecting the Send Invoice Email button, a new PDF of the Invoice will be created for the selected record to replace any existing PDFs and sent to the Invoice to Contact. The existing PDFs, if any, will be updated and renamed with the prefix ‘Superseded’, but will remain attached as Files to this Invoice Record.
- To customise the email message and recipients, click on the down arrow and click on the Compose Invoice Email button (see Figure 14).
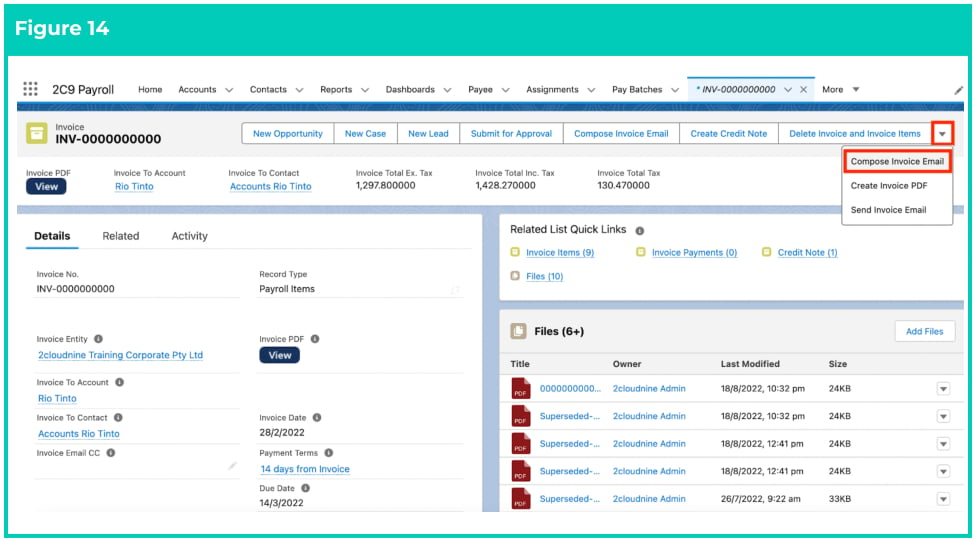
- On the Compose Invoice Email pop-up, the Invoice To Contact field will be pre-populated.
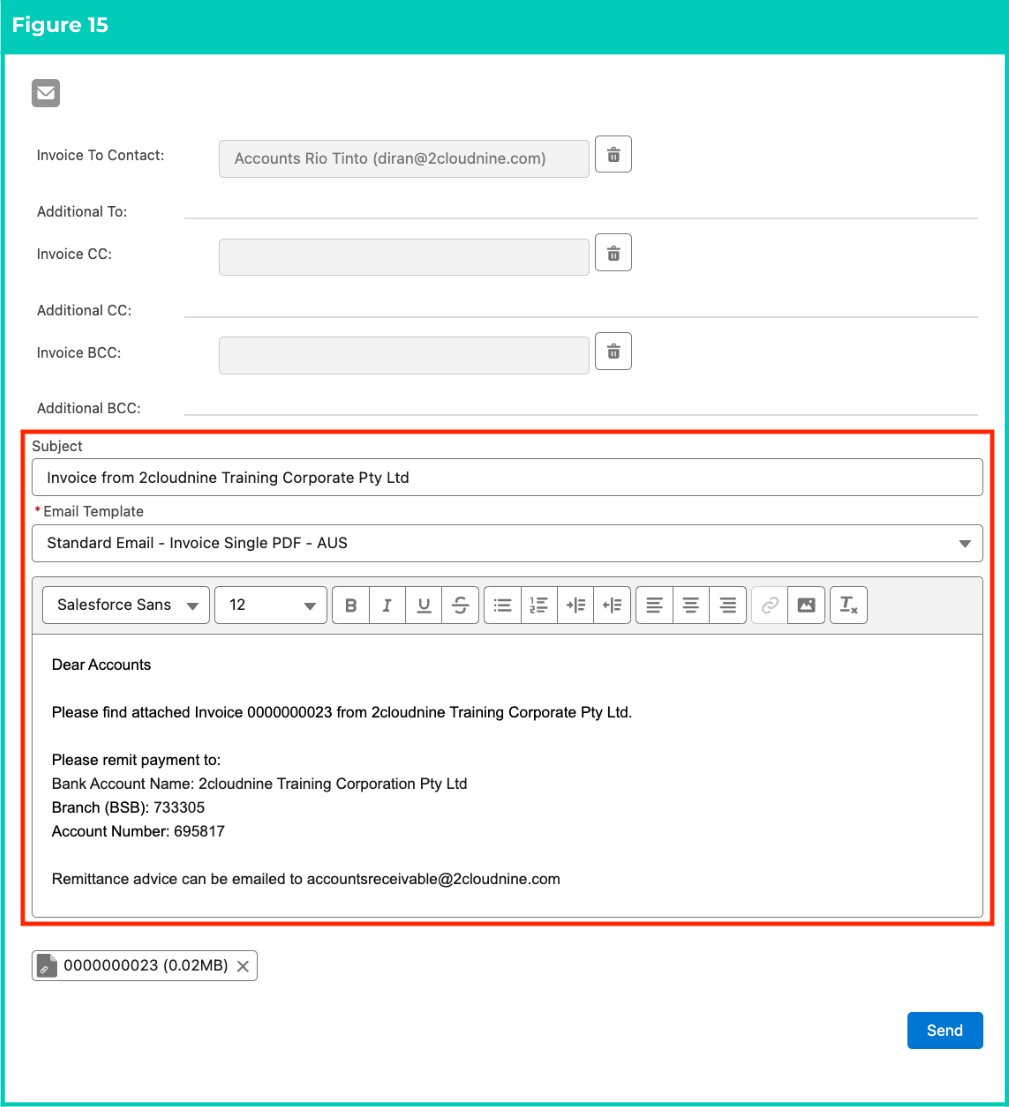
- Choose a template for the email by clicking on the Email Template picklist, which populates the Subject and Email text (see Figure 15).
- Populate the following optional fields:
- Cc
- Bcc
- Template
- If required, you can make changes to the email text, which auto-populates only when the Template field is populated, or you can type in some text without the use of a Template.
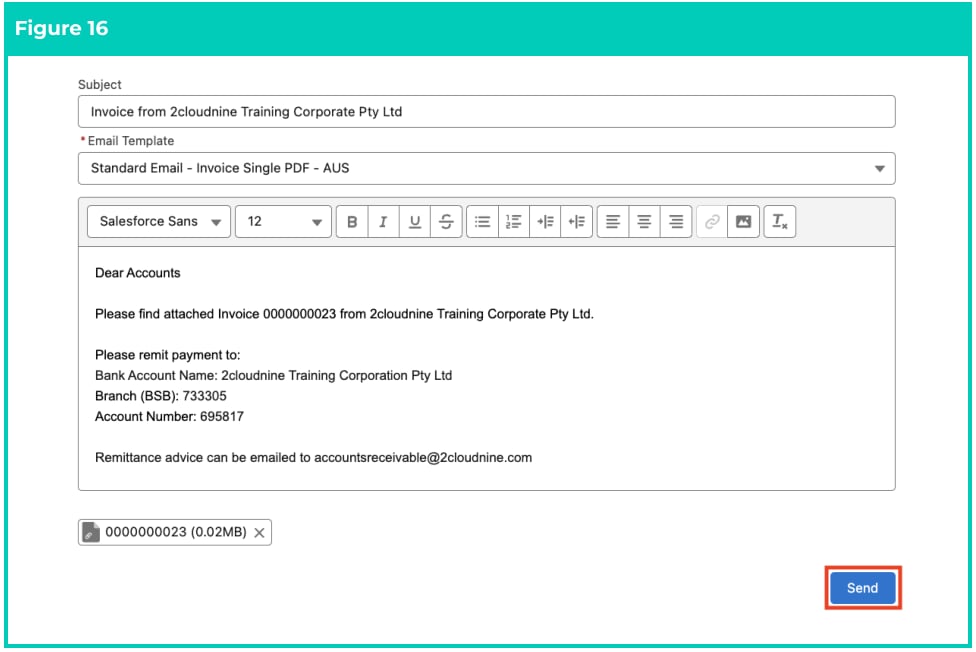
- When you are satisfied with the content of the email, click on the Send button (see Figure 16).
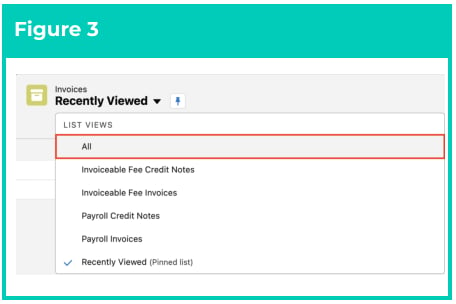
- A confirmation message will appear. To remove the pop-up window and return to the Invoice/Credit Note, click on the X button shown below (see Figure 17).