

Purpose
The purpose of this quick reference guide is to step through the process of creating Self Managed Superannuation Fund records. The intended audience for this document is system administrators.Steps
Create a Self Managed Fund record
To create a Self Managed Fund record, follow the steps below:-
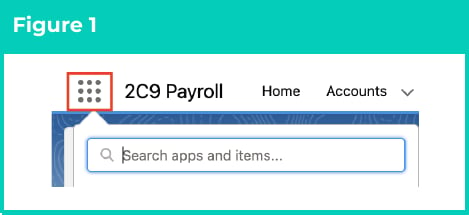
Click on the App Launcher icon. (See Figure 1)
-
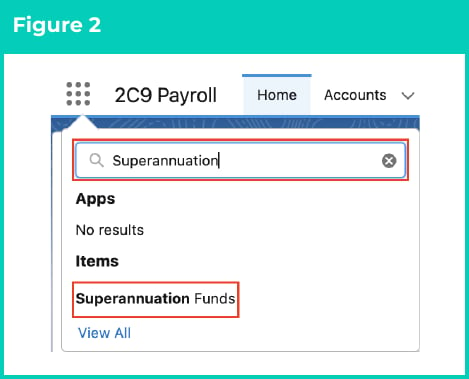
Go to the Superannuation Funds object by using the Search function. (See Figure 2)
-
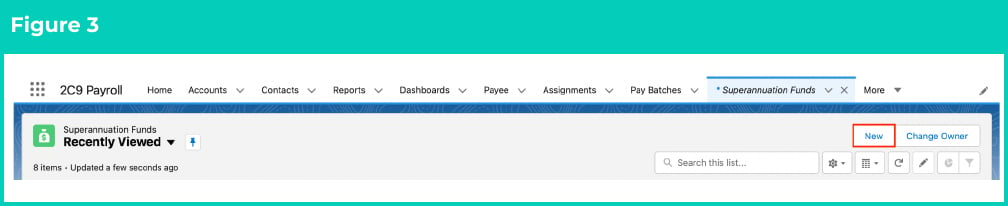
Click on the New button. (See Figure 3)
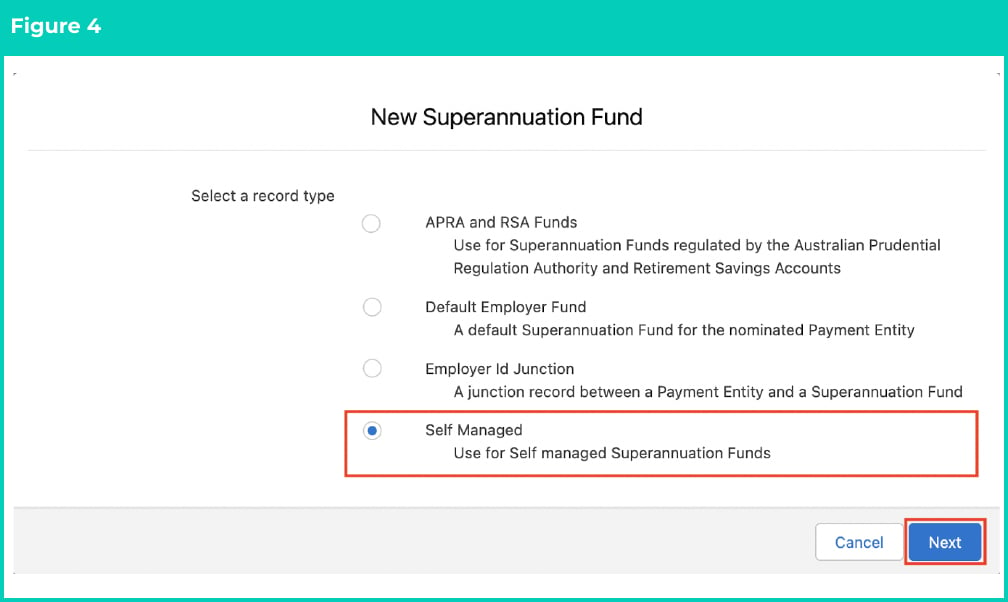
- Choose the record type of Self Managed. (See Figure 4)
-
Click Next.
-
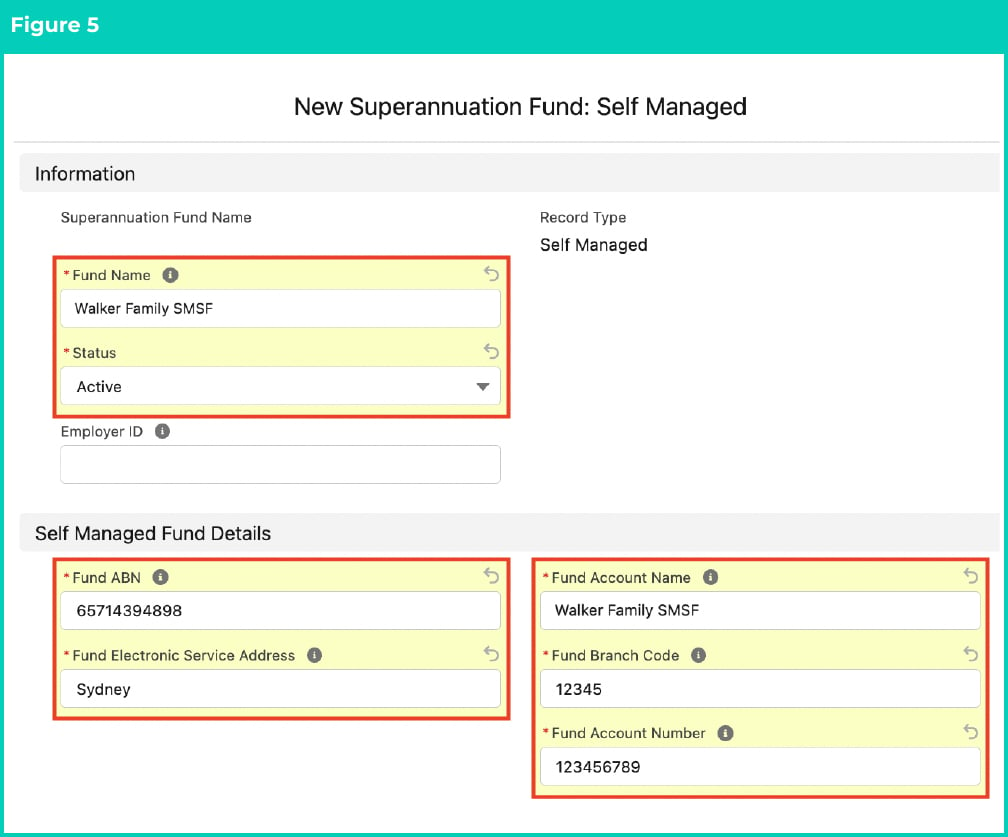
Populate the following required fields to provide the base details of the Superannuation Fund record: (See Figure 5)
- Fund Name
- Status
- Fund ABN
- Fund Electronic Service Address
- Fund Account Name
- Fund Branch Code
- Fund Account Number
-
Populate the following optional fields as needed: (See Figure 5)
- To provide an Employer Identification Number for which the Superannuation Fund record is being created, populate the Employer ID field.
-
Click on the Save button.
-
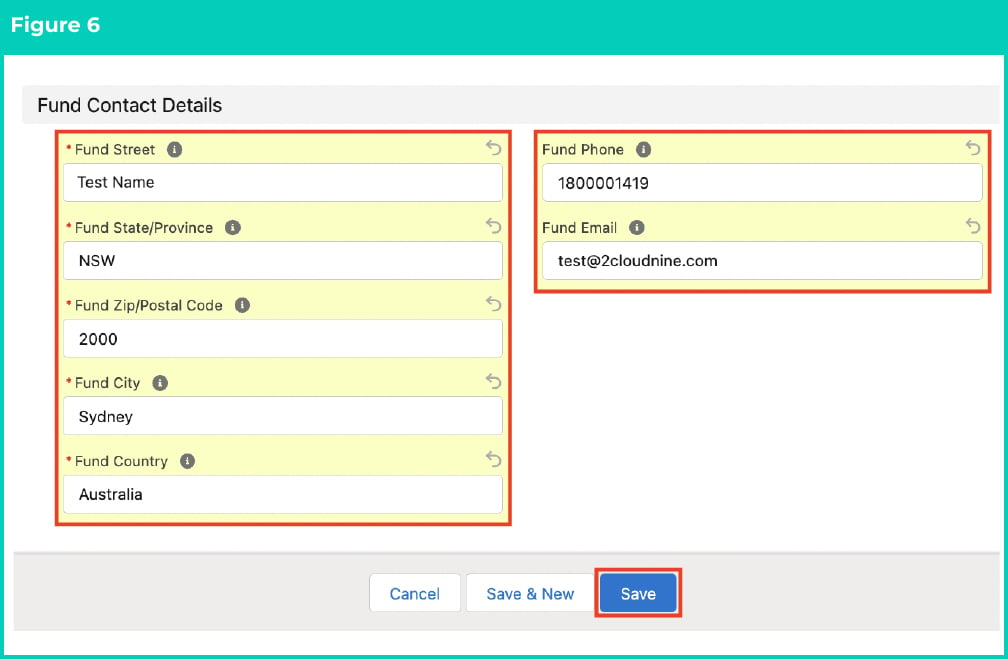
To provide additional contact details about the Superannuation Fund record, populate the following optional fields: (See Figure 6)
- Fund Street
- Fund State/Province
- Fund Zip/Postal Code
- Fund City
- Fund Country
- Fund Phone
- Fund Email
- Click on the Save button.
-
A new Superannuation Fund record has been created. (See Figure 7)
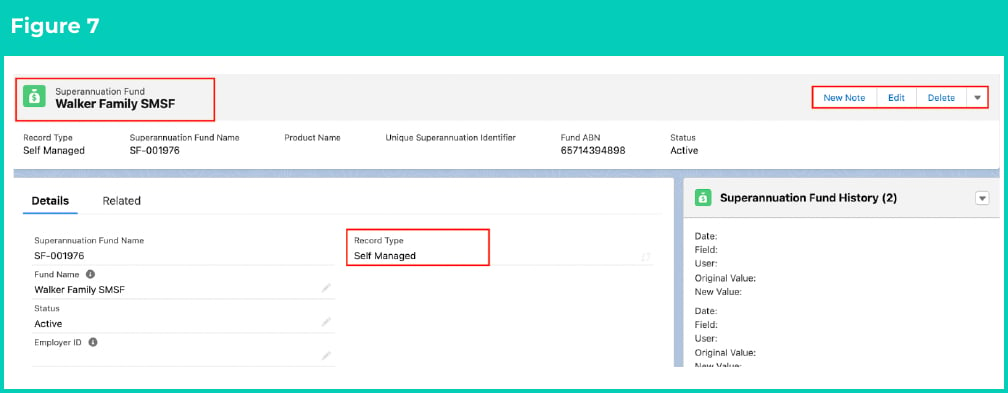
- To modify an existing Superannuation Fund record, open the required record and select the Edit button available on the top right side of the page. You can also double click in any of the fields that need editing or just click on the pencil icon that appears within fields when you move your cursor over the field.
- When complete, click on the Save button.
Superannuation Fund records CANNOT be deleted if they have related records or are used in other records. Deleting records is not recommended unless absolutely essential.