Purpose
The purpose of this quick reference guide details how to manage the entering of FBT (Fringe Benefit Tax). The intended audience for this document are System Administrators and Payroll Users. The Manage FBT process has the ability to enter both Reportable FBT and also Non-Reportable FBT.Steps
Enter FBT amounts
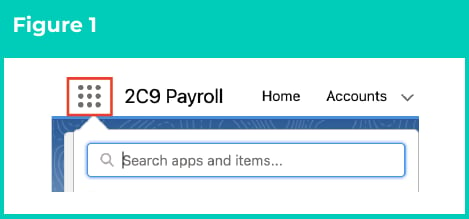
To enter an FBT amount, the following steps should be completed:- Click on the App Launcher icon. (See Figure 1)
-
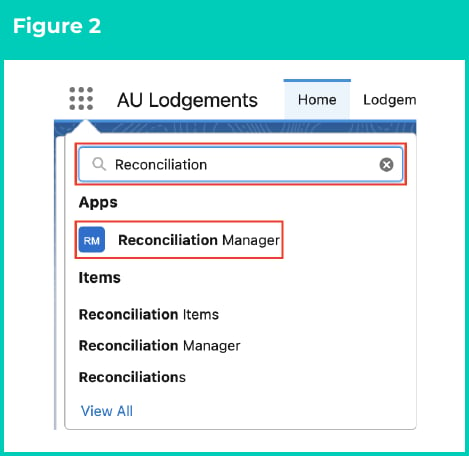
Go to the Reconciliation Manager App by using the Search function. (See Figure 2)
-
Ensuring you have the Reconciliation Manager App selected (will be by default) in the sub-tabs, select Manage FBT to enter a new Reportable or Non-Reportable FBT amount. (See Figure 3)

-
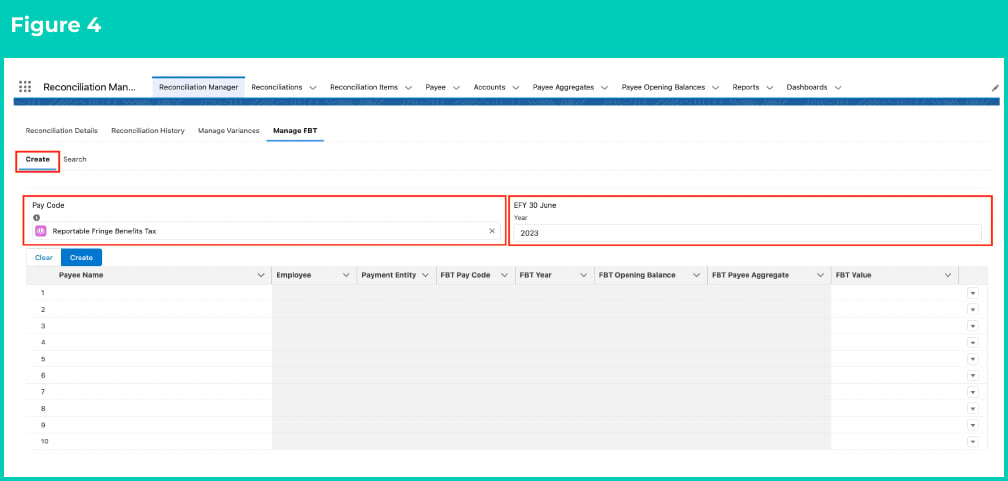
Populate the following required fields to filter the records: (See Figure 4)
- Pay Code (filters only Pay Codes with record type FBT)
- EFY 30 June Year
-
Upon populating the above two fields, the Create button will automatically appear just below these fields.
-
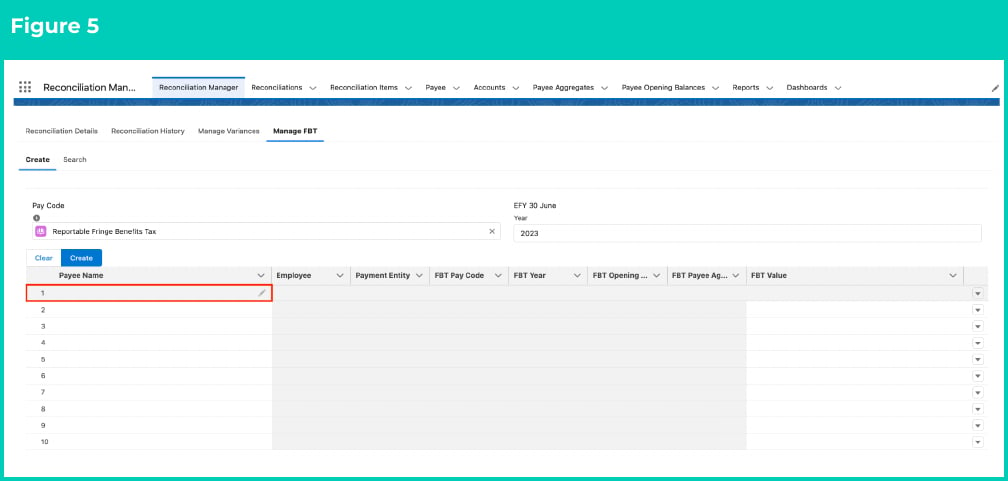
Move the cursor over the first row under the Payee Name column. You will notice that the edit icon appears on the right hand side of the box. Click on the edit button. (See Figure 5)
-
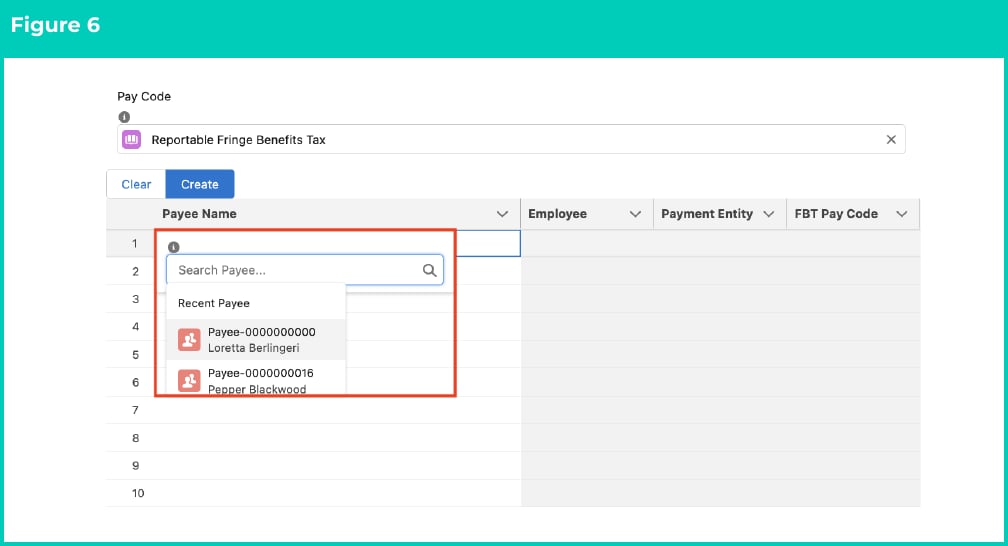
Enter the Payee Name or click on the Search Payee box and select the required Payee. (See Figure 6)
-
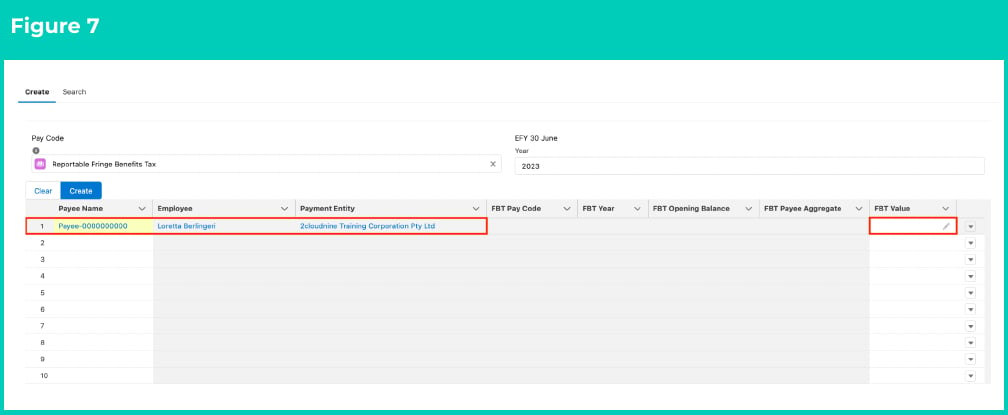
Upon selecting the Payee, the Employee and Payment Entity columns populate automatically.
Now move the cursor over the first row under the FBT Value column and click on the edit button on the right hand side. (See Figure 7)
-
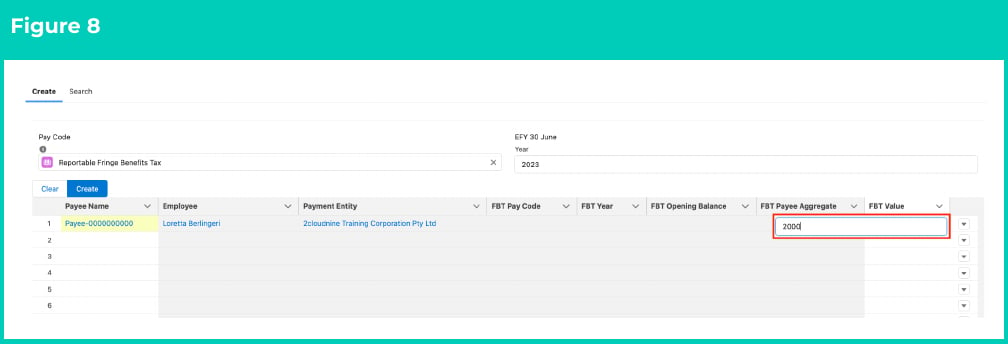
Populate the FBT Value for the Pay Code selected above in Step 4 for this selected Payee and press Enter. (See Figure 8)
-
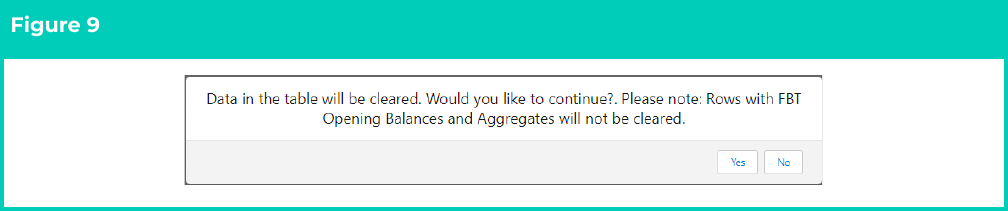
To clear all rows of data entered without the FBT Opening Balances or FBT Payee Aggregates created, you can click the Clear button anytime. Before deleting the records, it will have the following pop up confirming you would like to proceed, prior to them being deleted. (See Figure 9)
-
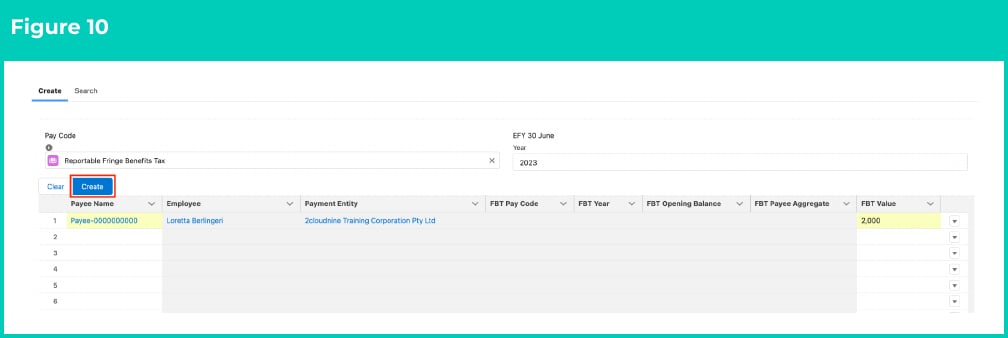
Users can continue to enter additional data for all the required Payees for the same FBT Pay Code entered above. Once all the FBT Values are entered, click the Create button. (See Figure 10)
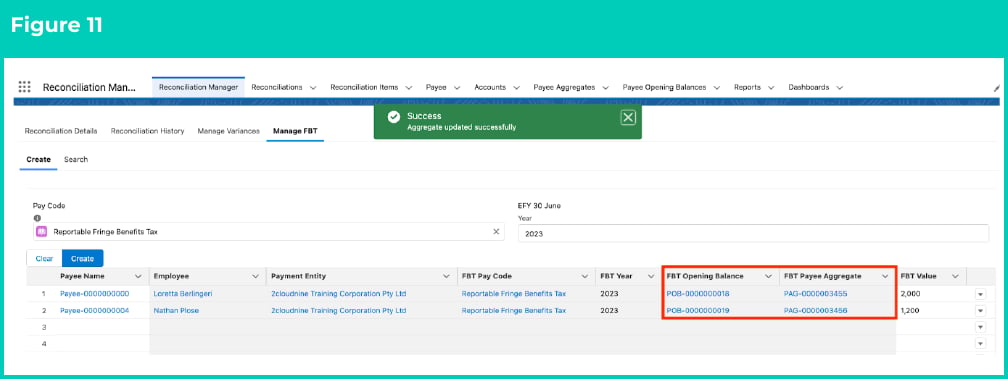
- A confirmation message appears indicating “Aggregate updated successfully”. The columns FBT Pay Code, FBT Year, FBT Opening Balance and FBT Payee Aggregate populate automatically. (See Figure 11)
- The FBT Payee Opening Balance record displays under the FBT Opening Balance column and the FBT Payee Aggregate record also displays under the FBT Payee Aggregate column. Both these newly created records will be linked to the most recent Finalised Payee Pay Batch record automatically. (See Figure 11)
-
Repeat steps 6 to 12 to enter FBT Values for as many additional Payees as needed. (See Figure 11)
-
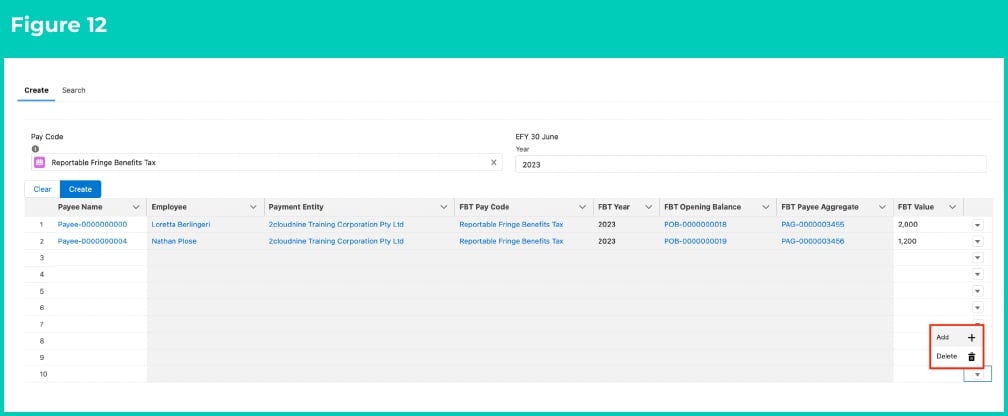
To add extra rows for entering FBT amounts, click on the dropdown arrow on the right hand side of any row and click Add, and to delete a single row, click Delete on a row without any FBT Opening Balance or FBT Payee Aggregate created yet. (See Figure 12)
Search FBT amounts
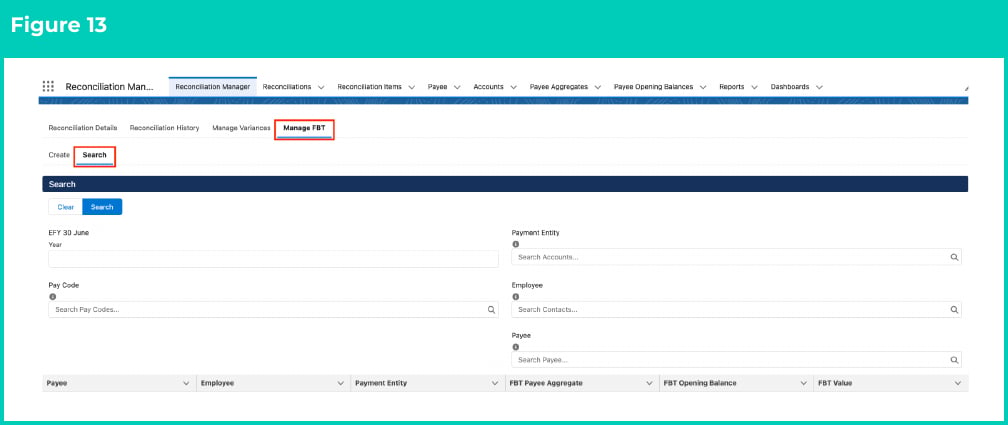
To search an FBT amount, the following steps should be completed:-
Go to the Reconciliation Manager App, Reconciliation Manager tab and then the Manage FBT sub-tab using the steps outlined on the first page. (See Figure 13)
-
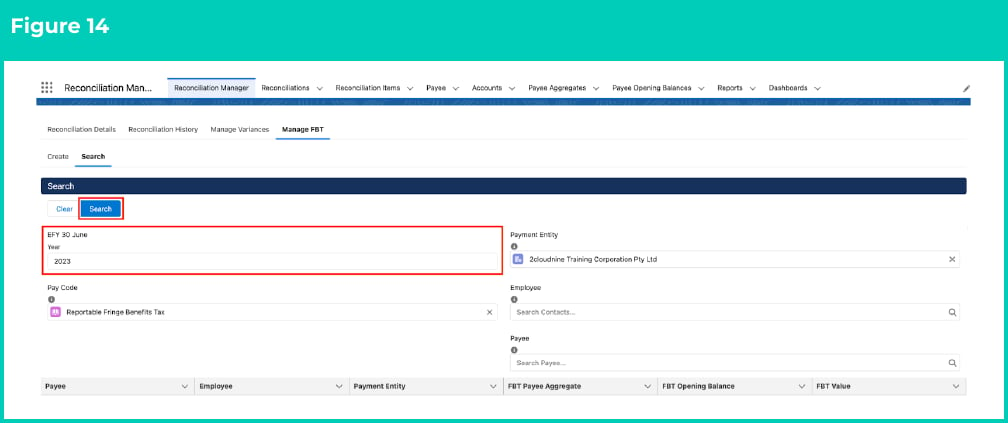
Populate the following required fields to filter the records: (See Figure 14)
- EFY 30 June Year
-
Populate the following optional fields to further filter the results of records to display: (See Figure 14)
- To filter the records to a specific Payment Entity, populate the optional field Payment Entity.
- To filter the records to Reportable or Non-Reportable records, populate the optional field Pay Code.
- To filter the records to a specific Employee, populate the optional field Employee.
- To filter the records to a specific Payee, populate the optional field Payee.
-
Click the Search button.
-
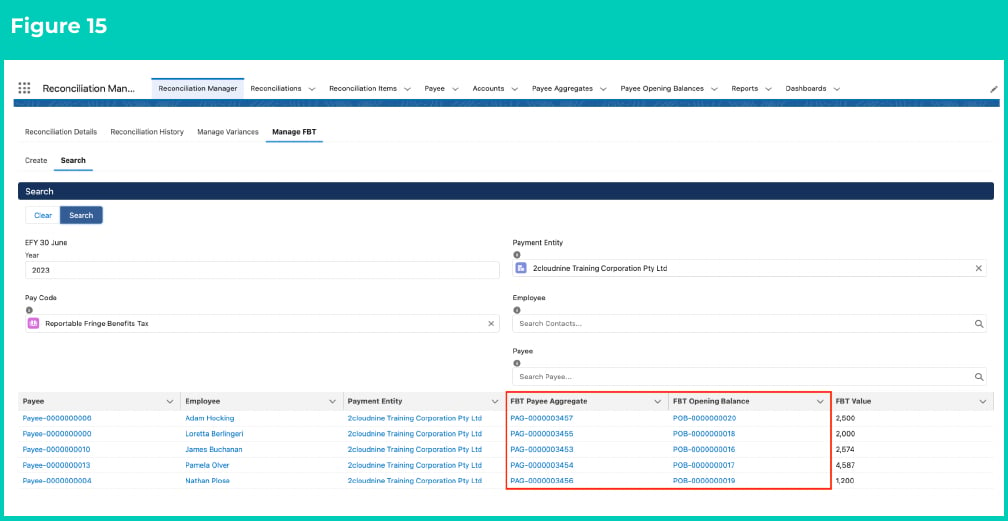
The search results will display on the bottom of the page. Click on the FBT Payee Aggregate or the FBT Opening Balance record name to open the record and view all details. (See Figure 15)