The purpose of this quick reference guide is to step through the process of creating and exporting
SuperStream Reports. The intended audience for this document is Standard Users.
Create a new SuperStream for Payment Entities using Third-Party Contributions API
To create a new SuperStream Report, the following steps should be completed:
Go to the Lodgements AU object (see Figure 1).
Figure 1
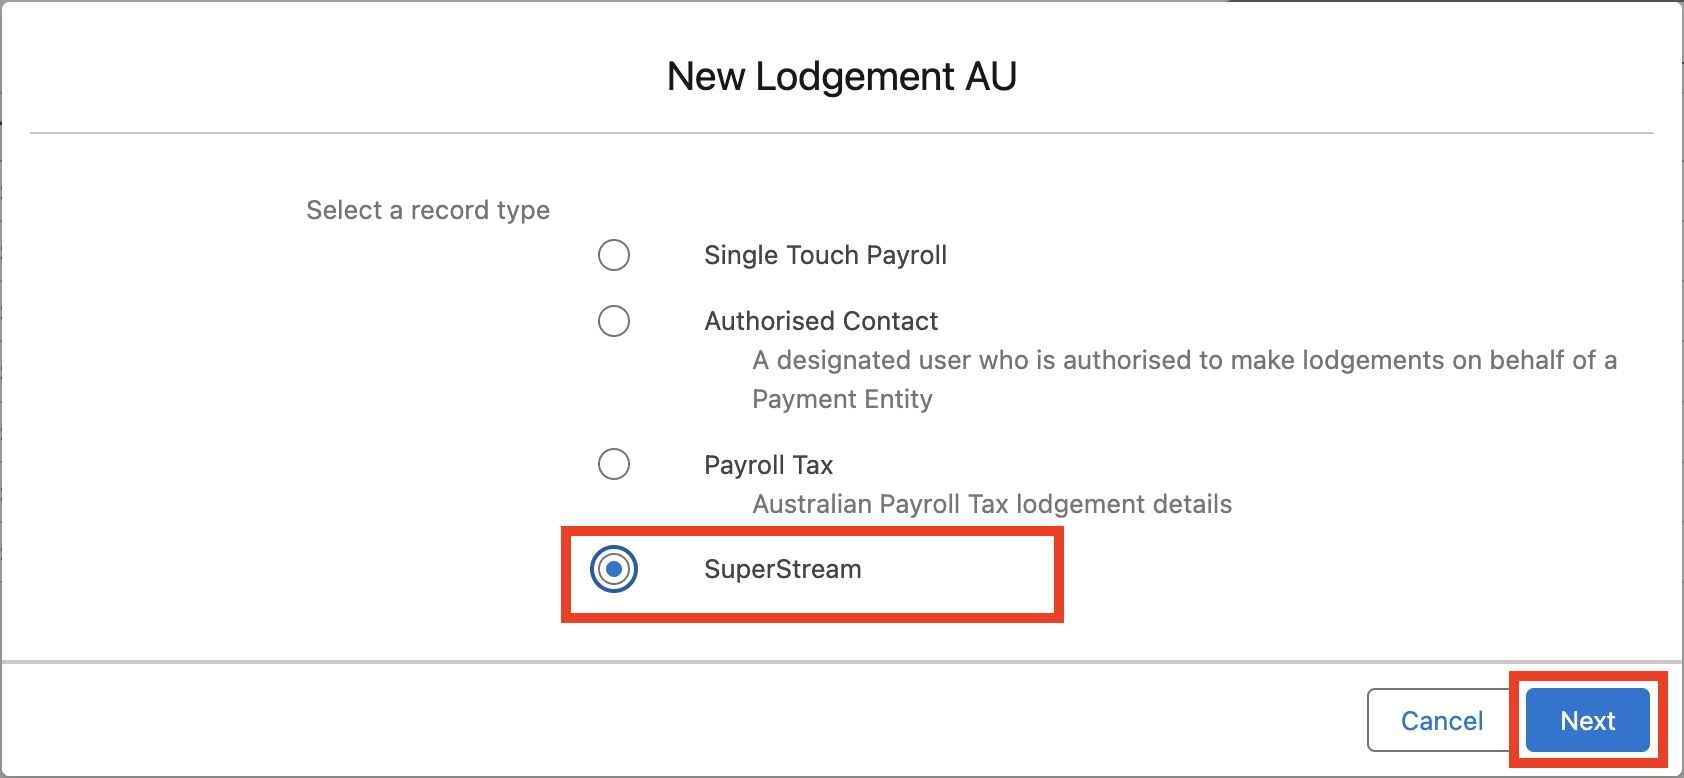
Click the New button, then choose the SuperStream record type and click Next. (See Figure 2).
Figure 2
Click the button on the left-hand side of the screen where it says Superannuation Lodgement
Manager (see Figure 3).
Figure 3
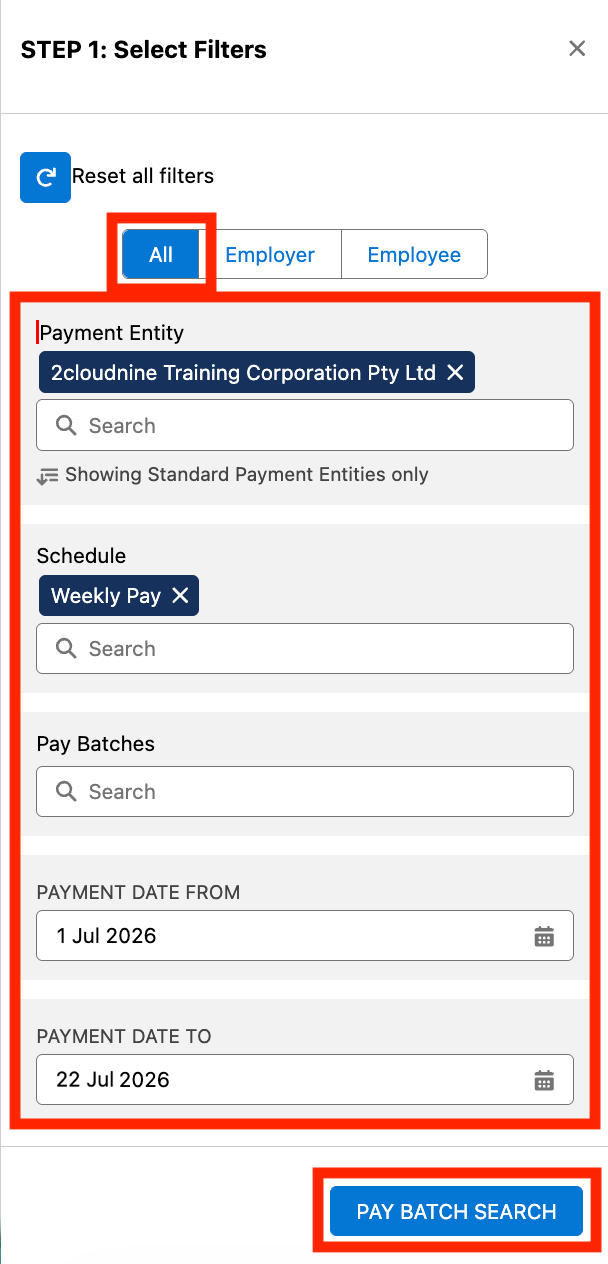
Within this filter screen, Users can create reports specific to Employer, Employee, or All Contributions. Unless you need to split out the report to be specific to Employer or Employee, most Users will keep this at the default of All (see Figure 4).
Populate the Filter Panel with the following fields:
Payment Entity – required (up to 5 can be selected)
Schedule – optional (up to 5 can be selected)
Pay Batches – optional (up to 5 can be selected)AND
Payment Date From - required
Payment Date To - required
Pay Batch Search: The Pay Batch Search button only becomes available once Payment Entity and both Payment Date From and Payment Date To fields are populated.
Figure 4
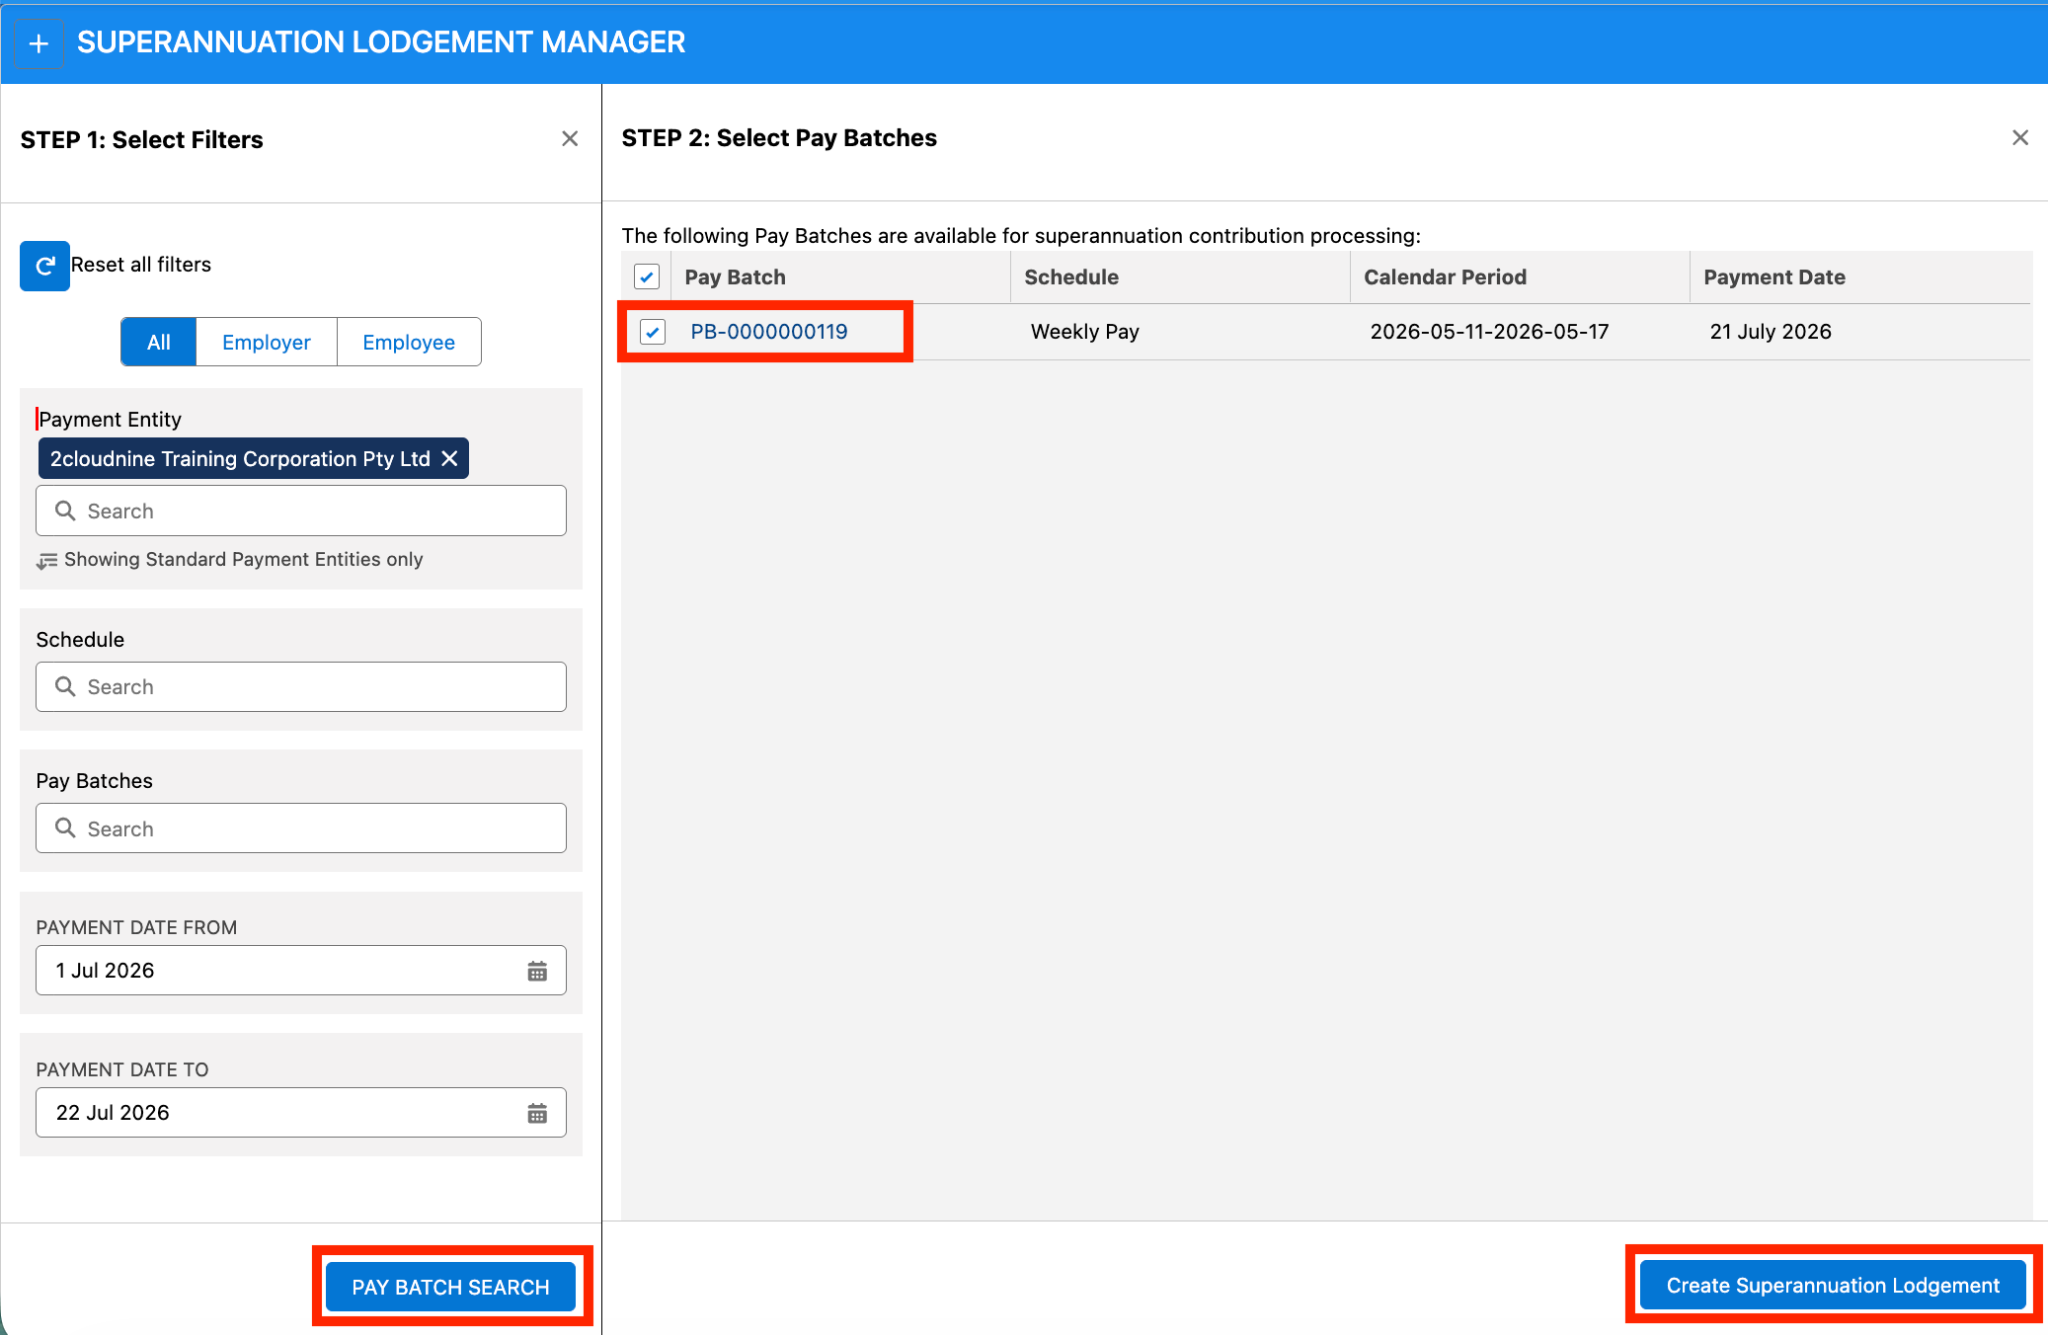
Click on the Pay Batch Search button (see Figure 5).
A new panel called ‘Select Pay Batches’ will appear with a list of Pay Batches without SuperStream Lodgements already created.
To create the SuperStream Lodgement, select the required Pay Batch(s) by ticking the checkbox(s) and
click Create Superannuation Lodgement.
Figure 5
Reset all filters: To change your filters or start again, click Reset All Filters at the top of the Select Filters window. This clears all filters.
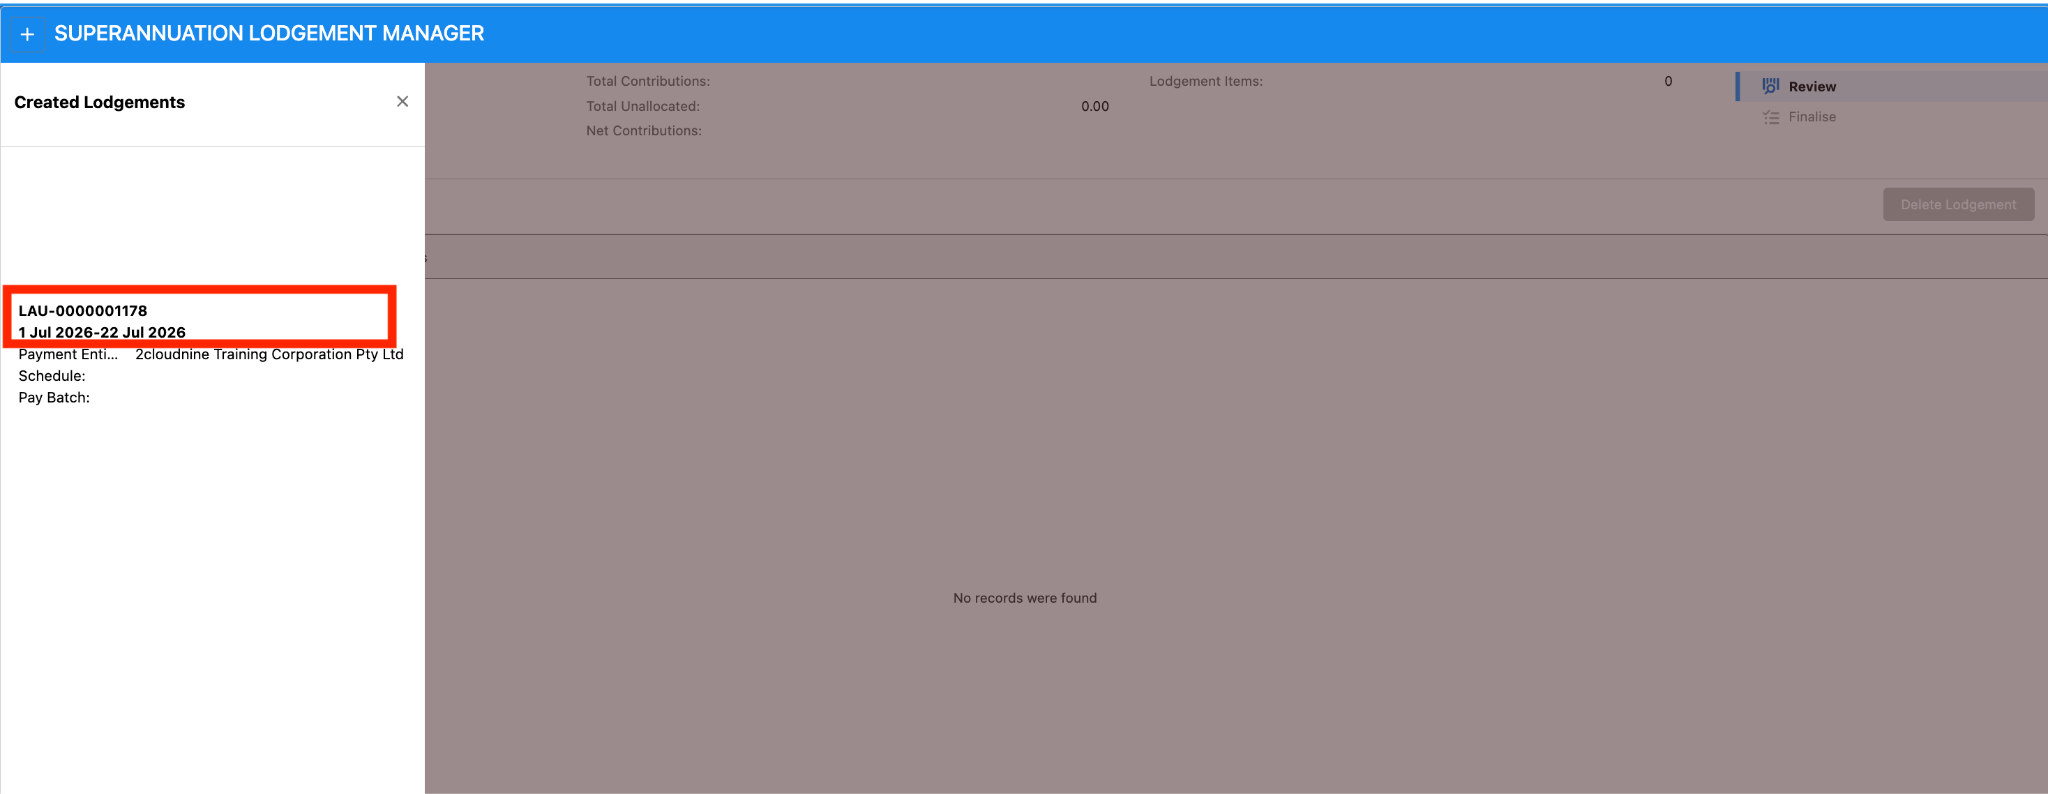
A new Lodgement AU Batch has been created. Click on the Lodgement Number listed, i.e. LAU-000000xxxx (see Figure 6).
Figure 6
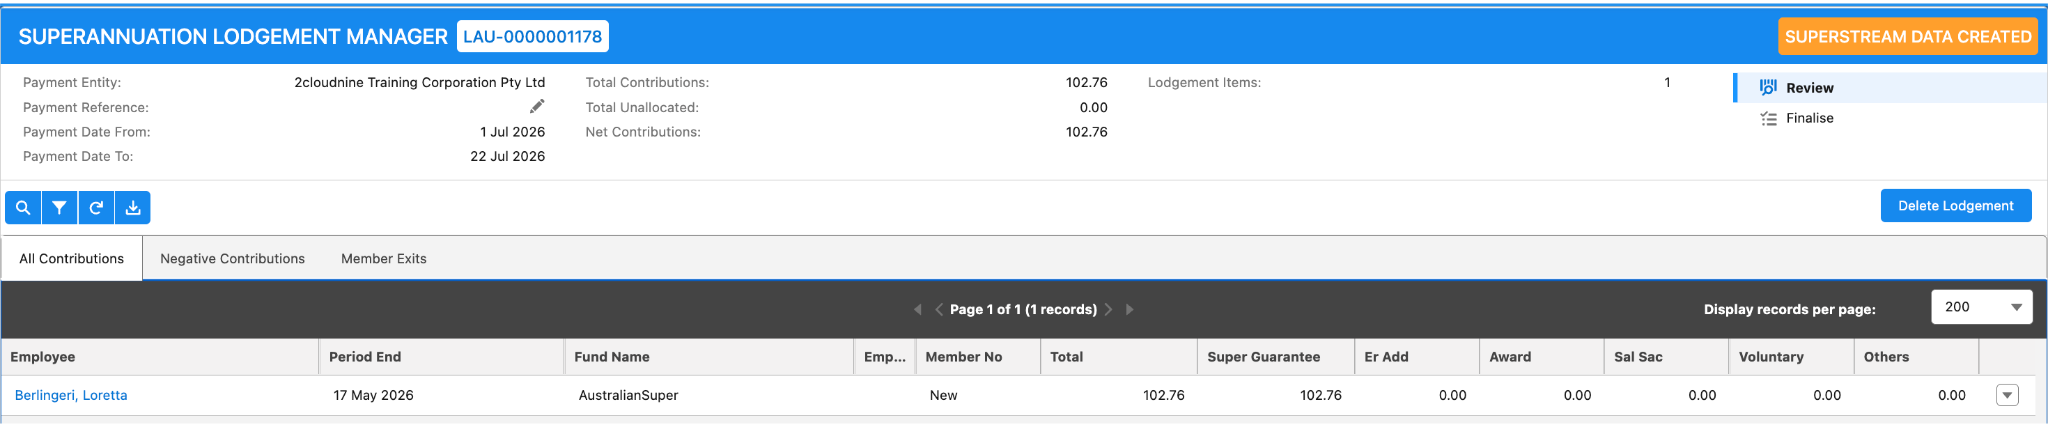
A new SuperStream Batch has been created with the status of SUPERSTREAM DATA CREATED as shown in the top right of the Lodgements Manager UI (see Figure 7).
Figure 7
Before moving to the next step, refer to the QRG SuperStream Reporting – Key Information to learn what the individual buttons and sections in this Lodgements Batch are called.
View/Edit the SuperStream Contributions for Payment Entities using Third-Party Contributions API
To view details of an individual record:
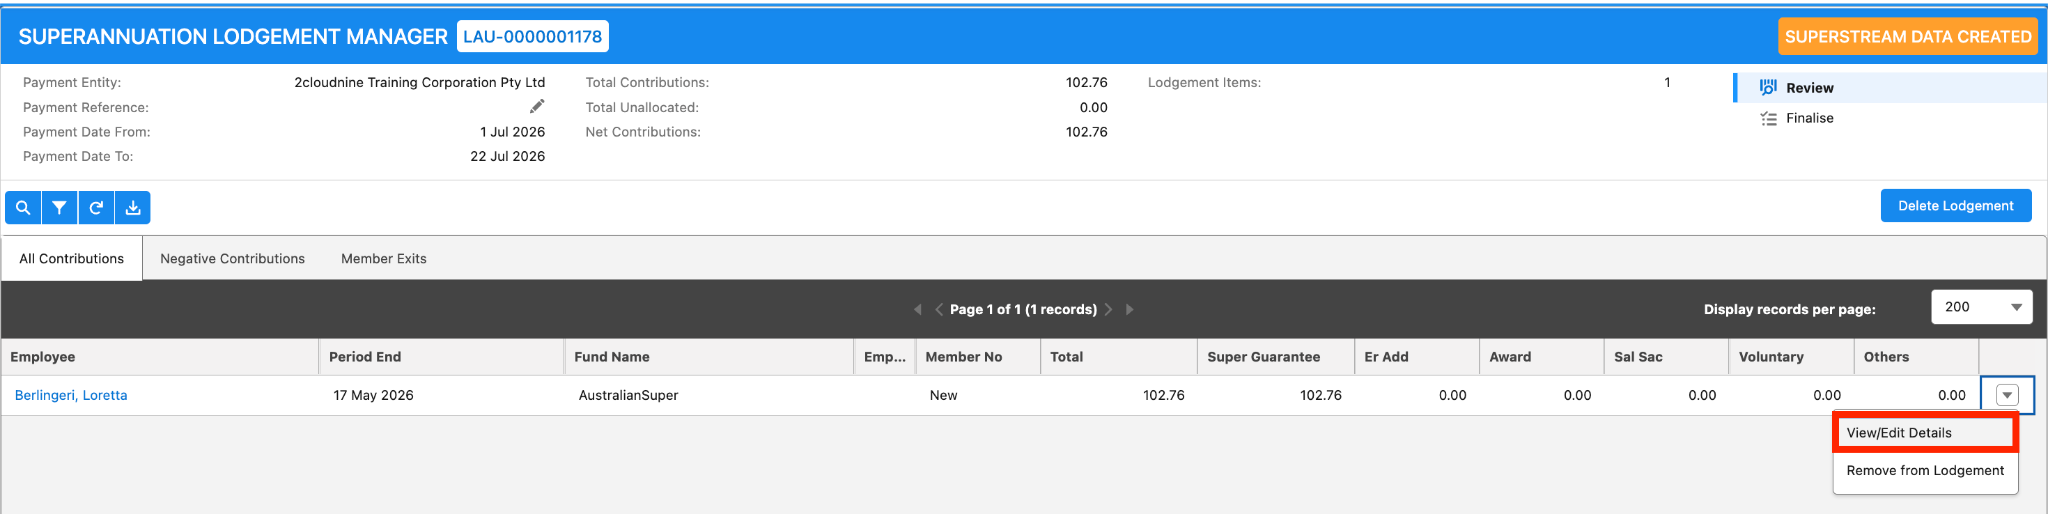
Click the down arrow on the right-hand side of the record row (see Figure 8).
Click View/Edit Details.
Figure 8
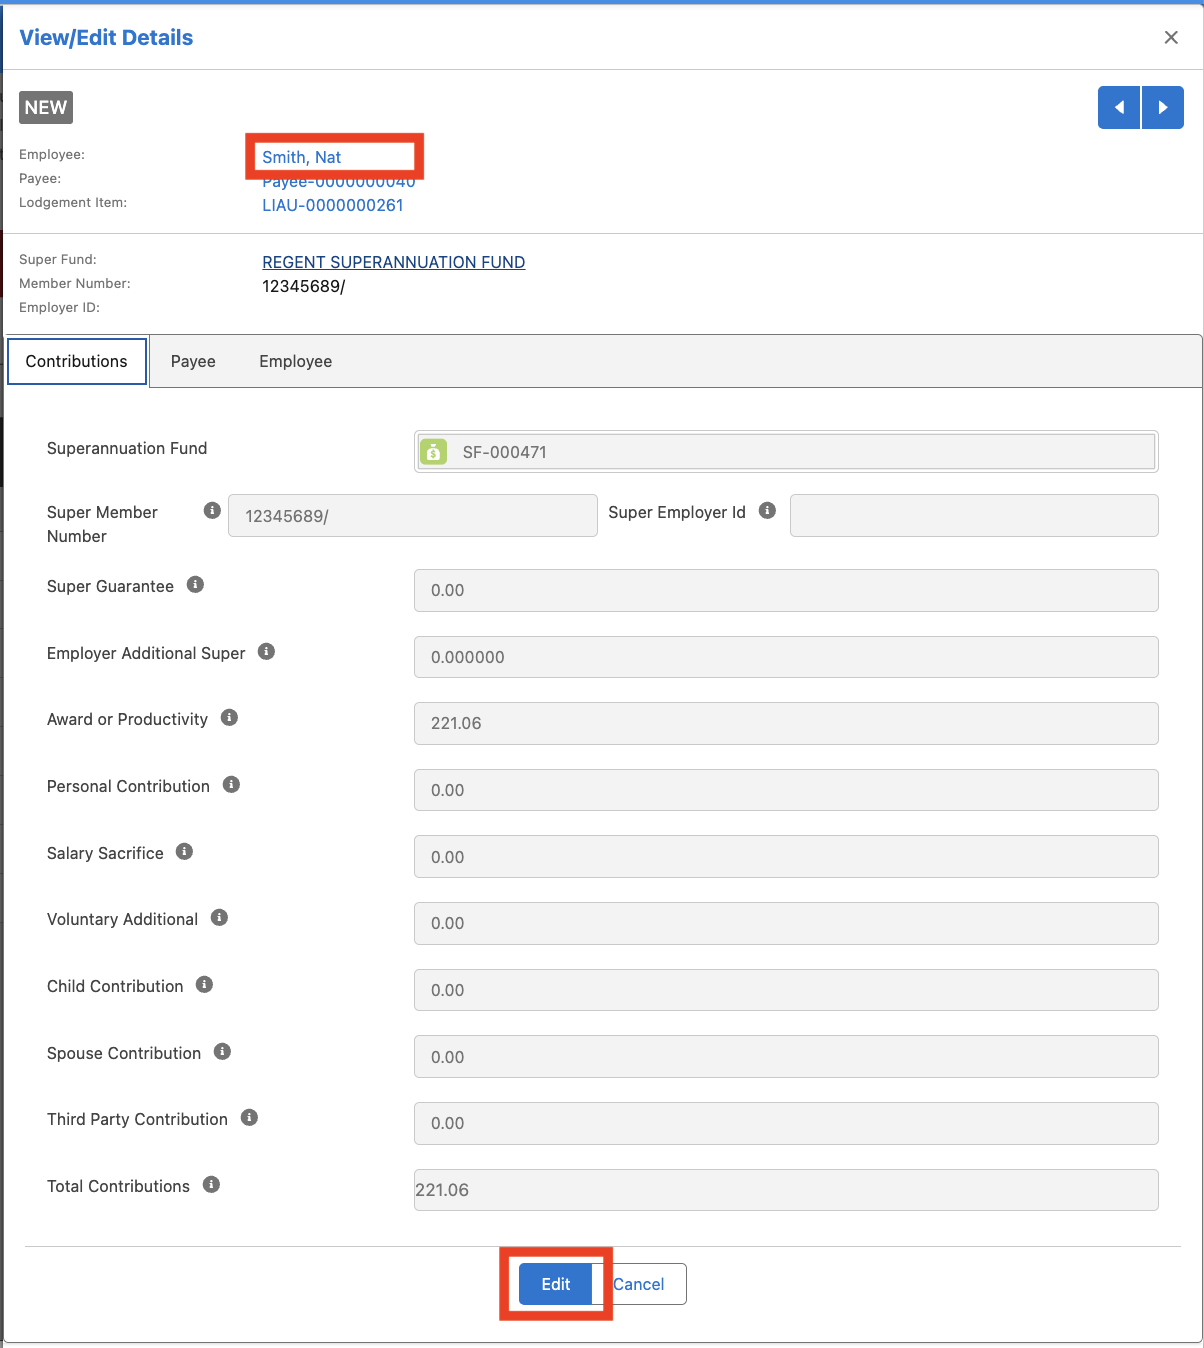
You will see Employee details in a pop-up screen. To update details directly within the Lodgement, click Edit on the Contributions tab to add missing or change existing contribution details, or on the Payee or Employee tabs to add/update personal details, and click Save (see Figure 9).
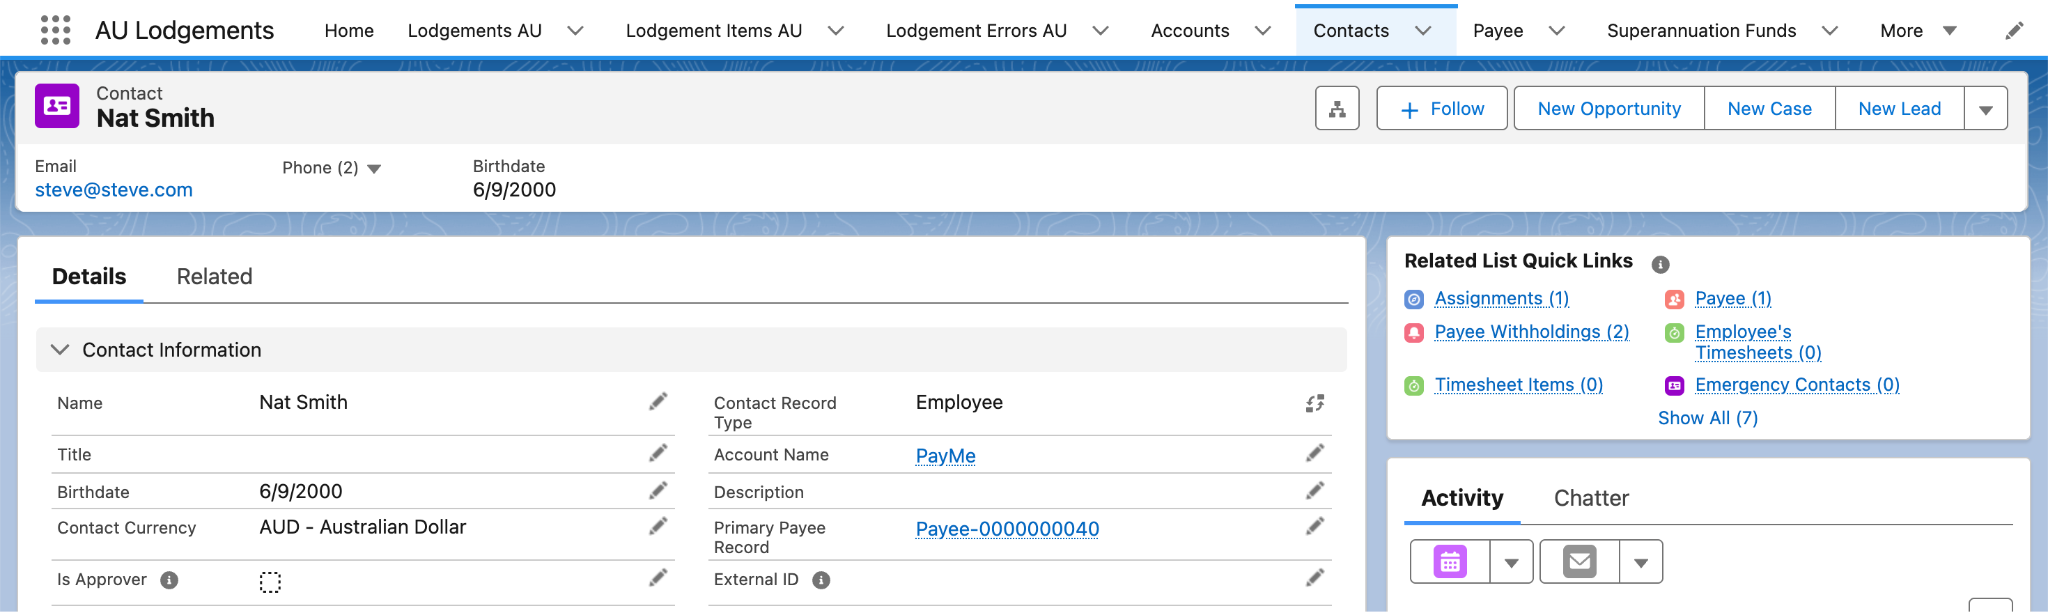
If any details are updated on the Payee or Employee tabs, they are not replicated to the Payee or Employee records automatically, so to apply them to the Contact record, right-click the Employee name and open it in a new tab.
Figure 9
On the Employee record, update the address details and check the Birthdate, Gender, Phone, and Mobile, adding or replicating anything missing, incorrect, or updated in the previous step, then save the record (see Figure 10).
Finalise the SuperStream for Payment Entities using Third-Party Contributions API
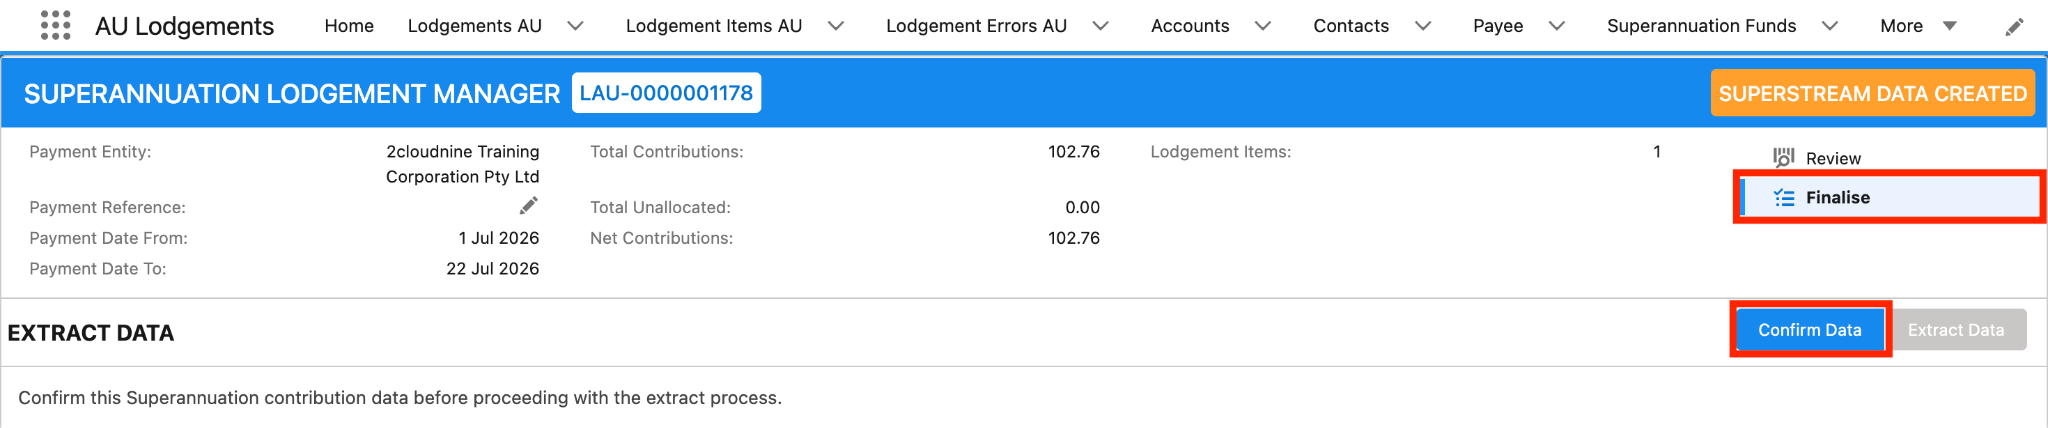
Return to the SuperStream UI tab, select the Finalise tab, and click Confirm Data (see Figure 11).
Figure 11
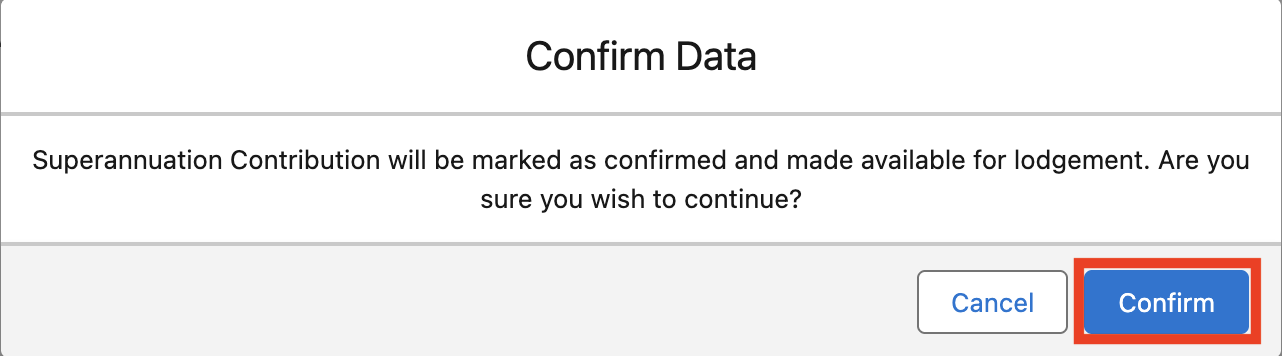
A pop-up message will appear. Click Confirm (see Figure 12).
Figure 12
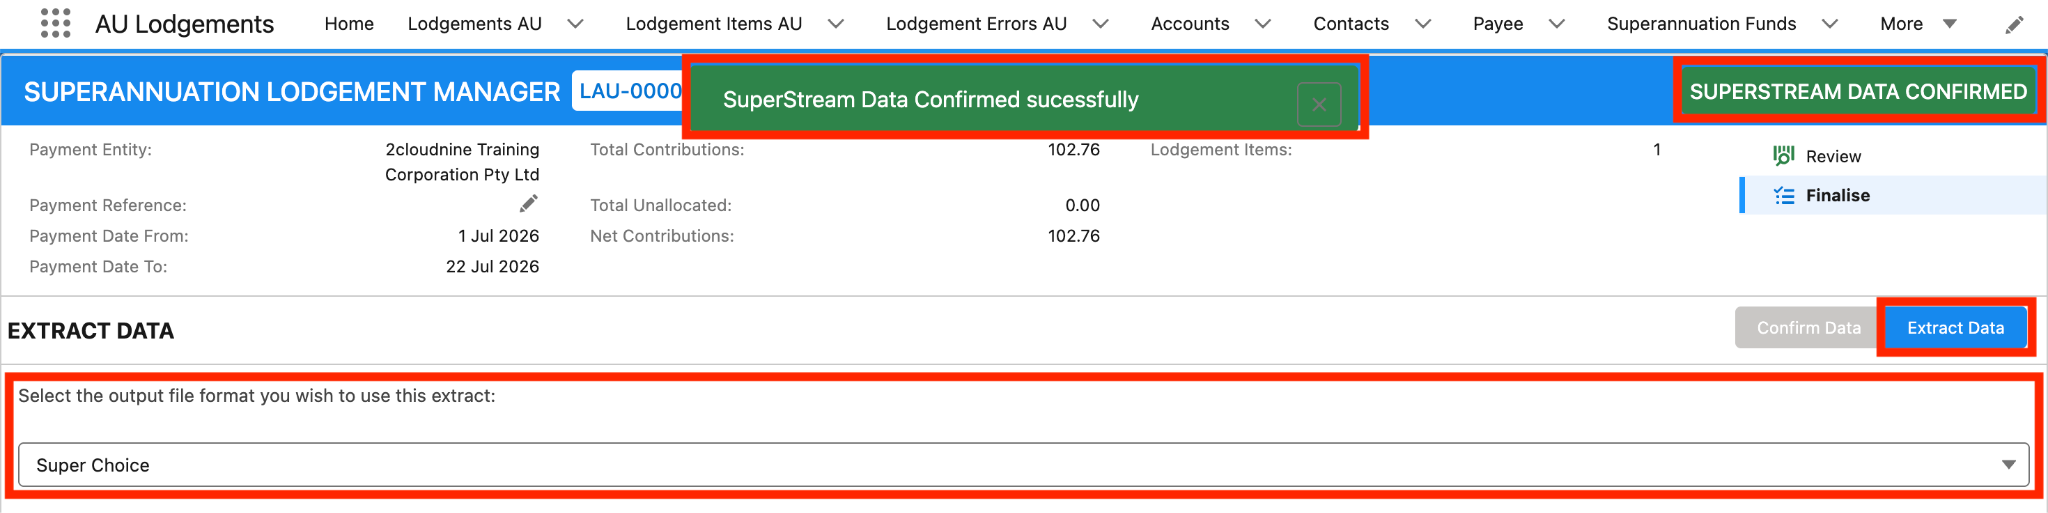
You will see a message ‘SuperStream Data Confirmed successfully,’ and the status will change to SuperStream Data Confirmed (see Figure 13).
To continue, select one of the four report options from the Extract Data picklist on the lower left:
Super Choice
Quick Super
One Path
SAFF
Click Extract Data.
Figure 13
Superstream Extract format: The Extract format to use will be dependent on the format required by their superannuation fund/clearing house. Users should be aware of any requirements based on their current processing in their existing Superannuation Portal software.
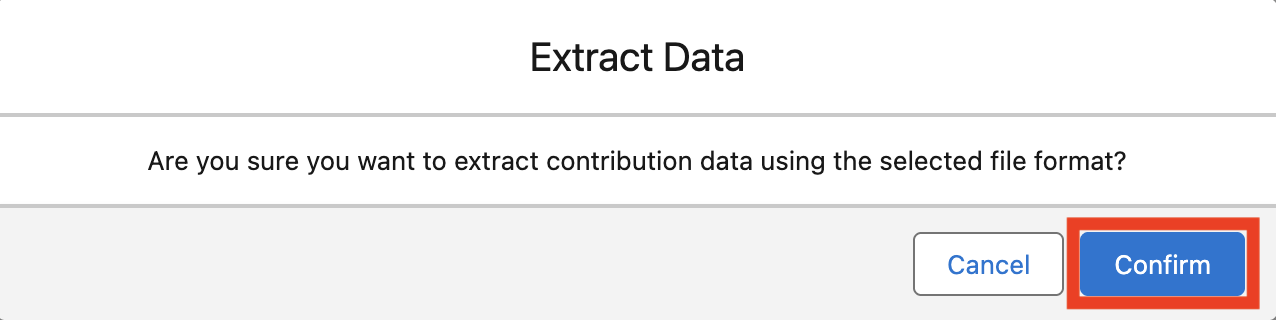
Another pop-up message will appear. Click Confirm (see Figure 14).
Figure 14
A message will appear confirming ‘Extraction Process has started’ (see Figure 15).
Figure 15
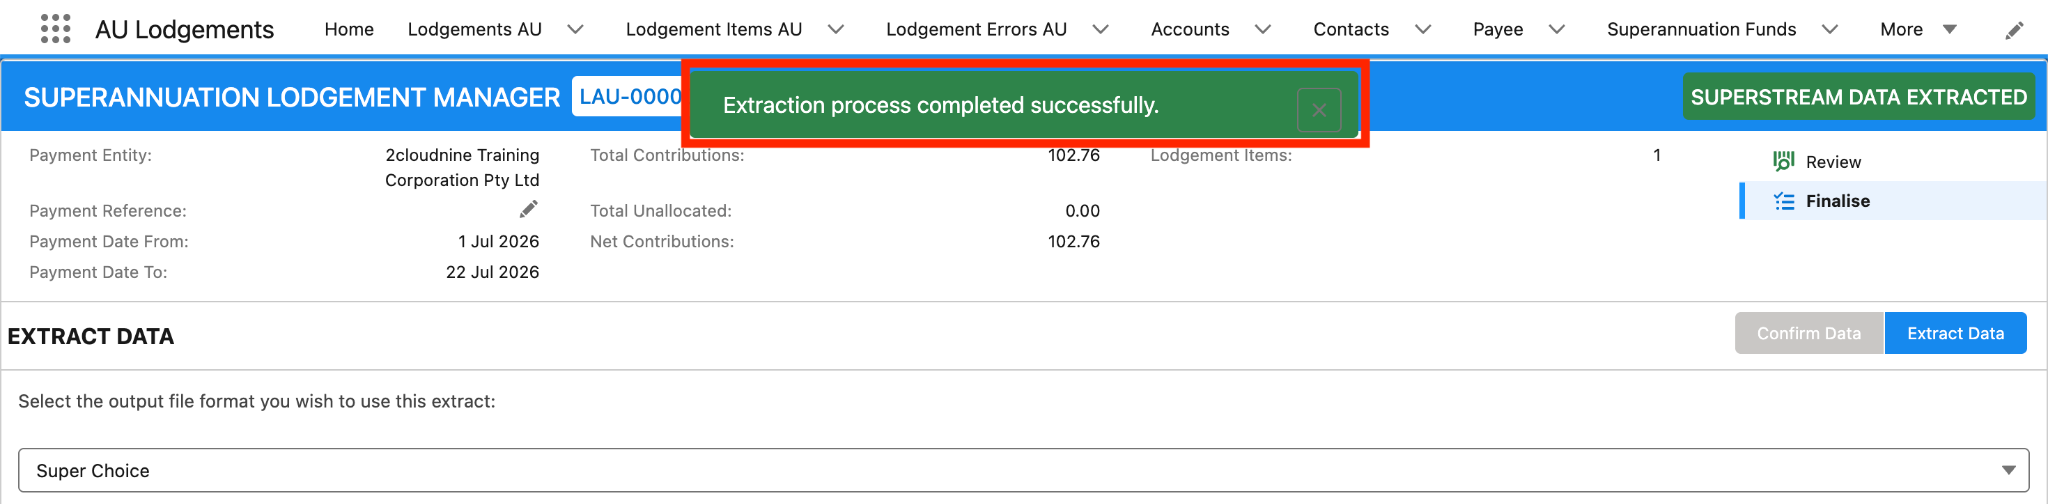
The message will change to ‘Extract process completed successfully,’ and the status will change to Superstream Data Extracted (see Figure 16).
A file will download to your computer (shown at the bottom of your screen or in your downloads folder). The file can be opened to review, moved to another folder if required, and is ready to be uploaded/sent to the clearing house/superfund. The same file can be accessed from the ‘File’ related to the Lodgement Record.
Figure 16
Using the text editor for CSV files: If opening the CSV file, it’s recommended to use a text editor to review, rather than a spreadsheet application, to ensure there is no interference with the required formatting of fields.
A quick reference guide outlining some useful information relevant to the SuperStream lodgements functionality. The document includes definitions, prerequisites, and other non-instructional information.
First Published: 12 September, 2021
Last Published: 09 September, 2026
Last modified on September 9, 2026
Was this page helpful?
Assistant
Responses are generated using AI and may contain mistakes.