Purpose

The purpose of this quick reference guide is to step through the process of creating Leave Templates. The intended audience for this document are System Administrators and Standard Users.

Steps

Create a new Leave Template

To create a new Leave Template record, follow these steps:
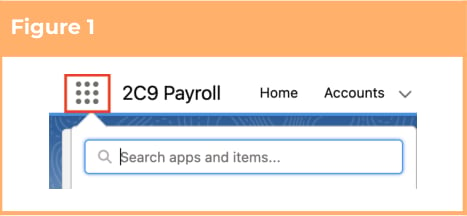
  1. Click on the App Launcher icon. (See Figure 1)
Screenshot from QRG Setup Leave Templates
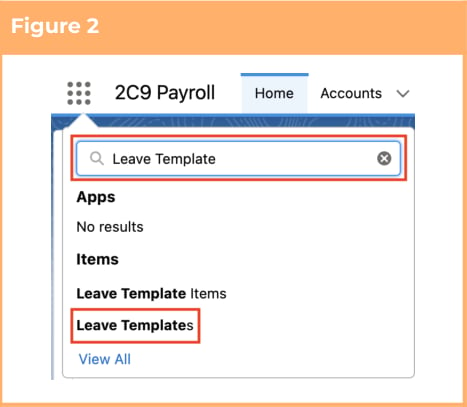
  1. Go to the Leave Templates object by using the Search function. (See Figure 2)
Screenshot from QRG Setup Leave Templates
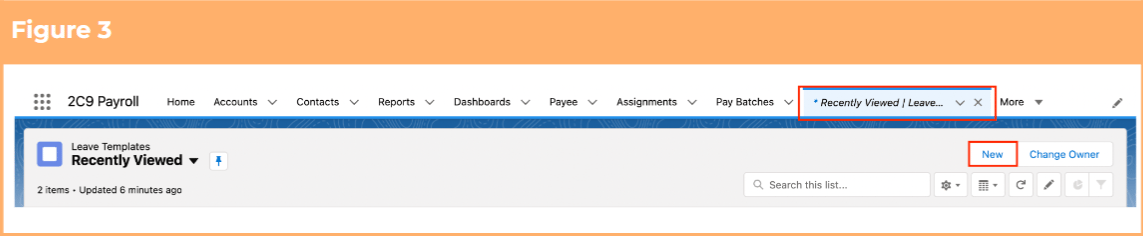
  1. Click New. (See Figure 3)
Screenshot from QRG Setup Leave Templates
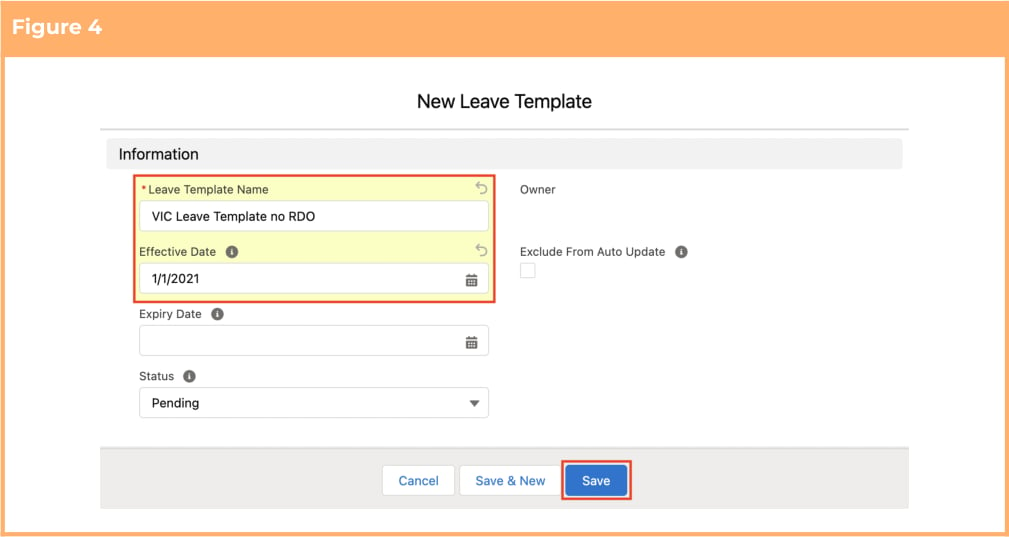
  1. Populate the following required fields to provide the base details of the Leave Template record: (See Figure 4)
    1. Leave Template Name
    2. Effective Date
  2. To set an expiry date for the Leave Template record, populate the Expiry Date field. If left blank, no Expiry Date will apply. (See Figure 4)
  3. Click on the Save button.
Screenshot from QRG Setup Leave Templates
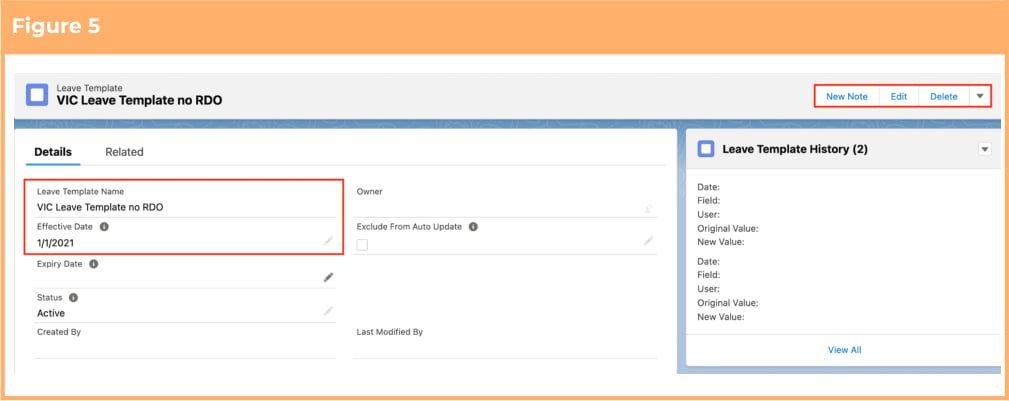
  1. A new Leave Template record has been created. (See Figure 5)
Screenshot from QRG Setup Leave Templates
Exclude From Auto Update checkbox can be ticked to exclude a Leave Template from being picked up for Auto Update Batch Processing, where Status field populates automatically based on the Effective Date and Expiry Date.
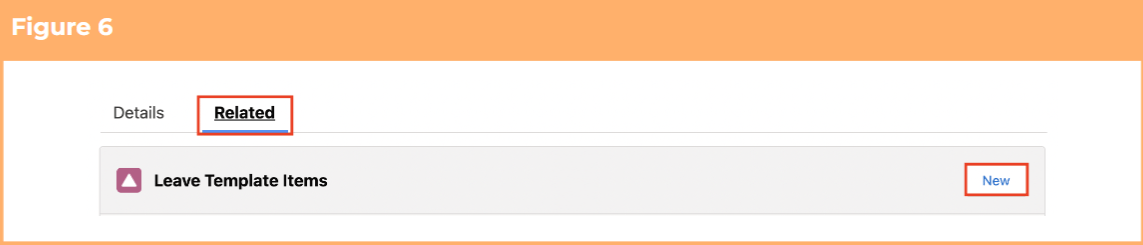
  1. After creating the record, click on the Related tab. (See Figure 6)
  2. Navigate to the Leave Template Items panel and click on the New button.
Screenshot from QRG Setup Leave Templates
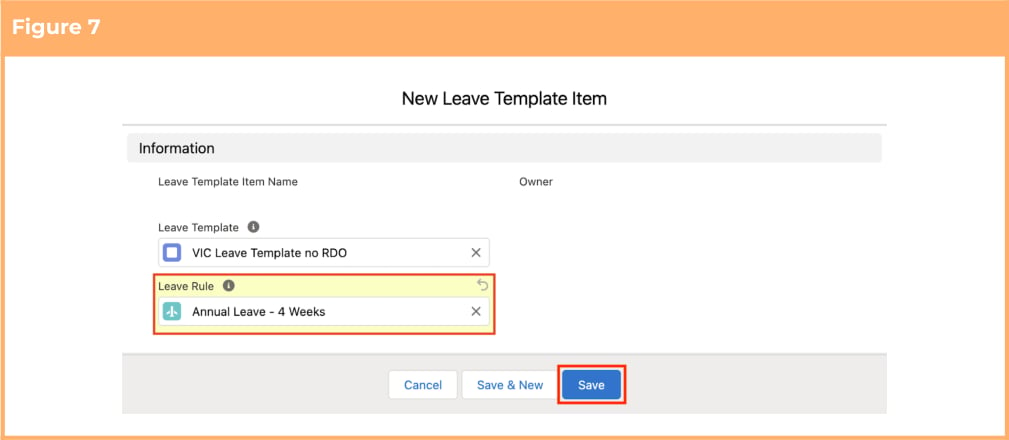
  1. Populate a Leave Rule that you would like to add to this Leave Template. (See Figure 7)
  2. Click on the Save button.
Screenshot from QRG Setup Leave Templates
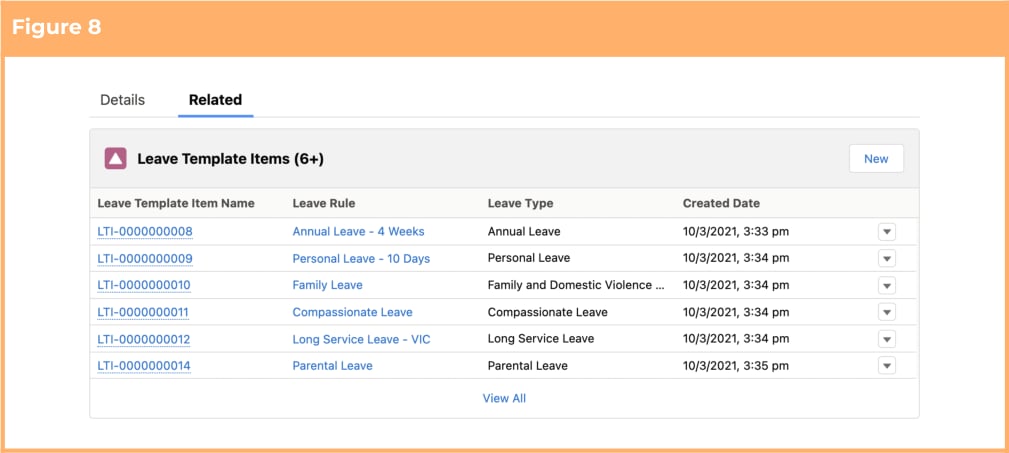
  1. The Leave Rule has been added to the Leave Template. (See Figure 8)
  2. Repeat steps 9-11 for each additional Leave Rule that should be included in this Leave Template.
Screenshot from QRG Setup Leave Templates
When the Leave Template is populated and the Payee is saved, the Leave Rules associated with the Leave Template (listed as Leave Template Items) are automatically created as Payee Leave Rules.
Leave Template records CAN NOT be deleted if they have related records or are used in other records. Deleting records is not recommended unless absolutely essential.
If edits are made to the associated Leave Template Items, then this doesn’t flow through to existing Payee Leave Rules already referencing this Leave Template, it only applies to new Payees referencing the Leave Template.
  1. To modify an existing Leave Template record, open the required record and select the Edit button available on the top right side of the page. You can also double click in any of the fields that need editing or just click on the pencil icon that appears within fields when you move your cursor over the field.
  2. When complete, click on the Save button.

Field Descriptions

Leave Template

Effective Date is the earliest date a Leave Template can be set to a status of Active, if using the Auto Update function. Exclude From Auto Update (checkbox) When this box is checked, the record will be skipped by the Automatic Status Update Scheduled Job. Expiry Date is the latest date a Leave Template can be set to a status of Active, if using the Auto Update function. Leave Template Name is the name given to the new Leave Template record that is being created. Status indicates the current status of the Leave Template record.

Leave Template Items

Leave Rule is a Lookup to the related Leave Rule. Leave Template is a Lookup to the related Leave Template. Leave Template Item Name is the auto-generated name given to the new Leave Template Item record that is being created.

Further Information