

Purpose
The purpose of this quick reference guide is to step through the process of creating Minimum Pay Rate (MPR) records. The intended audience for this document is System Administrators / Standard Users. MPR records facilitate the automatic creation of Timesheet Assignment Rate records for Assignments with matching Assignment Rate Template Group, Interpretation Rule, Award Classification and if applicable, Award Levels populated. Once an MPR with matching values is identified for an Assignment, automation will generate Assignment Rates according to the details of each related MPR record. If no Pay Code is populated, one Assignment Rate will be created for each Pay Code from the related Interpretation Breakpoints. Any additional MPRs with a defined Pay Code will create their Assignment Rates using the specific Pay Rate on this MPR. If Timesheet Activities or Project Codes are related to Assignments, additional MPRs must be created using the Parent/Child structure, to ensure Assignment Rates are defined for each potential combination of Pay Code and Timesheet Activity/Project Code.- Parent MPRs capture the base Pay Rate for each Pay Code associated with Timesheet Activities/Project Codes.
- Child MPRs define a specific Pay Rate for the Timesheet Activity and/or Project Code populated.
Steps
Create a Minimum Pay Rate record
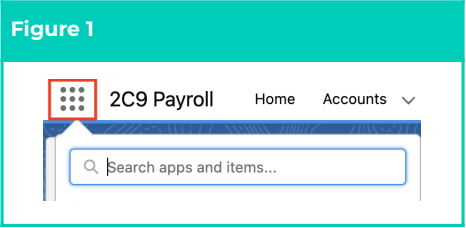
Create a new MPR for use with Rates Automation by following the below steps:- Click on the App Launcher icon (see Figure 1).
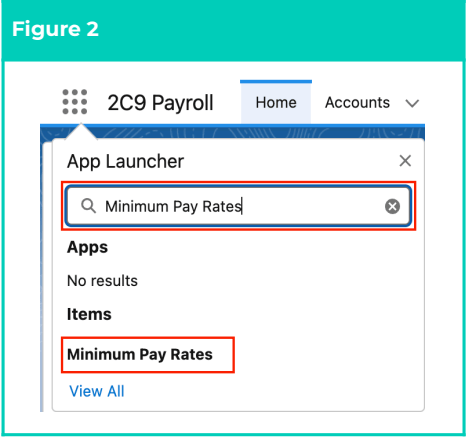
- Go to the Minimum Pay Rate object by using the Search function (see Figure 2).
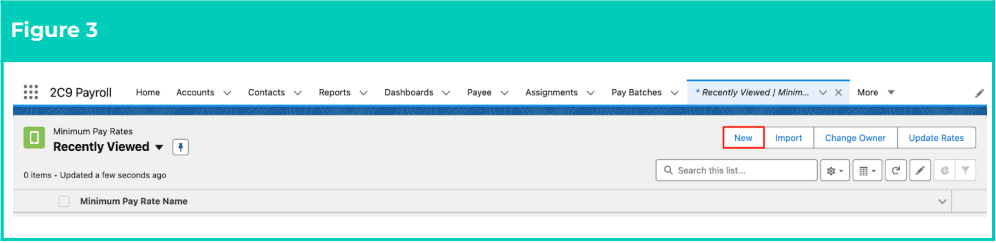
- Click on the New button (see Figure 3).
-
Populate the following fields according to the instructions provided:
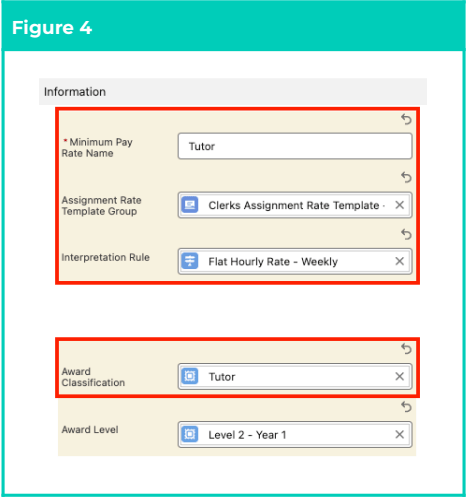
- Create a unique identifier for the record by populating the Minimum Pay Rate Name field (see Figure 4).
-
Populate an Assignment Rate Template Group using the lookup options available.
This record is only used as a filter condition for MPRs, and MUST NOT contain individual Assignment Rates when populated on an MPR.
- Specify the Timesheet Interpretation associated with MPR records by populating the Interpretation Rule field using the lookup options available.
- Select the applicable Award Classification using the lookup options available.
-
To define a specific level for Award Classification, populate the Award Level field using the
lookup options available.
The Status field is updated via system automation, and should not be manually populated.
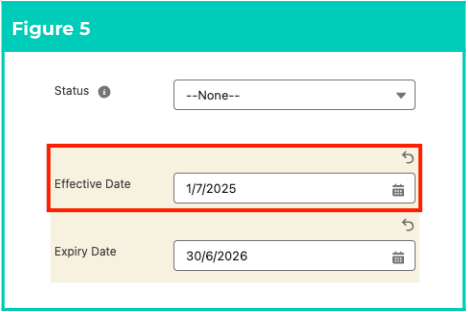
- Define a date for the Pay Rate to come into effect by populating the Effective Date field (see Figure 5).
- If the Pay Rate is only valid up to a specific date, populate the Expiry Date field.
-
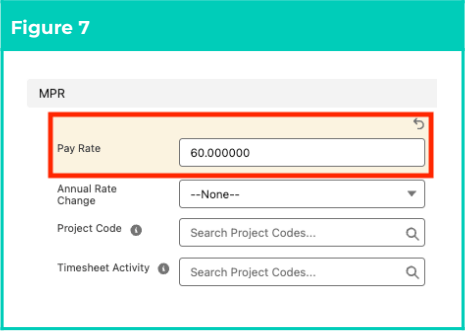
Populate the Pay Rate field with the value to be used during Assignment Rate creation for
related Pay Codes (see Figure 7).
The Annual Rate Change field is updated via system automation, and should not be manually populated.
- To relate a Project Code with the Pay Rate entered, populate the Project Code field using the lookup options available.
- To relate a Timesheet Activity with the Pay Rate entered, populate the Timesheet Activity field using the lookup options available.
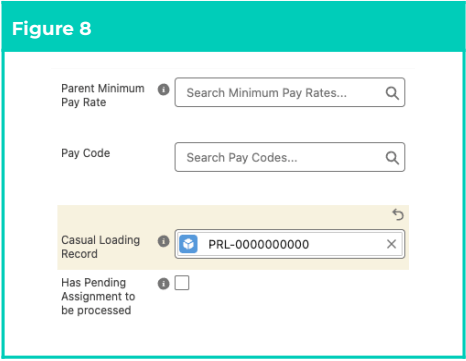
- If Project Code or Timesheet Activity fields were populated, you MUST establish this record as a Child MPR by populating the Parent Minimum Pay Rate lookup field (see Figure 8).
- To associate the Pay Rate with a specific Pay Code, populate the Pay Code field using the picklist options available.
- To apply additional casual loading to the MPR, populate the Casual Loading Record field using the lookup options available.
The Has Pending Assignment field is updated via system automation, and should not be manually populated.
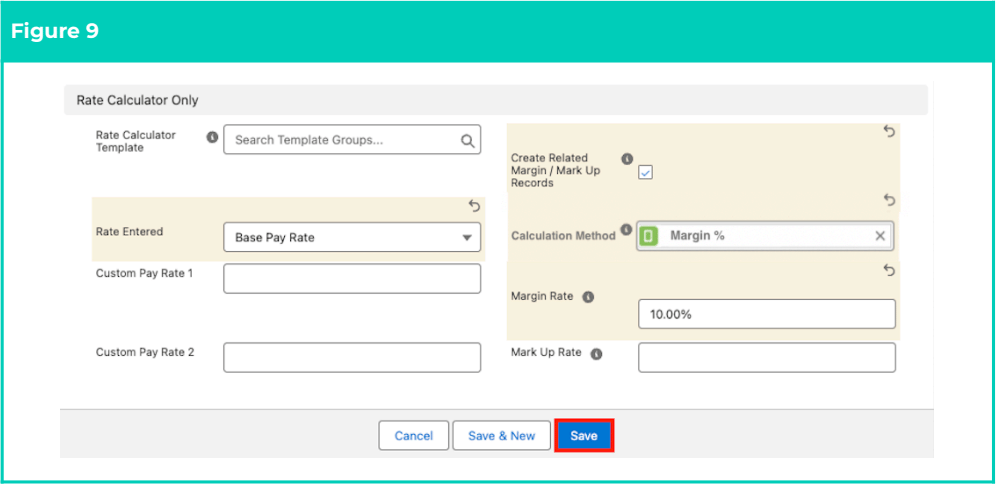
- Skip this step unless Rate Calculator components are required for the MPR (see Figure 9).
- To relate the MPR with a specific Rate Calculator Template Group, populate the Rate Calculator Template field using the lookup options available.
- Define oncosts calculation using Pay Rate amount as either the Base Pay Rate, Pay Rate, Total Pay Rate or Charge Rate by selecting from the available picklist options in the Rate Entered field.
- To define custom Pay Rates for calculation, populate the Custom Pay Rate 1 and Custom Pay Rate 2 fields as needed.
- Select the Create Related Margin / Mark Up Records checkbox field to enable the creation
of new Margin / Mark Up Rates for this MPR record.
- This field MUST be selected to enable Invoice Rate Calculation for the MPR.
- Specify the calculation type to use for the Rate entered by populating the Calculation Method field using the lookup options available.
- Populate either the Margin Rate or Mark Up Rate field, as defined in the Calculation
Method field.
- The Rate entered will display as either currency or percentage, according to the Calculation Unit of the selected Calculation Method.
- Click on the Save button.
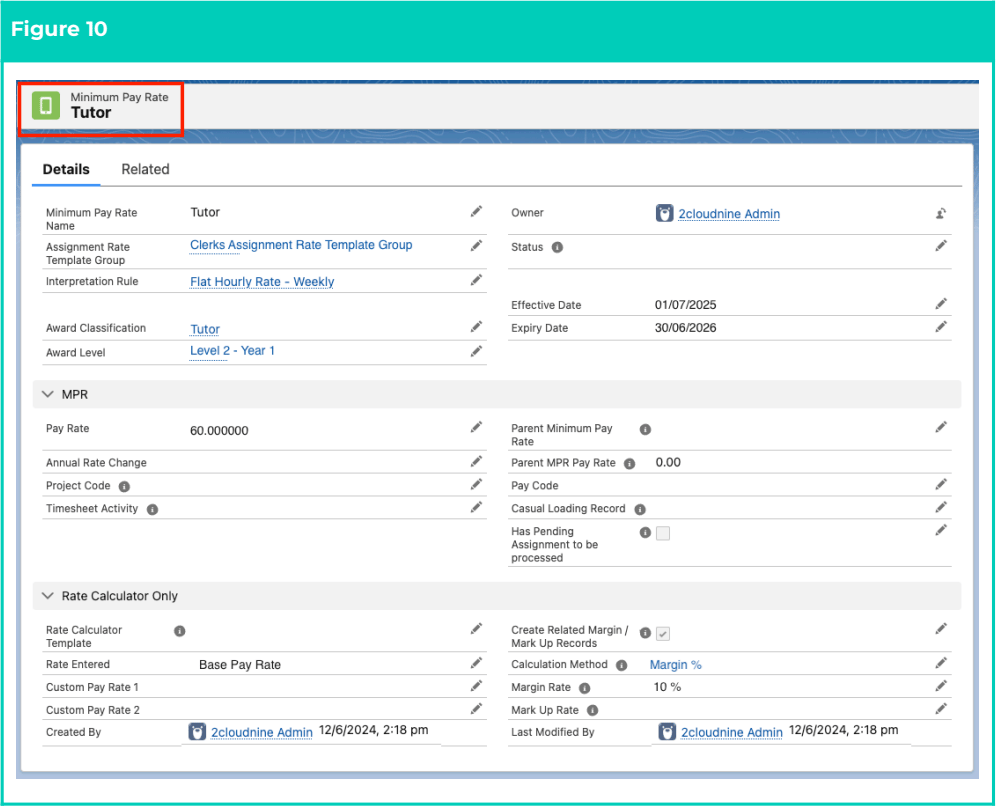
- A new Minimum Pay Rate record has been created (see Figure 10).
Minimum Pay Rate records CAN NOT be deleted if they have related records or are used in other
records. Deleting records is not recommended unless absolutely essential.
- To modify an existing Minimum Pay Rate record, open the required record and select the Edit button available on the top right side of the page. You can also double-click in any of the fields that need editing or just click on the pencil icon that appears within fields when you move your cursor over the field.
- When complete, click on the Save button.